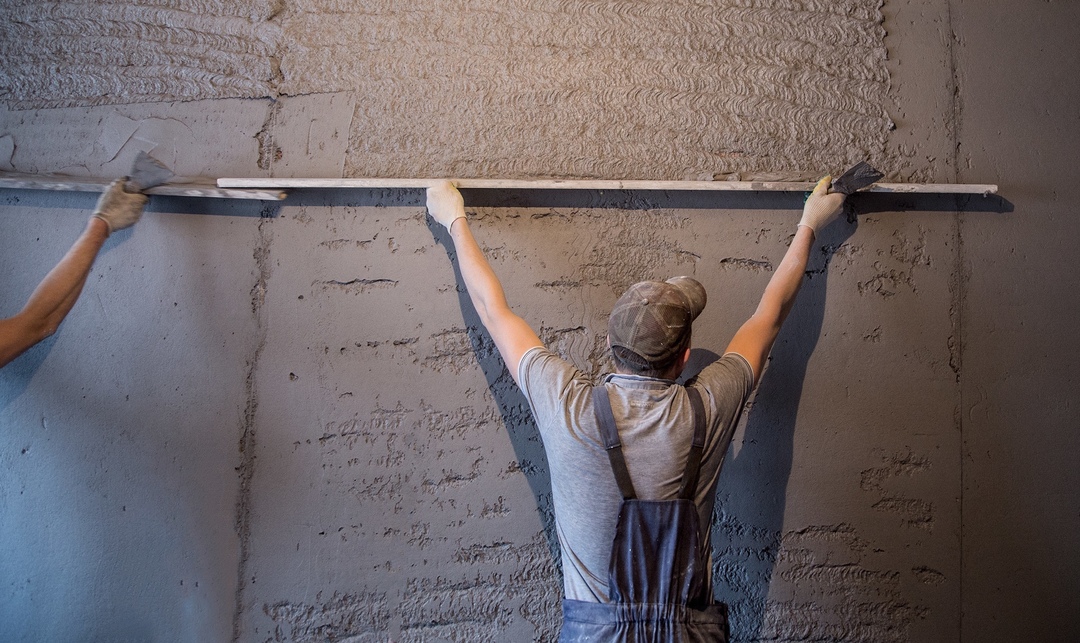
If you have started a major overhaul of an apartment or house, then you will certainly face the need to carry out plastering work. This stage of finishing allows you to make the surface of the wall very aesthetic and neat. The creation of an even plaster layer is a very laborious process that requires serious professional skills. But if you are not ready to contact specialists due to a limited budget and are going to carry out all the finishing work yourself, check out our tips. They will help you to correctly and efficiently do the plastering of the walls with your own hands and create the perfect interior.
Content
- Peculiarities
- Types of plaster, their advantages and disadvantages
- Cement
- Cement-lime
- Gypsum
- Clay
- Decorative
- Silicone
- Venetian
- Textured
- How to choose plaster
- How to prepare the surface for applying the plaster mixture
- Concrete wall
- Brick wall
- Foam concrete wall
- Wood wall
- The process of plastering walls with your own hands
- Required materials and tools
- Exposing beacons
- Solution preparation rules
- How to calculate the required amount of solution
- Reinforcement of plaster
- Corner plaster
- Finishing plaster of walls
- Plaster without beacons
- Features of plaster for wallpaper without putty
- Plaster of walls for painting
- Plastering walls for tiles
- Advantages and disadvantages of mechanized plaster
- Conclusion
Peculiarities
Plaster is a mixture for leveling walls. It allows you to prepare surfaces for finishing. But this is not its only purpose.
Wall plastering is necessary for:
- leveling surface defects;
- prevention and termination of the destruction process;
- protecting the base of the wall from moisture;
- increasing the strength of thin partitions;
- improving heat and sound insulation properties.
A properly plastered wall is a flat and smooth surface without cracks or depressions. Such a base is ideal for applying decorative finishes, regardless of its type - painting, ceramic tiles or wallpapering. Plaster mixes have a different composition. The choice of this or that type of material depends on the scope of the composition and the properties of the surface on which it will be applied.
The solution can be prepared by yourself by mixing cement, sand and water. However, it is more advisable to use high-quality ready-made dry mixes from reliable manufacturers. The plaster layer should form a solid base for the rest of the finish.

Any plaster mix includes the following components:
- filler - allows you to achieve the desired consistency of the solution, provides the required viscosity and strength;
- binder - holds the filler particles together and with the wall surface;
- diluent - provides a comfortable application of the solution to the wall, provokes the activation of the binding elements. During the setting of the plaster layer, the thinner evaporates.
The plastering algorithm includes several stages, at each of which certain tasks are solved. We do not advise you to neglect any of them and follow the rules of the technological process worked out over the years.
The compositions of the mixtures differ depending on their functional purpose - leveling, insulation, decoration. Qualitative differences depend on the binders of the solution. Fillers and additives play a huge role in providing ease of application and additional qualities to the finished coating.
Types of plaster, their advantages and disadvantages
To choose the right mixture, you need to decide on the scope of their application and understand the properties. All plaster mixes can be divided into two large groups:
- leveling - it is used to prepare walls for painting or wallpapering, differ in the binder component and the presence in the composition of additives, to improve the properties;
- decorative - are used as one of the finishing options.


Cement
The main binder in this mixture is cement. It is he who provides the strength of the finish. Cement-based mixtures are used in any type of premises, suitable for manual and mechanized work. The properties of the binder may differ - in terms of compressive strength, frost resistance. This type of plaster fits perfectly on any primed substrates. The only exception is gypsum plaster. Cement mixes are the most economical and versatile. White cement plaster can be used for finishing.
Cement-lime
This type of plaster combines the advantages of both binders. At a relatively low cost, it exhibits a high level of:
- adhesive ability;
- plasticity;
- crack resistance;
- moisture resistance;
- resistance to temperature changes;
- strength;
- resistance to the formation of fungus.
The solution can be mixed by yourself or purchased prepared. The latter allows you to achieve the maximum effect due to the introduction of modifying additives into the composition. The mixture is used for leveling internal and external walls, not excluding rooms with a high level of humidity.
It is better not to use the composition on weak walls due to its high specific gravity. Also, the disadvantages include:
- the need to create a multi-layer coating;
- long duration of the period required for the final set of strength - up to 3-4 weeks;
- impossibility of applying on smooth walls without special preparation;
- not suitable for plastering wooden walls.
Gypsum
It has a long history - it appeared in ancient times. Contributes to the creation of a favorable microclimate in the room. For its manufacture, natural stone is used, which is dried in ovens and crushed. It is used for interior decoration, but recently there have been variants of this material developed for outdoor work.
The composition of the leveling mixture includes medium- and coarse-grained filler, for decorative use a filler of fine fractions. Plastering can be done both manually and mechanically. Gypsum plaster gets along well with clay, lime.
Strengths of the material:
- High adhesiveness.
- Excellent maintainability.
- No shrinkage.
- Easy to sand.
- Possesses high plasticity.
- Short term for curing.
- Fire safety.
Cons of gypsum plaster:
- Increased setting speed, which limits the application time of the material.
- The need to strictly follow the technology.
- Not resistant to moisture.
- High price - relatively clay or limestone.
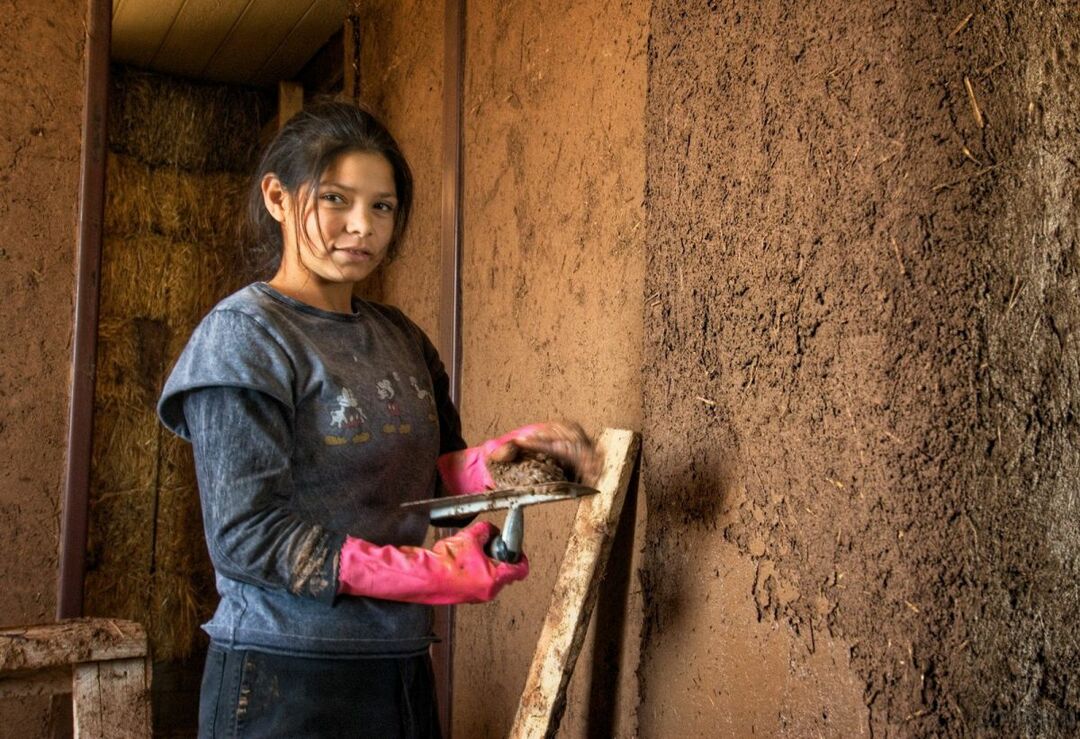
Clay
The oldest of all types of plaster known to mankind. The raw materials for its manufacture literally lie under our feet. The solution is prepared from self-selected components or purchased dry mix. Historically, chaff, pine needles, straw chops, sawdust, horse manure were used as fillers. Thanks to these fillers, the strength and thermal insulation properties of the plaster increase. The clay-clad wall feels warm to the touch. The plasticity of the solution is regulated by the addition of sand. The required amount of this component is determined using simple techniques empirically. The composition of the mortar can be improved with lime or cement.
Clay plaster is used to level and insulate walls. Colored clay is used for decorative purposes.
The main advantages of clay plaster:
- Environmental friendliness.
- Low cost.
- High maintainability.
- Excellent heat retention performance.
- Serves as a natural regulator of indoor humidity.
- Enables reusable, waste-free application - fragments of old plaster can be soaked and reused.
- Suitable for finishing wooden walls.


Among the disadvantages are:
- inability to withstand the effects of moisture - it gets wet;
- dries for a long time - within 1-2 months;
- the layer should be at least 10 mm when applied to a flat wall, and 15 mm to shingles or wood. Otherwise, cracking of the material cannot be avoided.


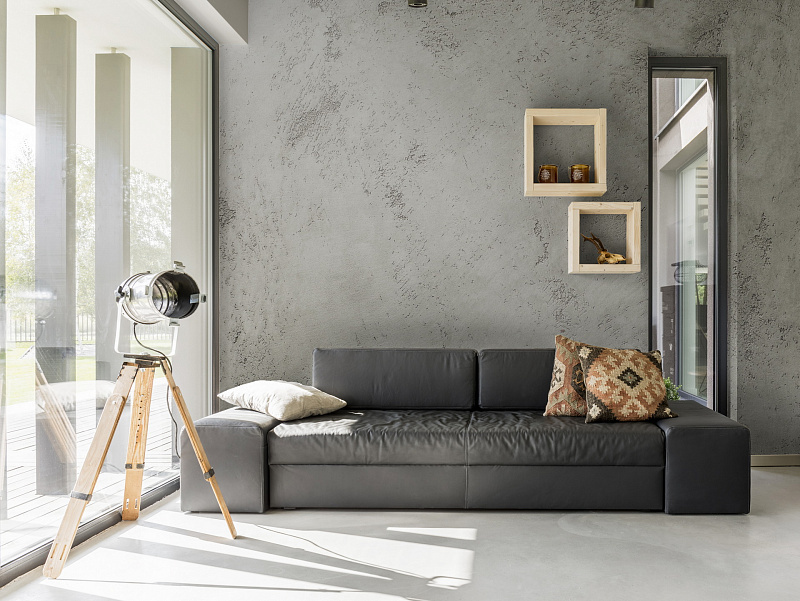
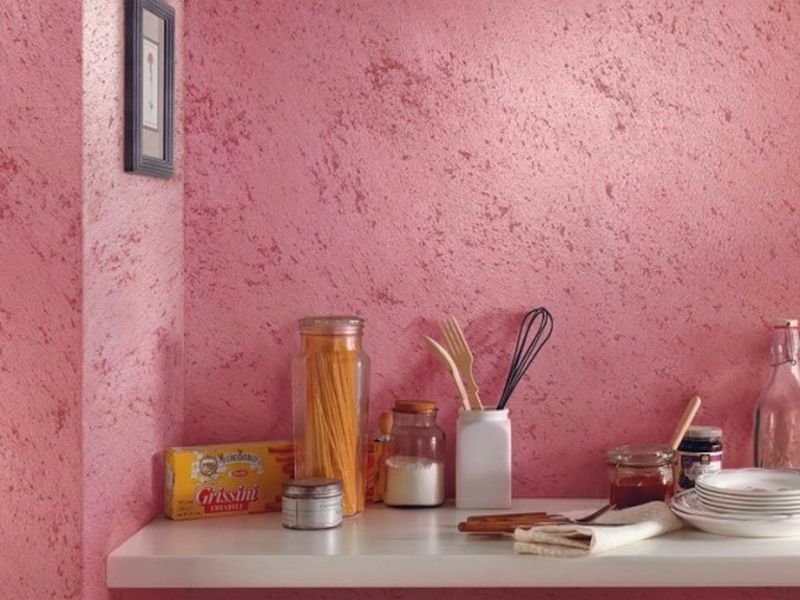
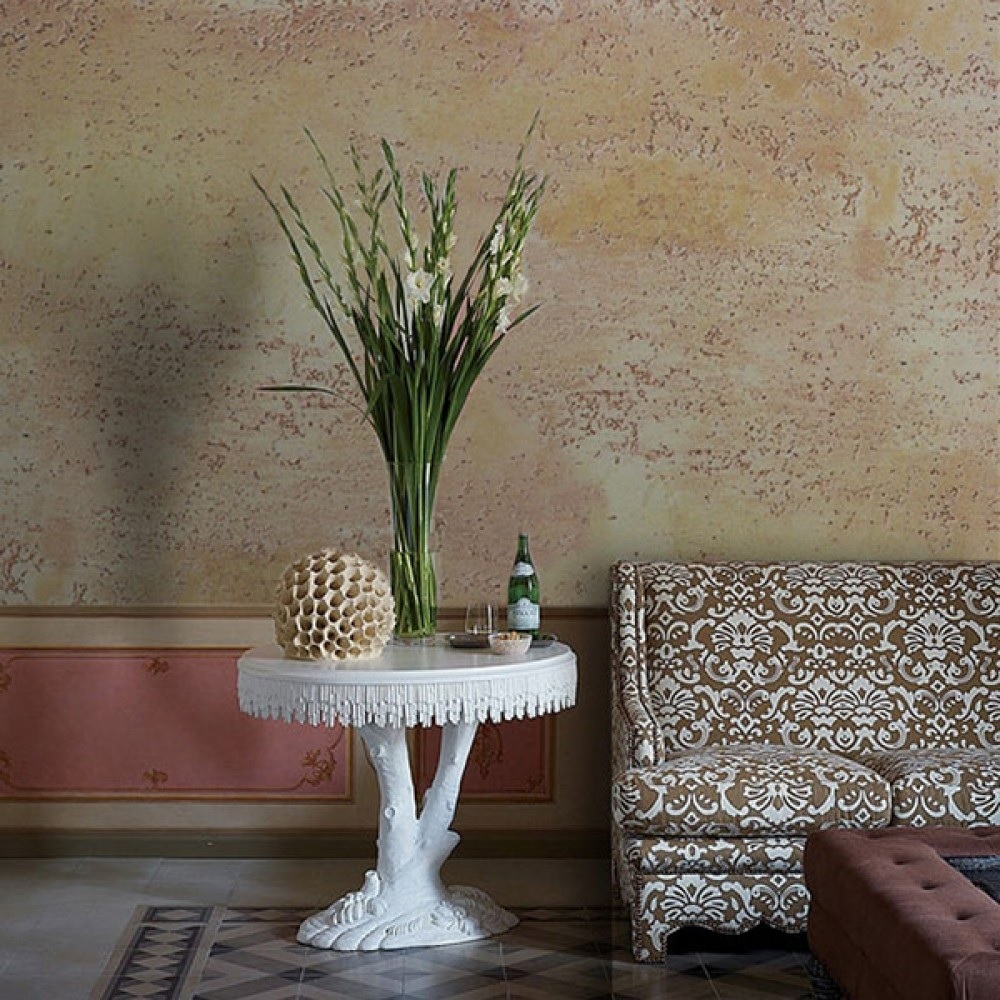
Decorative
Able to play the role of ordinary plaster and finishing at the same time. The plaster composition can be created on the basis of acrylic, mineral, silicone and other fillers. The decorative effect is provided by:
- structures;
- relief;
- color scheme;
- multi-layered translucent coatings of different shades;
- ways of applying patterns or textures.
Manufacturers offer smooth solutions that require an even base and textured ones - allowing to hide the flaws of the treated surface.


The advantages include the following properties of decorative compositions:
- strength;
- durability;
- fire resistance;
- resistance to decay;
- vapor permeability;
- environmental friendliness;
- decorativeness;
- uniqueness of the coating;
- the fascination of the process of creating textures or patterns with your own hands - to apply a picture, you can use materials at hand - brushes, spoons, nets, films, paper - everything that your imagination tells you performer.
The main disadvantage of such mixtures is their high cost. To save money, you can prepare the composition yourself.


Silicone
Material from an expensive price segment, made on the basis of silicone fibers, resins. It also contains various additives. Coatings made of such plaster are highly elastic and resistant to mechanical stress. In order to remove or scratch such a coating, you will have to work hard. Silicone plaster is waterproof, so it is great for decorating a bathroom. The coating from it is highly resistant to ultraviolet rays, so the paints retain their original color even when exposed to direct sunlight. The material easily withstands temperature fluctuations with a large amplitude - from -50 to + 70 degrees, shows resistance to aggressive environments. The high adhesiveness of the mixture makes it possible to exclude the priming stage from the technology. They are able to maintain their original appearance for more than 20 years. Characterized by fire resistance, do not emit toxins into the environment.
The material is sold as dry mixes or ready-to-use solutions. It is used for leveling and finishing. It fits well on concrete, gas silicate, wood, gypsum and limestone substrates. It is not recommended to apply silicate mixtures on walls with paint, varnish and oil coating. Cracks do not form on the finish, it does not shrink. You can restore the life of a thickened mixture with the help of water.

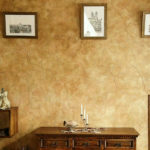


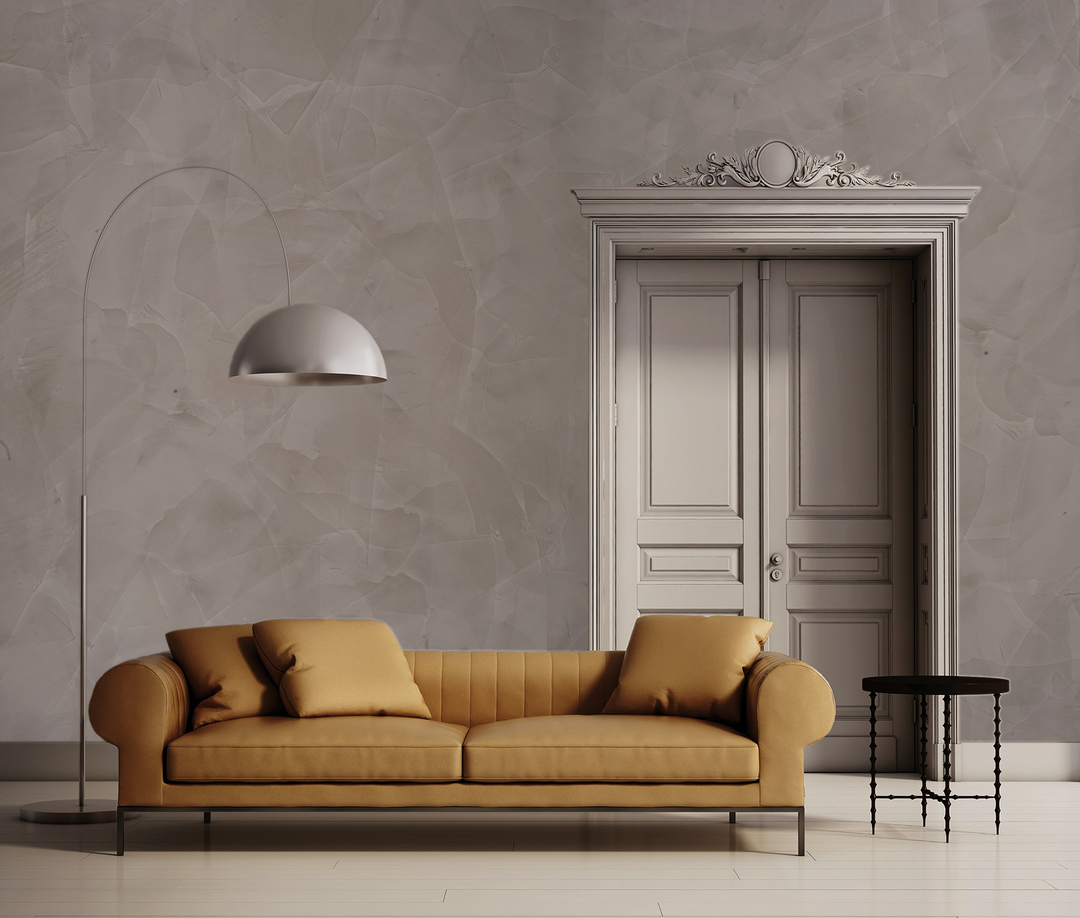
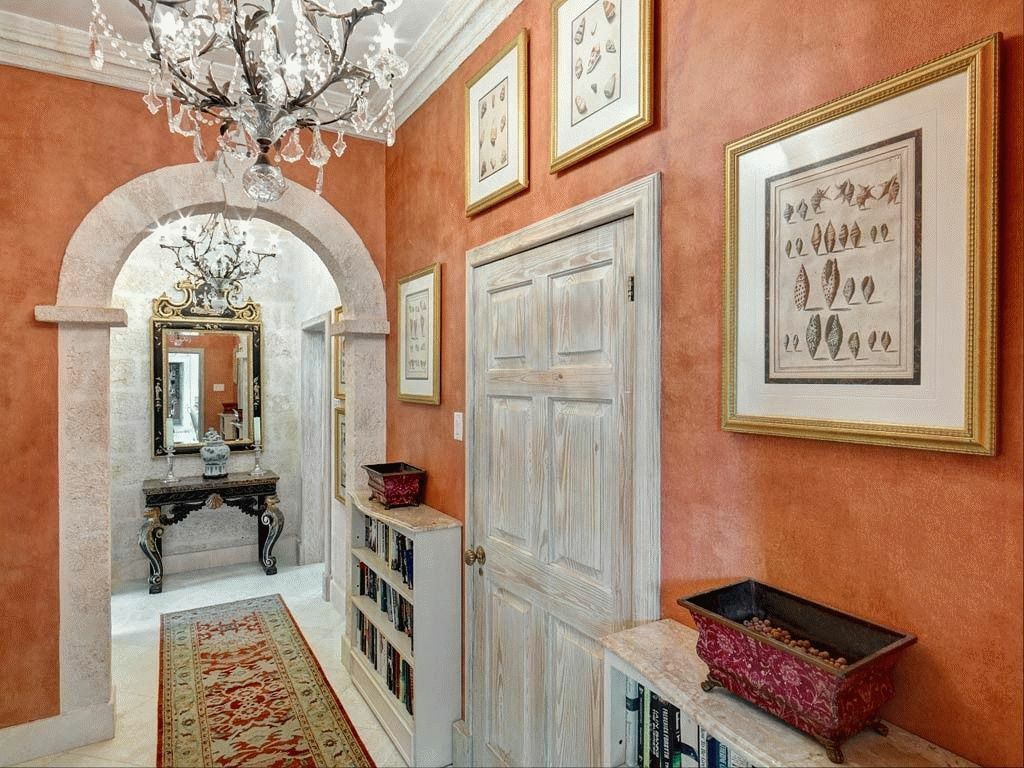
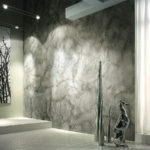
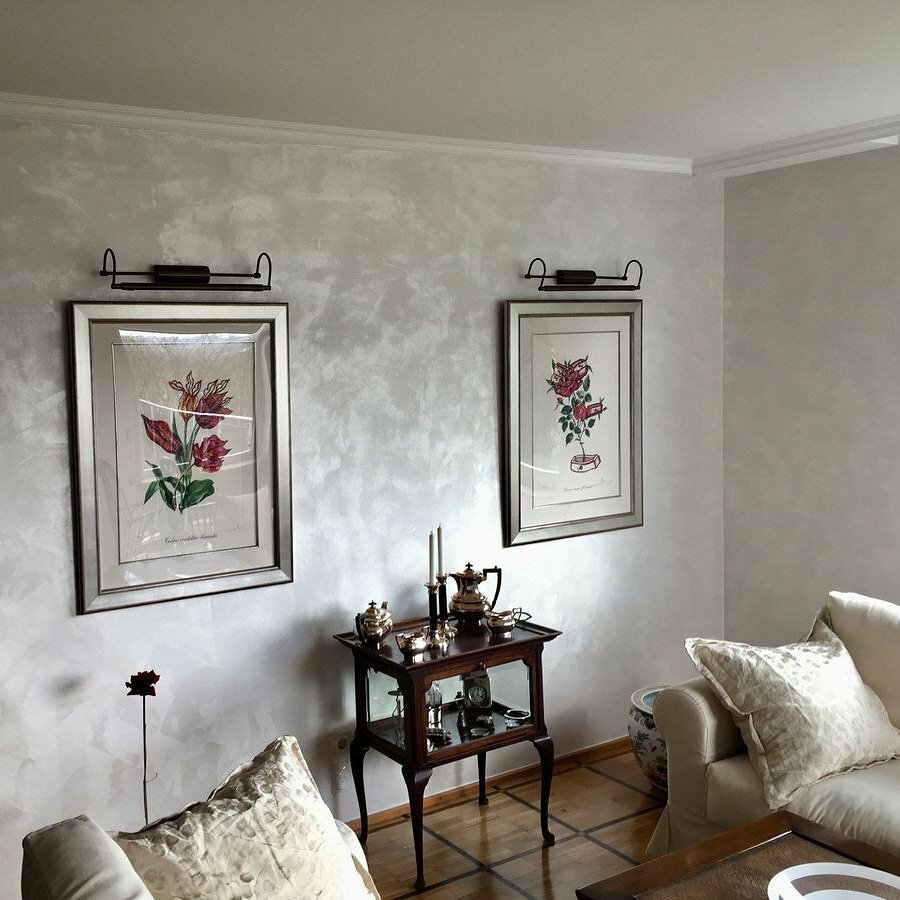
Venetian
The luxurious multi-layer coating is mesmerizing, makes you want to look at the transitions of shades without stopping. The base should be as smooth as possible. The wall is leveled with mortars containing stone flour. In addition to the classical method of application, there are other techniques. The base layer of Venetian plaster can be classified as rough. The rest are finishing. Using special techniques on the wall, you can recreate a coating with a craquelure effect, imitation of polished marble, silk, cork wood. The photo shows the implemented options for this finish. They were obtained as a result of using various methods of applying the material. A top coat of varnish or wax is applied to the plaster.


Surprisingly, you don't need to buy an expensive plaster solution. It is quite possible to make it yourself from a regular putty. In comparison with ready-made decorative mineral-lime or acrylic compositions, it will cost much less. Venetian plaster is applied only with stainless tools.
The main advantage of the Venetians is their high aesthetics and originality.
The disadvantages include - high cost, the need to own a complex technique for applying the material, high labor costs.


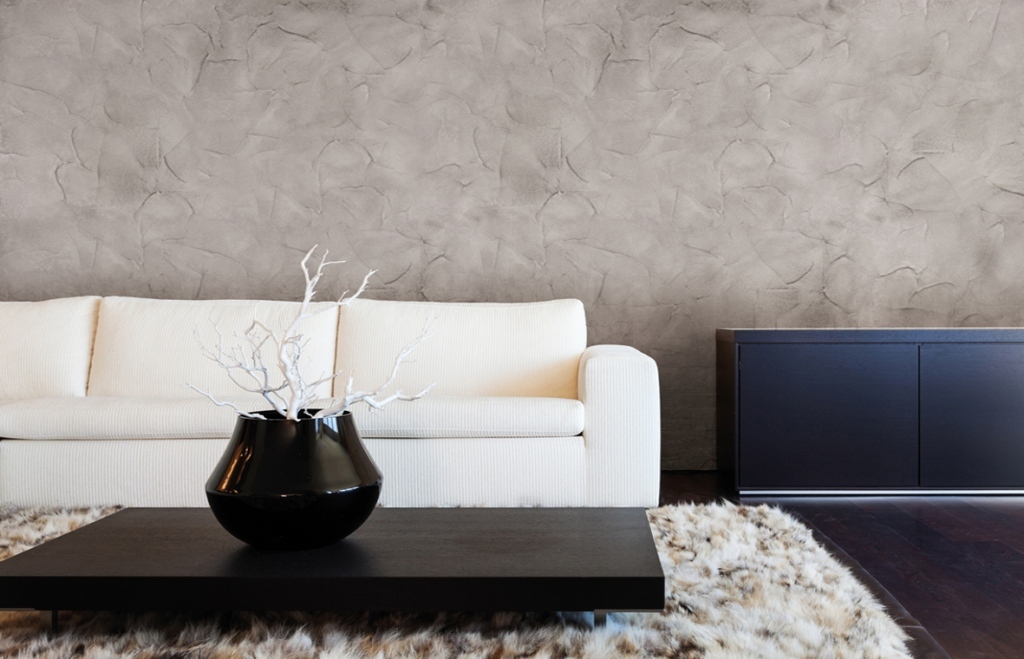
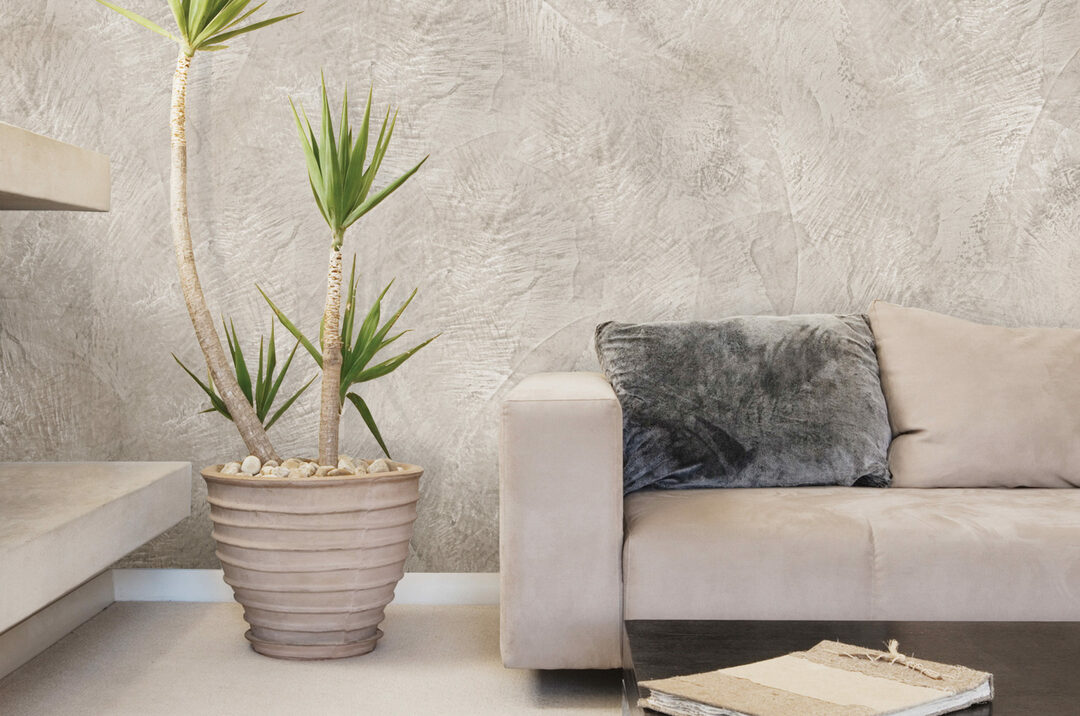
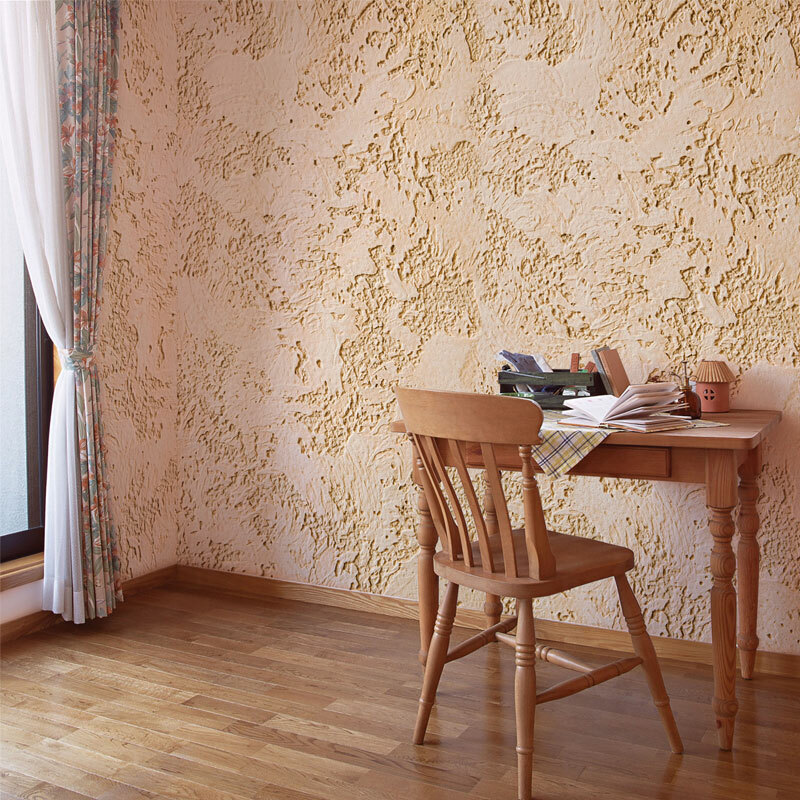
Textured
This type of plaster mix also belongs to the veterans in the family of finishing materials. Lime is present in the composition as a natural binder. It endows the mixture with environmental friendliness and bactericidal properties. The result is a breathable, fire-resistant coating. The composition can be used for leveling walls and as a textured finishing plaster. Great for painting murals. It goes well with mineral binders - cement, gypsum, clay. It is realized in the form of dry mixtures, but if you wish, you can prepare a solution from an independently compiled material.


Advantages of textured plaster:
- Perfectly hides small defects in the base.
- Does not require the addition of antibiotic components.
- Regulates the microclimate.
- Does not burn.
- Odorless.
- Easy to apply to the surface.
- Affordable cost.
Minuses:
- Lack of water resistance - this drawback can be leveled with a wax protective layer or special additives.
- A set of strength sufficient for further work occurs only after a few days.


How to choose plaster
First of all, you need to decide - dry or wet type of plaster you want to use. The dry method involves lining the walls with plasterboard plates. Thanks to the use of this material, you can significantly speed up the process. However, it is better not to use gypsum board sheets in small rooms - they will hide an already small space.
The "wet" method involves leveling the walls with building mixtures. When choosing a plaster composition, it is necessary to take into account the material from which the walls are made and where they are located - inside or outside the building.

How to prepare the surface for applying the plaster mixture
Wall preparation is an important stage in finishing work. The base must be freed from the old exfoliated coating, cleaned from dust, mold, grease stains. This is followed by the repair of potholes, chips and cracks. The wall is covered with a layer of soil and reinforced with a reinforcing construction mesh. Such careful preparation is necessary to prevent the new coating from flaking and bleeding through oil or rust stains. The primer with antiseptic components prevents the wall from collapsing under the plaster layer.
Concrete wall
If concrete walls act as a base, they must be primed with a special material with quartz particles. The additives will significantly increase the adhesive properties of the wall and allow the plaster mixture to reliably adhere to the base. Concrete surfaces are well tolerated by gypsum-cement plaster and a mixture based on gypsum and lime.

Dilute gypsum, lime and cement compositions separately, and mix together in an already prepared form. The consistency of the mortar should be thick and homogeneous.


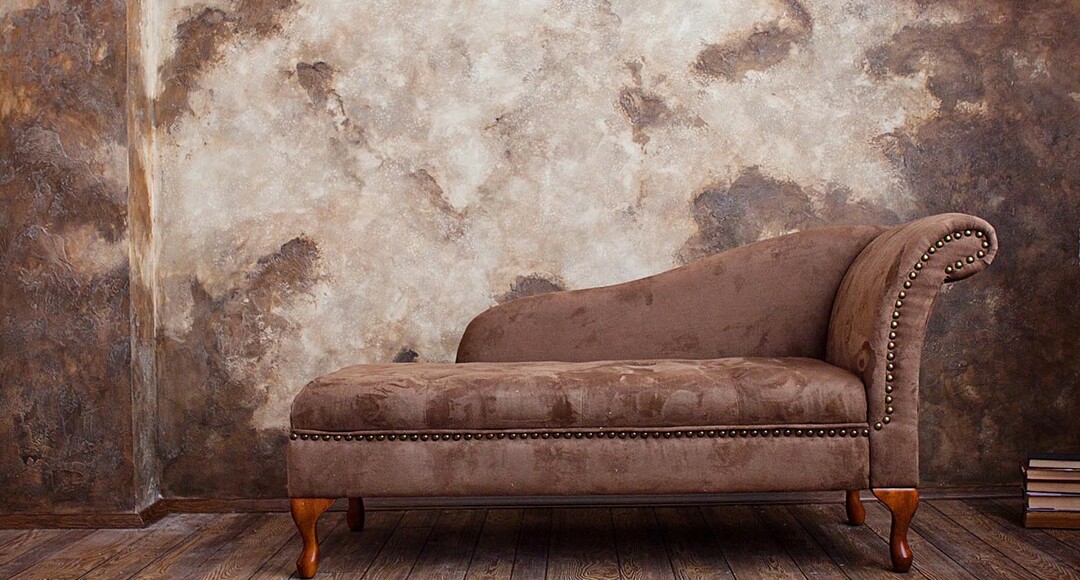
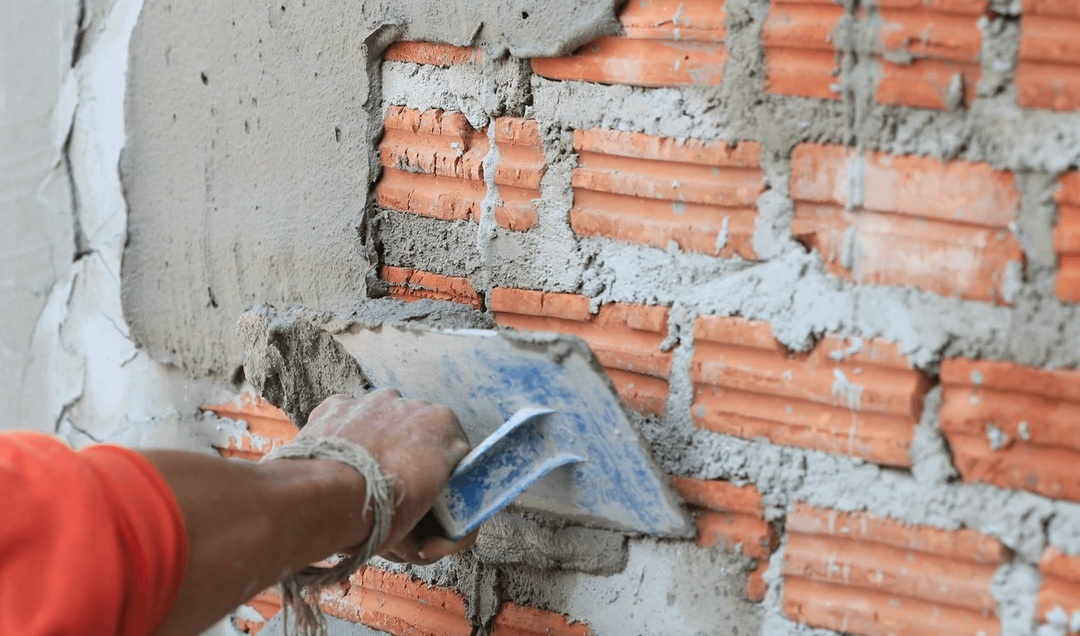
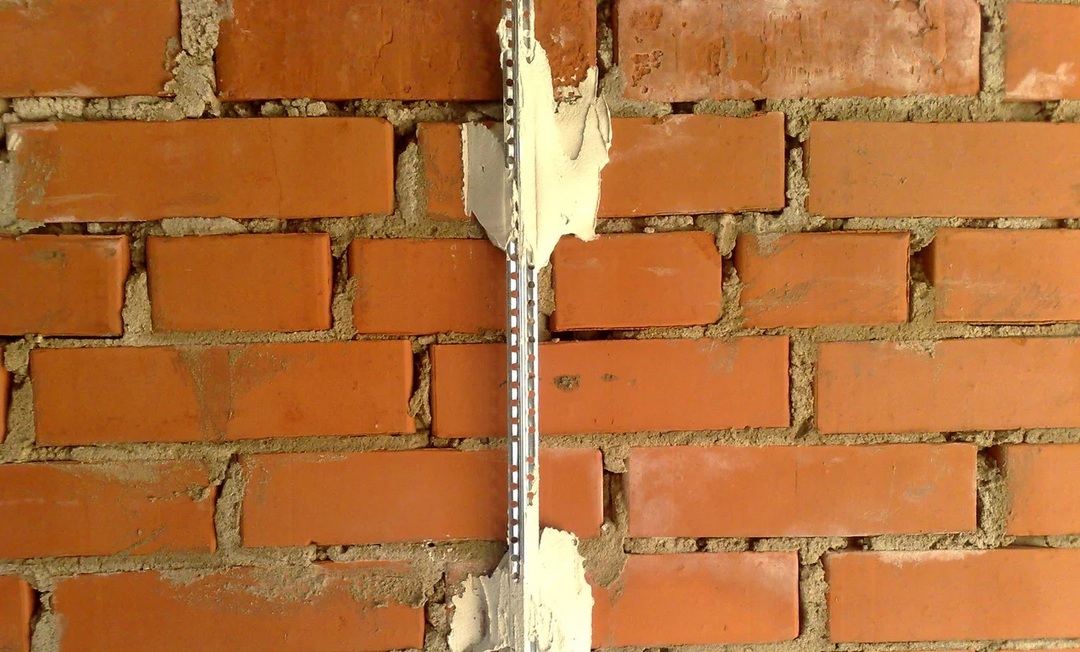
Brick wall
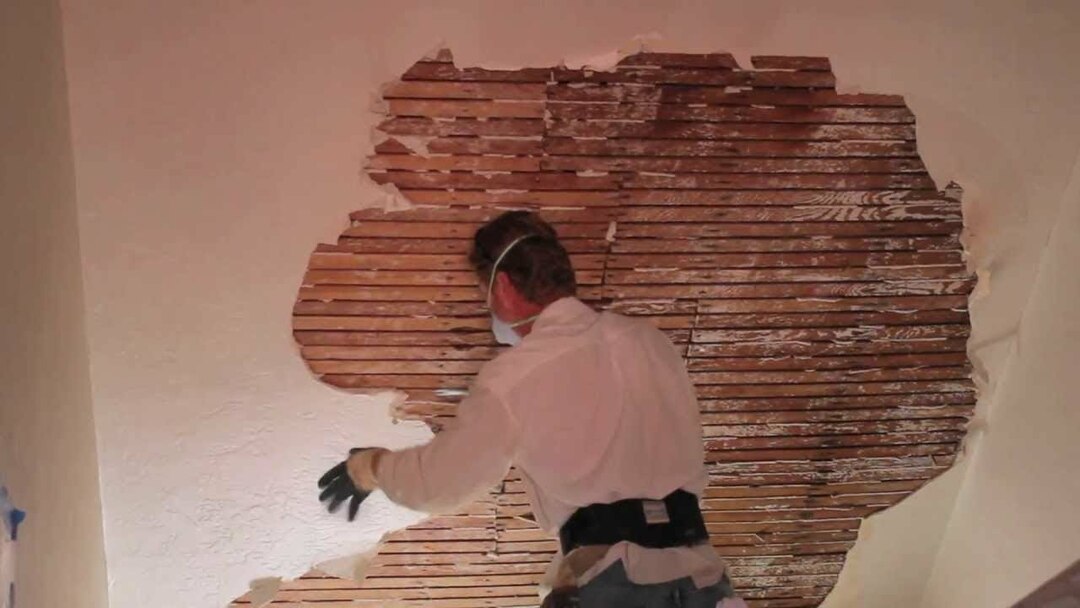
Choosing plaster for brick walls is not easy. Regardless of the material chosen, high-quality surface preparation is required. Most often, brick walls are already covered with old plaster. It is necessary to get rid of this layer, and this can be done with water and a sponge. We wet the surface several times and wait for the water to completely saturate the coating. This procedure will greatly facilitate the removal of obsolete material. Next, we arm ourselves with a spatula with a working surface thickness of at least 1.5-2 mm and a hammer and knock down the old plaster. First you need to gently tap the area to be cleaned. Due to this, cracks form on the surface, which will allow you to push the spatula inside and pick up the coating. If the plaster does not want to fall off under your pressure, help yourself by tapping the handle of the trowel with a hammer. This will make the task somewhat easier.
After removing the old coating, it is necessary to treat the surface with a grinder or metal brush. Next, the seams between the masonry elements should be deepened by 5-7 mm to increase the adhesion of the material to the wall. After that, the surface is cleaned with a soft bristle brush and dust is removed with a damp cloth. The final stage is priming the wall in two layers using a compound that provides deep penetration.


Foam concrete wall
Most modern buildings are built using this material. Surfaces made of foam blocks and aerated concrete must not only be carefully primed, but also reinforced with a special reinforcing mesh or fiberglass "serpyanka". For the manufacture of plaster mortar, you can use gypsum, lime-cement mixtures.


Wood wall
Before you start plastering wooden walls, you need to treat them with protective compounds against fungus and bark beetles. After that, you need to make a special lattice of wooden slats - shingles. The product has a mesh shape. The shingle is fixed to the wall with nails. The fasteners are not completely recessed into the wall. It is very important to remember that the nails need to be driven in only up to half, and the top with the cap is bent, pressing against the surface.
Instead of "shingles", you can use a special metal mesh to reinforce the facades. It is attached to the wall prior to plastering.


The process of plastering walls with your own hands
Plastering is a complex and time-consuming process. If you nevertheless decide to do it yourself, we recommend using our advice. We present detailed instructions for beginners.

Required materials and tools
To complete the work, you cannot do without:
- dry plaster mix, primer, putty;
- paint beacons, dowels, screws;
- hammer, screwdriver, grinder or scissors for metal;
- drills with a perforator with a set of drills, a construction mixer and a container for mixing the solution;
- building level, tape measures;
- long thread, marker;
- wide and narrow trowel, brush and roller, rule and ironed.
In addition, you will need work clothes, a hat, goggles, gloves.
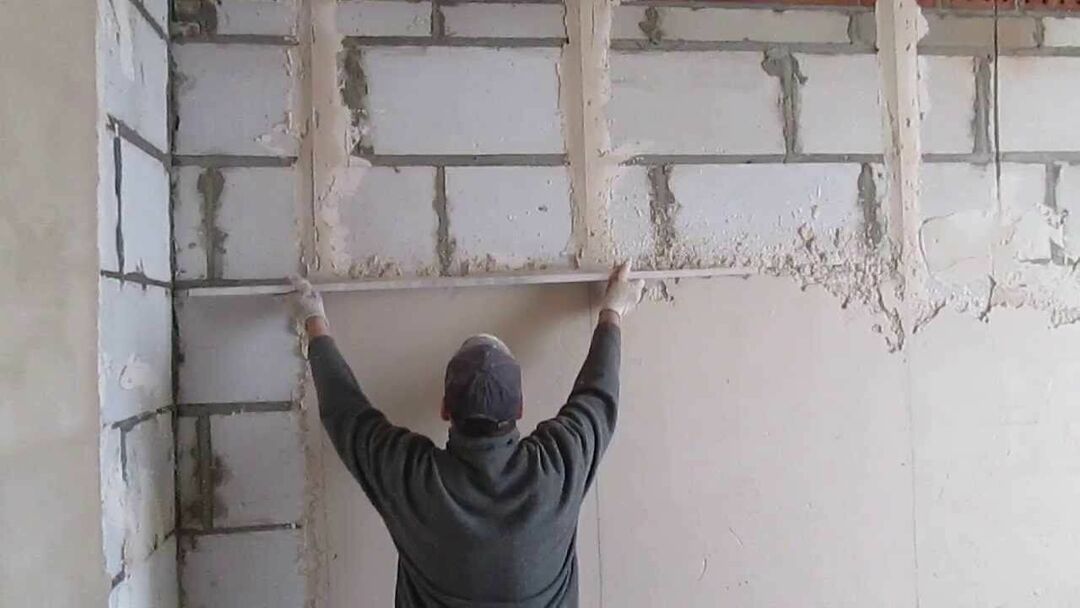
Exposing beacons
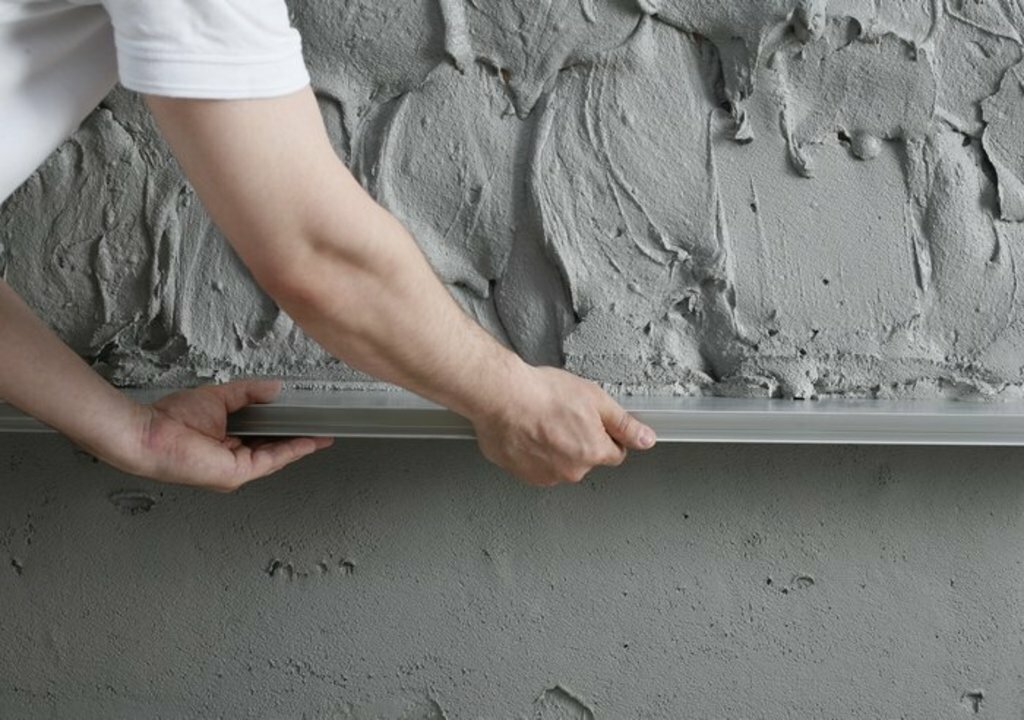
To level the walls and, if necessary, form a layer of great thickness, plastering is carried out using beacons. For this purpose, wooden planks, metal profiles, gypsum rectangular bars are used. Beacons simplify the work, guarantee an even application and distribution of the mixture, which is leveled over them using a rule.
Installation of beacons is carried out as follows. It is necessary to screw a self-tapping screw into the wall at a distance of 5 cm from the ceiling and 40 cm from the corner. We screw in the next screw directly under it, stepping back from the floor along a plumb line of 5 cm. We draw a line from one screw to another and measure the distance between them. Slightly reduce the result obtained, cut off the strip from the metal profile, equal to the length of this line. We throw on the line several tubercles of the plaster mixture and press the profile into it so that its surface is level with the caps of the screws. Remove the screws and repeat the procedure at the opposite corner. We expose the following beacons at intervals of 1-1.5 m. We check their verticality using a stretched cord. The quality of the formed surface depends on it. After applying the solution, the beacons should be removed and the remaining grooves should be filled with plaster. Gypsum beacons do not need to be removed if gypsum mix is used.
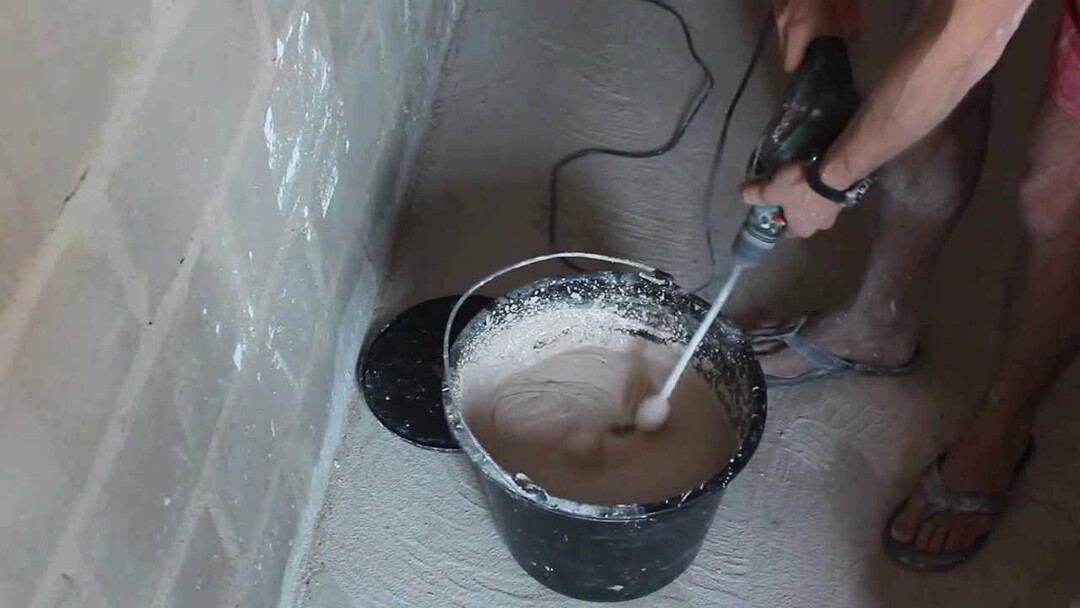
Solution preparation rules
Previously, we considered the types of plaster solutions, but now it is worth mentioning some of the nuances of various compositions.
- To make a cement mixture, you need to take 3 parts of sand and 1 part of cement. It is necessary to use this solution within an hour after mixing. Therefore, you should prepare the material in small portions and apply it to the wall quickly and without interruption. Otherwise, the composition will begin to dry out and set, and it will not be possible to use it.
- A cement-lime mixture is composed of 1 part of cement, 1 part of a lime mixture and 5 parts of sand.
- To prepare gypsum plaster, you need to take 3 parts of lime, resembling dough in density, and 1 part of gypsum powder. Such material grabs very quickly, so it must be diluted immediately before application.
How to calculate the required amount of solution
It is very difficult to independently calculate the required amount of material. A special online calculator can help you with this. It determines the amount of mixture you will need using a formula. According to it, the costs of the plaster mixture are equal to the product of the consumption of the mixture by the area of the room and the leveling layer. The resulting value will help you at least approximately navigate during the purchase of mixtures.
Reinforcement of plaster
Reinforcement mesh can make cracks less visible, but it will not prevent cracks from occurring.
There are different types of mesh for wall reinforcement:
- metal - indispensable for plastering walls with pronounced protrusions and irregularities that can exceed 4-5 cm. To level these surfaces, a thick layer of material is required. However, after drying, it may come off. A coarse-mesh metal mesh with holes exceeding 4 mm will help to prevent such a development of events. It is more durable than plastic, which can suffer from contact with an aggressive environment of a cement-sand mixture;
- plastic - painting mesh with a mesh size of 2-3 mm. It is used for finishing with putty or when applying a thin layer of plaster;
- fiberglass.
Reinforcement can be performed not entirely on the entire wall, but only at the joints of various finishing coatings and structural parts. But when plastering ceilings or when finishing a new building that has not yet shrunk, it is necessary to reinforce the entire area to be trimmed.
You shouldn't skimp on reinforcing mesh. Cracks that can form to the entire depth of the plaster layer will lead to the need to redo the entire coating or at least a layer of putty.

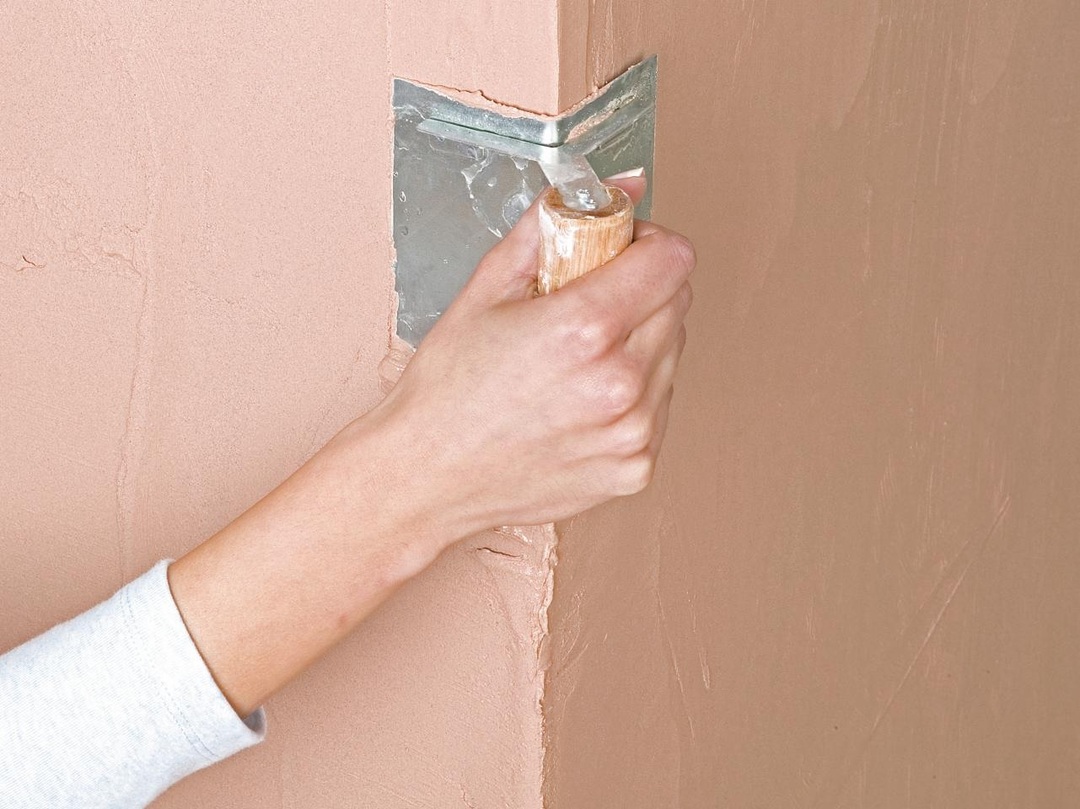
Corner plaster
Curved corners and slopes are ubiquitous - both in old Soviet buildings and in modern buildings. Therefore, one of the mandatory procedures in the plastering process is the alignment of the corners. If you do not want the patterns on the wallpaper to be distorted, and it took many times more glue to glue the ceramic tiles, do not neglect this important step.
Both internal and external corners are subject to alignment.
The inner corner is formed according to the following scheme:
- we set the beacons in such a way as to connect the wall planes at right angles. If there are a large number of corners in a small area, you can not adhere to the perpendicular - it will still not be striking;
- carefully align the first wall using a rule, a trowel and a spatula. During work, we focus on lighthouses;
- when the mortar on this wall grasps, it will be possible to start processing the adjacent surface. At this stage, you should use a spatula with a beveled blade to prevent rubbing against an already leveled plane;
If desired, you can immediately plaster both adjacent walls. In this case, the rule should not be brought to the corner, stopping 5-10 cm before it. These stripes will then need to be aligned manually.
- shape the corner using a special tool with a curved blade. We draw from top to bottom to remove excess mixture and create a clear joint line;
- we cut off the remains of the plaster with a spatula when the setting of the composition begins.
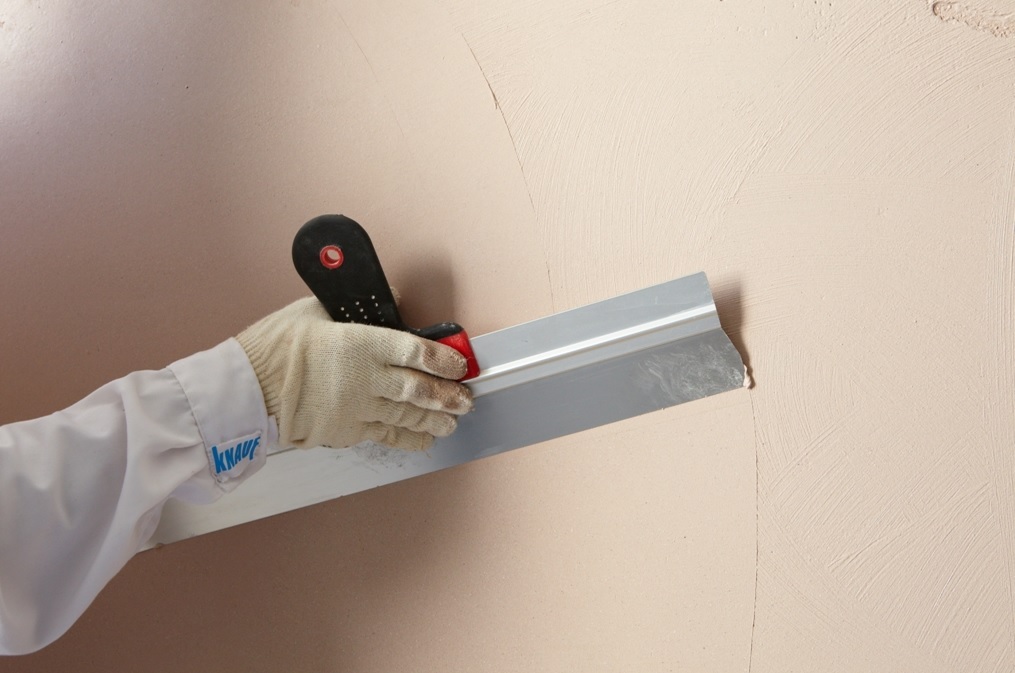
Step-by-step instructions for removing the outer corner.
- We throw the mortar on a plane using a trowel. We put the material on the corner with a margin;
- We remove the excess mixture using the rule, first from one wall, then from the other. In this case, the rule should be based on beacons and an angle;
- Using spatulas and half-trowels, we correct the existing defects as a rule. If there are depressions, close them with a small amount of solution and level them;
- We make the final leveling of the walls by moving the trowel longitudinally. The blade must not touch metal or plastic parts.
If the corner is located in the passage, it is recommended to slightly round it. This will save you from the appearance of chips, which will inevitably form at a sharp joint.
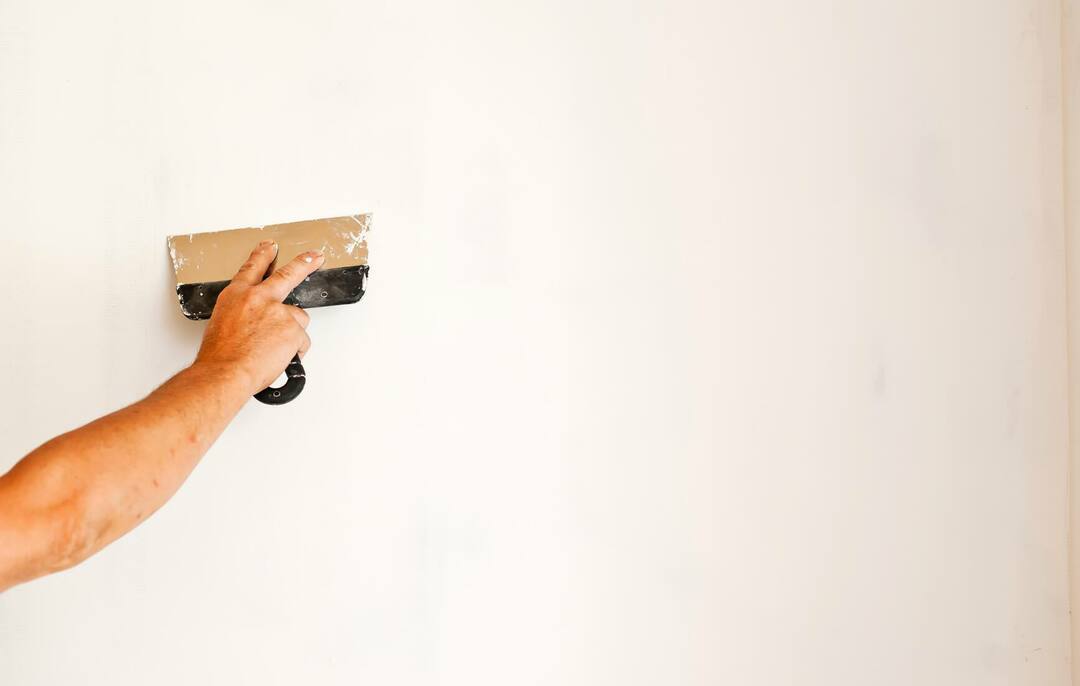
Finishing plaster of walls
This is the final stage of plastering, which will make the wall ready for finishing. For this, you can use cement mixtures, gypsum, polymer materials. Any of these formulations will work well for finishing coat.
Finishing plaster tasks:
- Get rid of any irregularities by filling them with material.
- Protect the wall from mechanical stress - you need a high quality composition.
- Create an aesthetic surface with texture or relief.
Materials with identical components must be used. This will ensure a high level of adhesion.
The finishing plaster should have:
- resistance to mechanical damage;
- good level of sound insulation;
- vapor permeability;
- moisture resistance;
- the ability to maximize heat retention;
- aesthetic appearance.
To get the job done, you will need:
- drill with mixer;
- container for mixing the mixture;
- spatulas - narrow and wide.
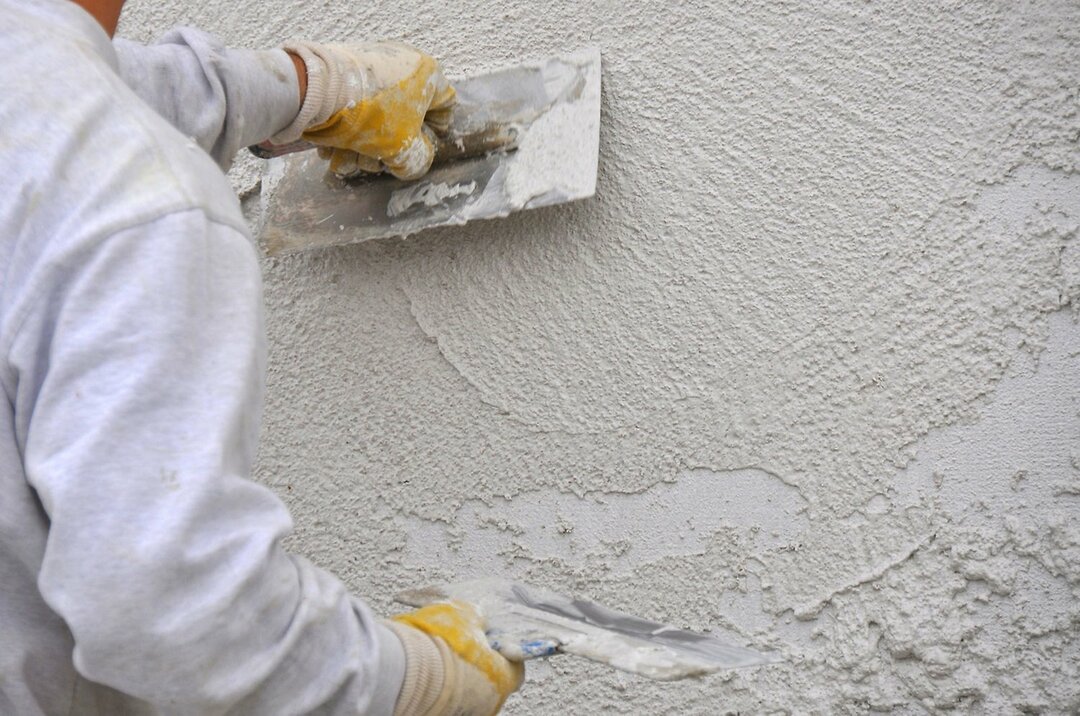
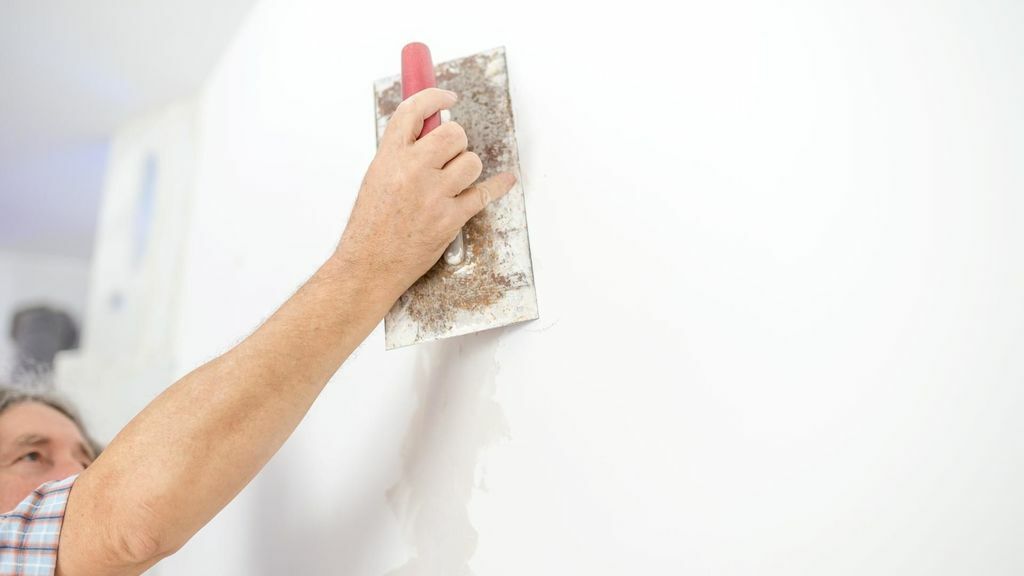
Application steps:
- It is sprayed to form a thin base layer. It is necessary to increase the adhesion of the wall and soil.
- Primer is the main plaster layer used to level the surface. We cover the spray with soil and distribute it well along the plane of the wall. As a result, the wall should become flat, almost perfect.
- Covering - allows you to make the surface perfectly smooth.
After the finishing layer has dried, it is grinded, and you can proceed to the decorative finish.
Plaster without beacons
If the ideal evenness of the wall is not important to you, and you plan to eliminate flaws and small errors with the help of the base material, plastering on beacons is not necessary.
Stages of work:
- If necessary, apply a thin layer of material, use a trowel, and form a thick layer with a spatula.
- Using the rule, we stretch the mixture, moving from bottom to top and to the sides. We do the same vertically.
- If, after the first layer dries, pits are formed, the second should be formed.
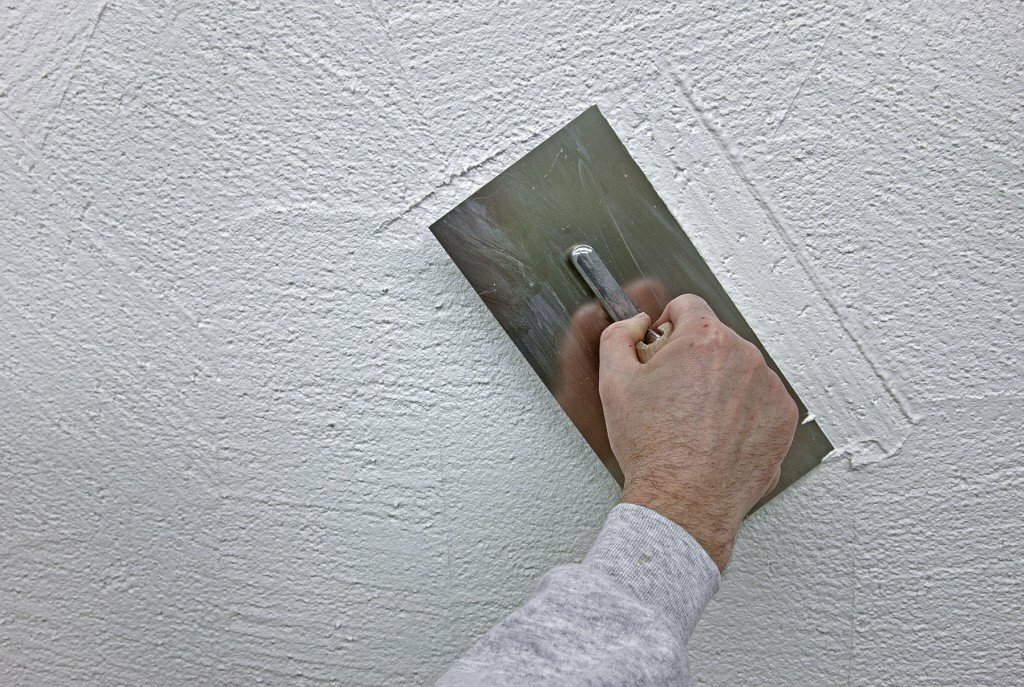
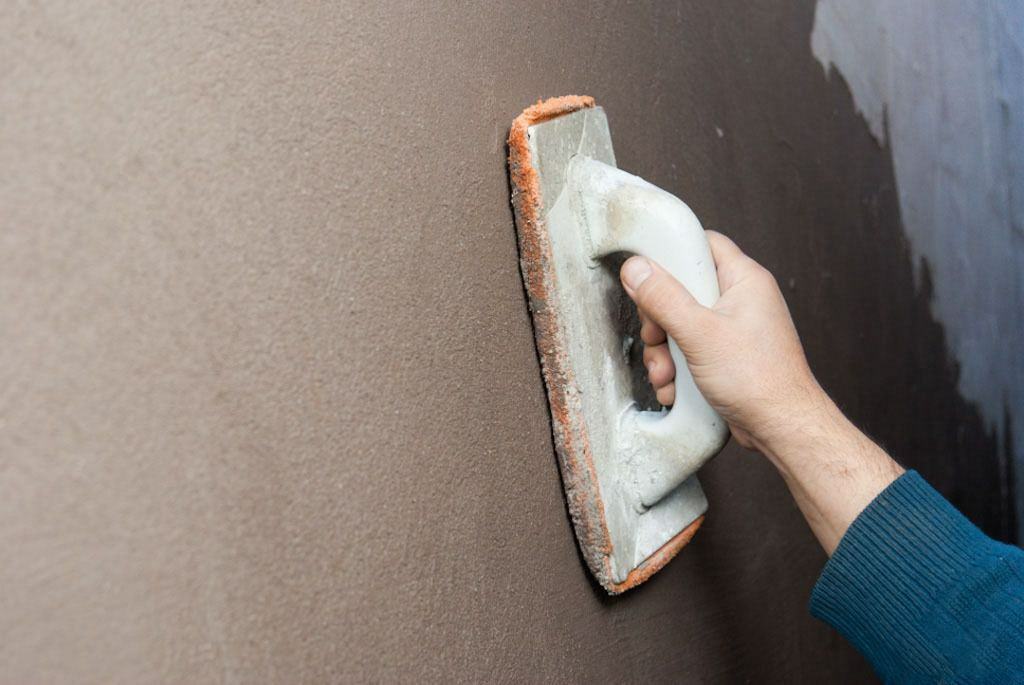
- After waiting for the surface to dry completely, rub it with a plastic float.
Plaster without beacons is used to level walls with minimal differences. Since there is nothing to focus on, you need to check the quality of work more often with the help of a building level. A detailed master class is presented in the video.
Features of plaster for wallpaper without putty
If the walls after applying the plaster have become sufficiently even and smooth, the application of the finishing putty is not required before gluing the wallpaper.
Sometimes it is necessary to reinforce the plaster layer. For example, if the base is a cement-bonded particleboard or when joining different types of materials, for example, brick and concrete. In this case, the wall is reinforced with a fiberglass mesh with 5 mm cells. The strips are overlapped, with each of the subsequent ones covering the previous one by 10-20 cm. A solution is applied on top and contraction begins.
The final stages are grouting and smoothing. For this, the base is softened with a moistened sponge, brush or spray bottle. Then take a grater and rub the ledges in a circular motion. If after that there are ring strips, we carry out the smoothing procedure. We are waiting for the plaster to become dull, and we process the wall with a trowel or spatula.
Plaster of walls for painting
Preparing walls for subsequent painting is more difficult than for wallpaper. The paint will not look good on an uneven and poorly putty wall. Usually 3-4 coats of putty are required.
This is followed by skinning - to do this work, you need skill. Any risks and poorly cleaned areas will certainly show up and be very visible under the paint. Fractures of light will accentuate the unevenness of the walls. When cleaning the walls, it is necessary to illuminate the wall with a lamp, directing its diffused light onto the wall. This will help to identify defects in the prepared surface. For sanding, you need to use a mesh No. 240.
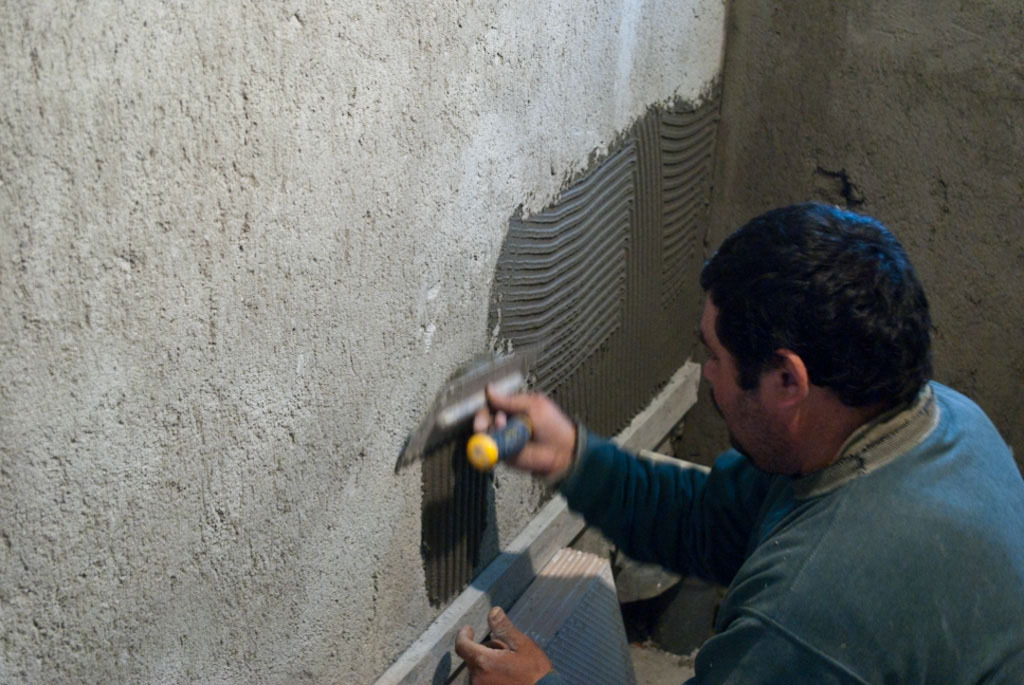
Plastering walls for tiles
It is impossible to stick the tiles on an uneven wall with high quality. Therefore, it is necessary to align with plaster. This will reduce the consumption of tile adhesive, prevent tiles from slipping, and the cladding process itself will be much easier to perform.
To prepare the wall for gluing the tiles, you will need improved plaster. High quality is inappropriate in this case. The final gloss is not needed - the wall will still be hidden under the decorative finish. In addition, smooth surfaces will only interfere with the secure fixing of heavy tiles.
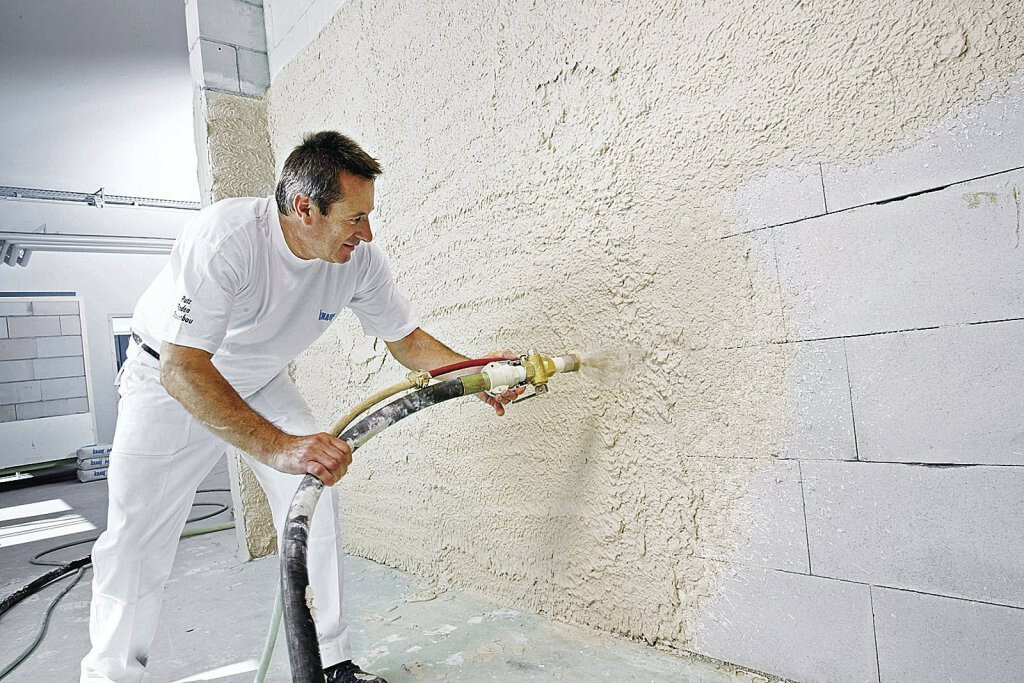
Advantages and disadvantages of mechanized plaster
Mechanization of the plastering process allows you to automate all stages - from diluting the mixture to covering the wall with mortar.
The composition is poured into a special plastering station, which begins to prepare the solution. After that, the master applies the mixture to the wall with a hose and levels the coating.
Advantages of using mechanized plaster:
- The rate of coating formation is 4-5 times higher than with the traditional method.
- Saving on putty - 1 layer is enough, while manual application requires 2-3.
- The cost of a mixture for machine application is 30-40% less than that for a similar one for manual application.
Flaws:
- It is difficult to lift heavy equipment to the floor. If it does not fit into the elevator, then it will not be possible to use it.
- To carry out the work, it is necessary to connect the facility to the electrical network.
- Economic benefit can be obtained only when finishing large areas from 100 to 150 square meters.
Conclusion
Now you know how to plaster a wall with your own hands. Doing it yourself is not so difficult, even if you are new to this business. Skills can be honed as you work. Practice on a small section of the wall before proceeding with the actual finishing.