
Good is important for any master organized workplace - crafting table. It is not difficult to make such a device with your own hands. A big plus in this case will be that you adjust all the details in it for your own convenience. Three options for convenient and simple workbenches with step-by-step assembly - in this material from the editorial staff of HouseChief.
Read in the article
- 1 Why is it needed and where to put it
- 2 Types of workbenches and their features
- 3 Do-it-yourself large carpentry workbench: master class
- 4 Small carpentry workbench with all the necessary tools
- 5 How to make a simple metal workbench
Why is it needed and where to put it
Do you need a workbench at all? Maybe get by with an ordinary table? In principle, if you have a one-time job planned, then you can get by with an ordinary table. The workbench is for those who regularly do manual work and are interested in convenient and rational storage and use of tools.

Working with wood and metal can make an ordinary table look unusable, so if you still decide to do without a workbench, you need to take care of organizing the workplace. The main thing is that the table you choose is strong and stable enough for work.

The ideal place is a garage, here is just a suitable environment for work, and you will not disturb your family with the noise of tools. In the absence of a garage, a basement or attic space is suitable in a private house, but there will certainly be difficulties with moving materials. In a city apartment, this task is even more complicated.

Types of workbenches and their features
There are three main types of workbench:
- Locksmith.
- Joiner.
- Plotnitsky.
Locksmith. The locksmith works with metal, performs sharpening, cutting, grinding and assembly and disassembly of units and assemblies. All these manipulations are carried out on the desktop. This load places special demands on the workbench design. It must be exceptionally strong to withstand heavy metal. The thickness of the countertop is at least 2.5 cm, the wood on it is covered on top with a sheet of metal, otherwise, the coating will quickly become unusable from working with a sledgehammer and welding. In addition, the locksmith's arsenal will necessarily contain oils, solvents and acids, and they will also damage the tree. To work with motors, the tabletop is reinforced so that it can withstand a load even up to 3 tons. The locksmith uses a variety of tools, so it is important to provide convenient storage. A perforated screen is best suited for this purpose and drawers.

Joiner. This type of workbench is adapted for working with wood. Here, the metal surface of the countertop is not necessary. And space for placing stops, vices and other equipment is not required. The carpenter is engaged in artistic processing of blanks, he does not need a lot of space, a table 1 × 3 m is enough. From the fixed tool, wooden clamps are useful, which carefully fasten the parts. But ideally, it would be nice to build the necessary mechanisms into such a workbench.

The carpenter's is a long wooden table that is comfortable to handle large parts. The convenient length of such a table is 6 m. A vise is required from the tool here.

If you need to perform work of a different nature, then the right decision would be to make a universal workbench that combines all these three types into something in between. Prepare a design drawing that meets all your requirements.
In addition to the direction of work performed on them, workbenches may differ in design features. They are sliding or folding, have a different number of pedestals for storing tools or wheels for moving.
Do-it-yourself large carpentry workbench: master class
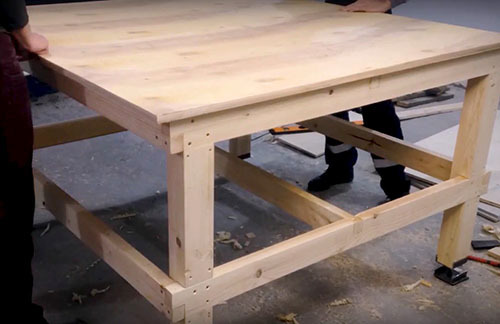
The carpenter's workbench should be large. It is desirable that the approach to it was from all sides. Here is an example of such a construction:
| Illustration | Description of action |
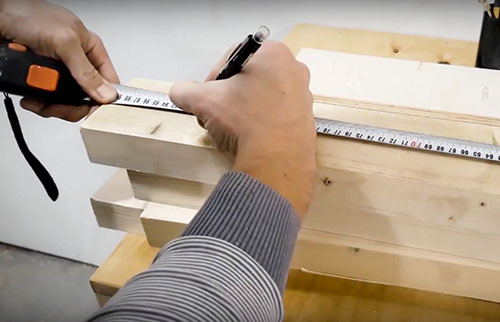 | The table requires a 40 mm board and plywood thickness 20 mm, self-tapping screws and wood glue |
 | The legs of the table are made of a solid board, reinforced with two layers. The parts are fastened together with wood glue, and then additionally with self-tapping screws |
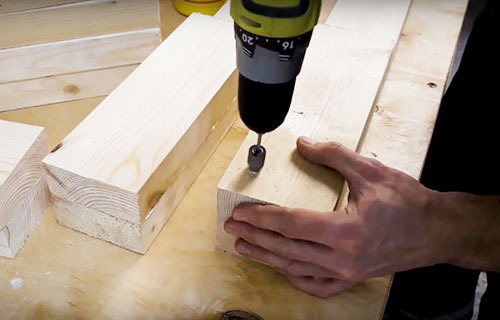
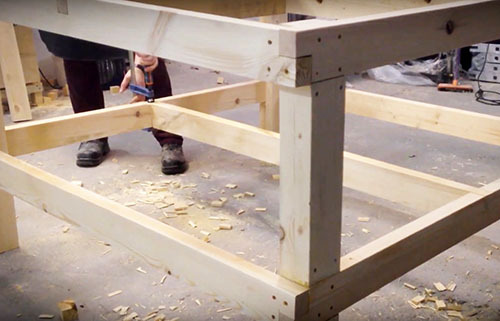
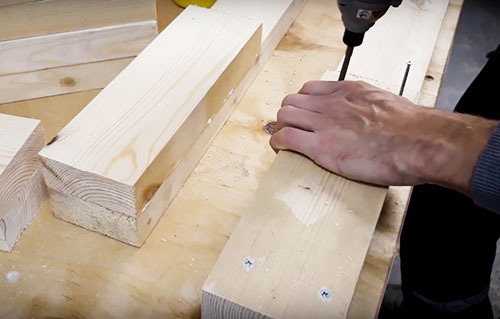 | The heads of the self-tapping screws in the entire structure must be sunk into the wood so that they do not cling to the tool and clothing |
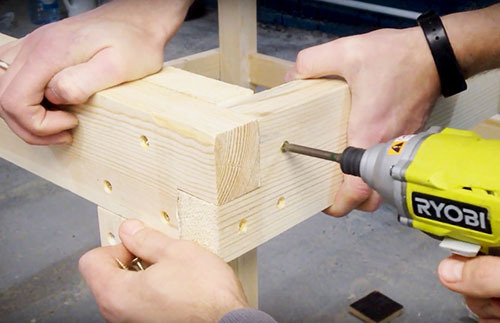 | The frame at the corners is assembled with grooves, all joints are glued and fixed with self-tapping screws |
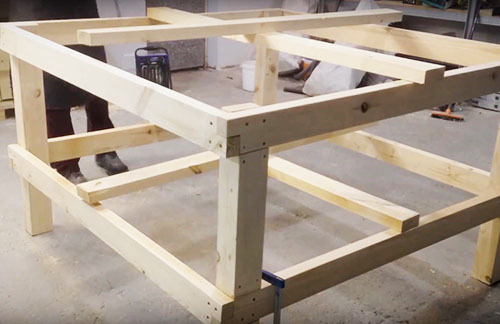 | The base of the table is square, approximately 170x170 cm². It makes no sense to make it wider, since it will be inconvenient to work, and it will not be easy to find a place for such a large table. Optimal size - 150 × 150 cm² |
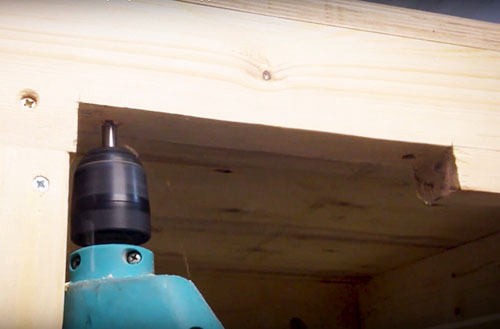
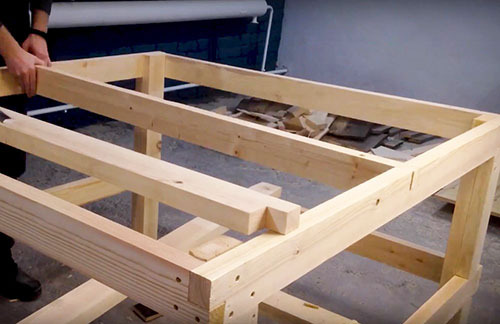 | In the upper part, additional joists are installed for the table top. You can make them longitudinal or crosswise |
 | Logs should also be installed on the lower part of the table, they will additionally fix the entire structure, and in addition, on them, if desired, you can put a shelf for the tool |
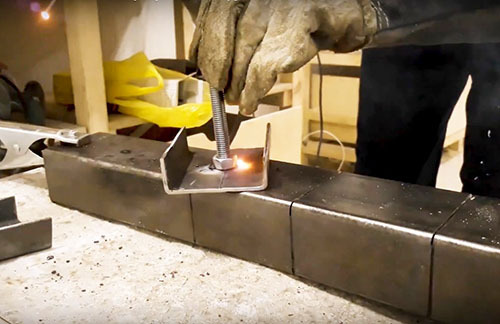 | To make the adjustable legs at the table, you will need to cut a square metal pipe |
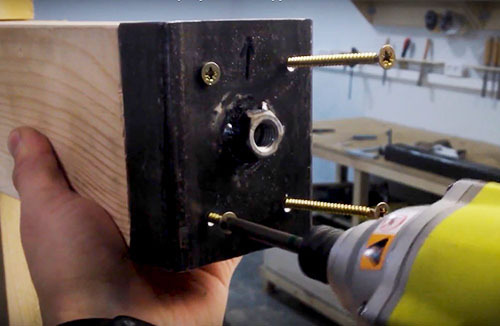 | A bolt is welded into one part, and it is fixed on the table leg with self-tapping screws |
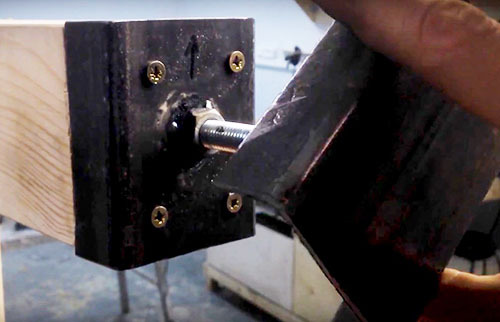 | A hairpin is welded on the second part. Now, by rotating the pin, you can set the table even on an uneven floor |
 | A tabletop is installed on the frame and fixed with self-tapping screws |
 | To mount the vise in the table frame, you need to select a groove |
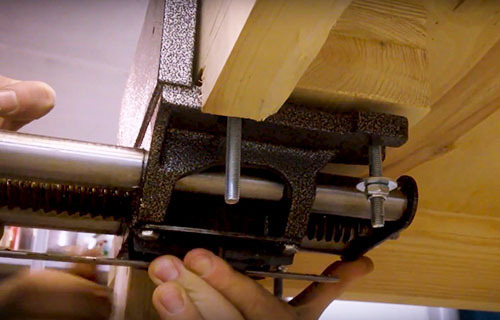 | The vice is fixed with standard bolts. They will not take up space on the table itself. At the same time, it will be very convenient to work with a vice. |
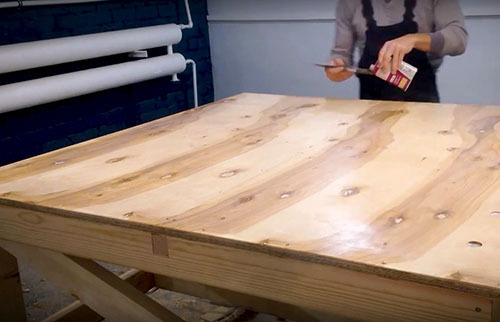 | The worktop should be coated with a protective compound: paint or varnish. This coating will protect the plywood from moisture and other liquids. |
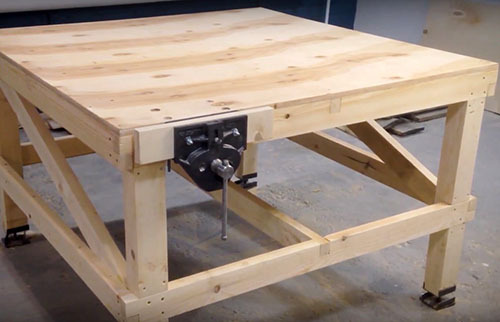 | The carpenter's workbench is simple but very handy. It can work with any material |
Small carpentry workbench with all the necessary tools
A joiner's workbench is required for the final processing of wooden parts. It is not the area of the working surface that is important here, but the ease of use of the tool for cutting, grinding and other processing. Here's an interesting idea for how to make a very easy-to-use mini workbench. The result is a fairly mobile design:
| Illustration | Description of action |
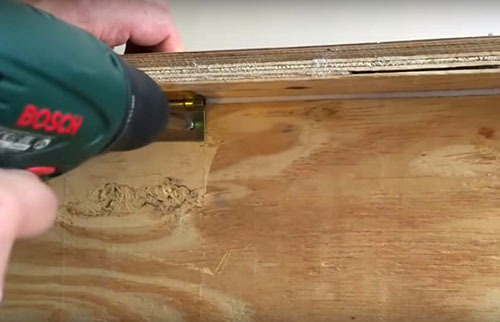
 | To make a carpentry table, you will need plywood 1 cm thick and a piece of the same material 2 cm thick, as well as self-tapping screws |
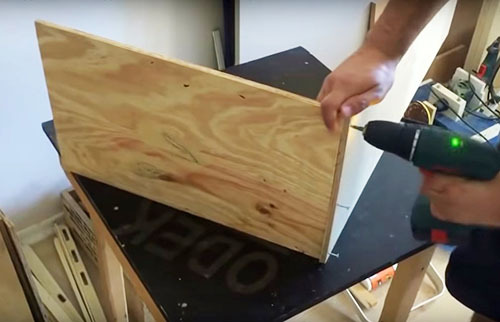
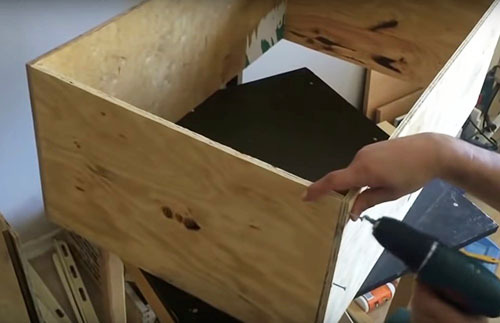 | A box measuring 70 × 100 cm is assembled from centimeter plywood. The walls are fastened with self-tapping screws. You can use a metal corner for reliability |
 | The bottom of the box is also 1 cm thick plywood |
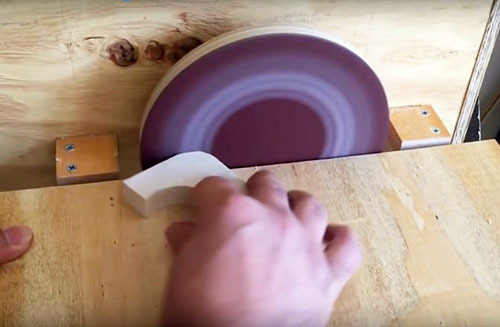
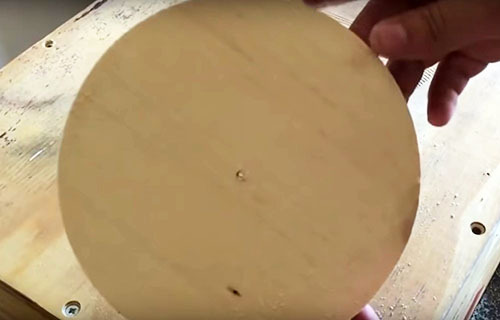 | From the same material, cut out a wheel for a grinding unit. In its center, you need to fix the bolt for fastening |
 | A wooden support with a nut is attached to the side wall of the box. The nut must be opposite the through hole |
 | A circle on a stiletto heel is put on this support. The hairpin must be long enough |
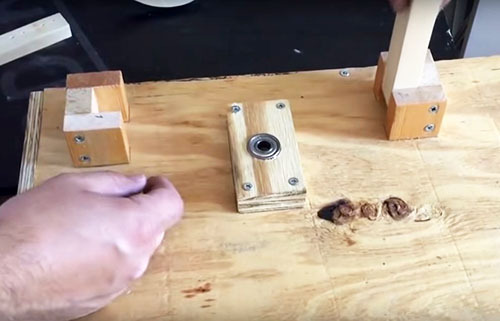 | To fix the stand, it is necessary to fix two such U-shaped parts on the wall |
 | The stand is a piece of plywood with two runners that just fit into the U-shaped mounts |
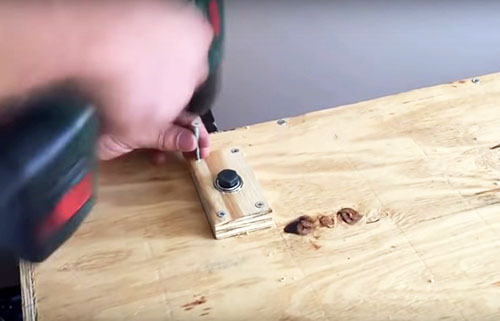
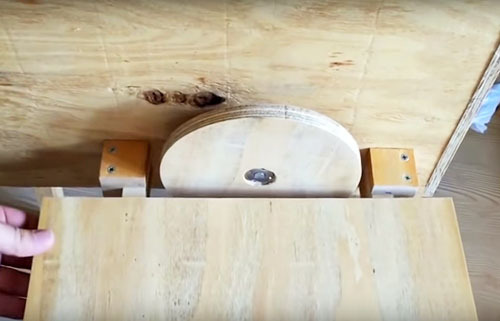
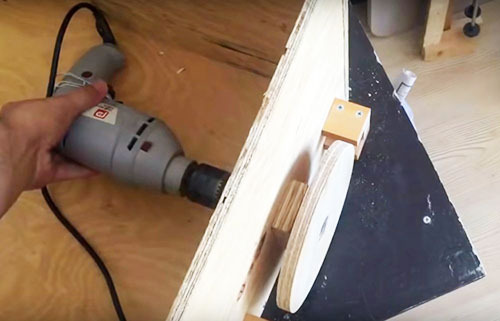 | The grinding wheel will be driven by a conventional drill or screwdriverwhich is located in the box |
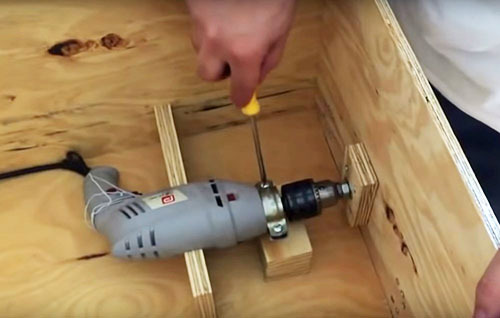 | The screwdriver is fixed in the box with wooden inserts and a metal clamp |
 | A base with a sticky layer is glued onto a wooden circle and sandpaper is already fixed on it. It is convenient to hold the part on the stand during processing |
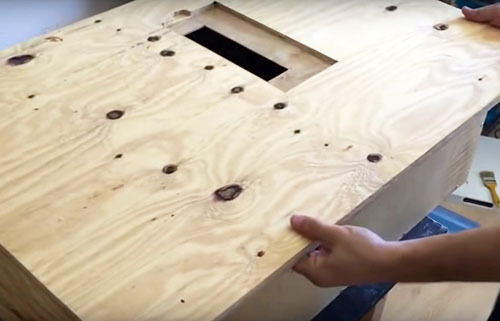 | In the cover of the box, made of plywood 20 mm thick, a through hole is selected for a circular saw. To securely fix the tool, you need to make not only a hole, but also a recess in which the base of the mechanism will fit |
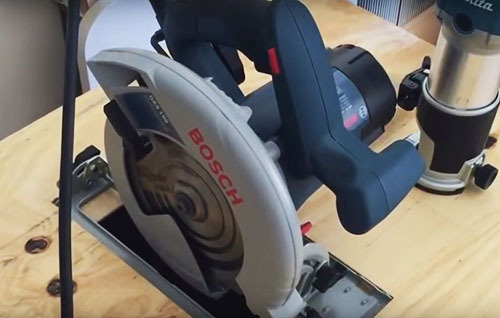 | The saw is fixed with regular bolts. Please note: it will be inside the box, and only part of the disk will be outside |
 | The cover itself is attached to metal hinges. To be able to look into the box and operate its contents, you need a stick-stop |
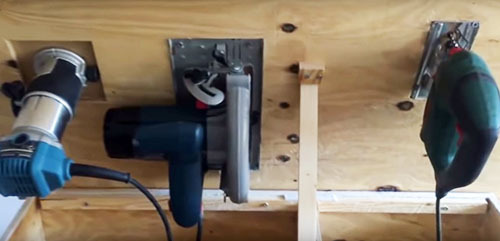 | In addition to the saw, in the same way, you can install jigsaw and any other carpentry tools you need |
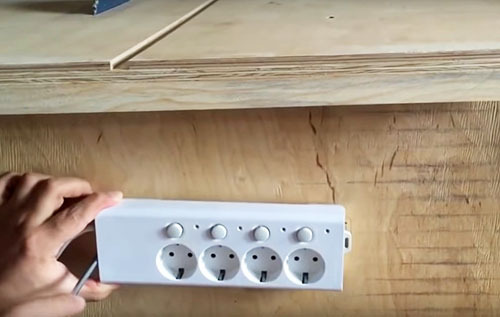 | On the side wall of the box, you need to fix an extension cord with buttons that allow you to turn on the tools. That is, on the instruments themselves, by default, everything is turned on, but they will start working only when you press the button that connects the current |
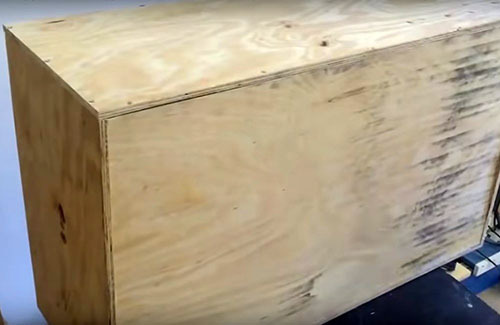
Such a miniature table-box is easy to move and take with you, for example, to the country. All tools are securely fixed, but when working with them, it is imperative to observe safety measures and use protective equipment. And, in addition, it is important to firmly fix the box before starting all the manipulations.
How to make a simple metal workbench
As already mentioned, the locksmith's workbench must be of an exceptionally strong structure to support the heavy weight of the metal parts.
| Illustration | Description of action |
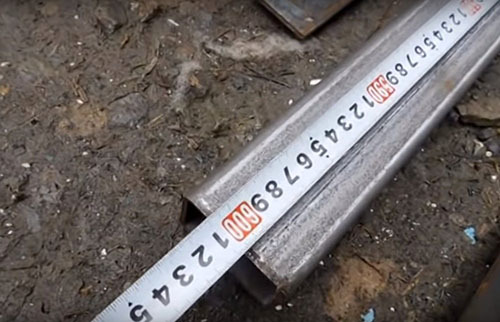 | To make a workbench, you will need a metal pipe with a cross section of 60 × 40 mm, a corner, a sheet of metal for the countertop and an OSB sheet for the screen. Fastenings are made by welding, the screen will be fixed with self-tapping screws for metal |
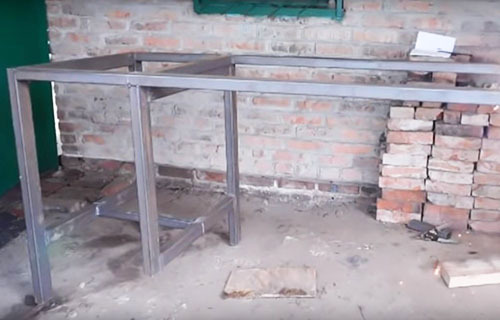 | The main frame is a rectangular structure with legs and an additional part on the side for the shelf device |
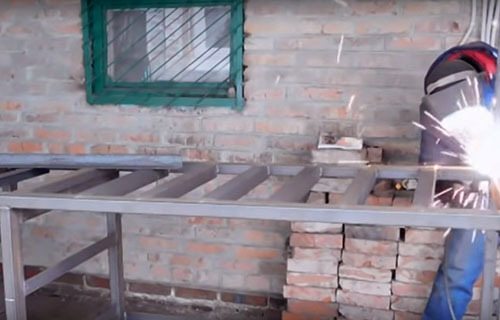 | To securely fix the tabletop, metal corners are welded across the frame |
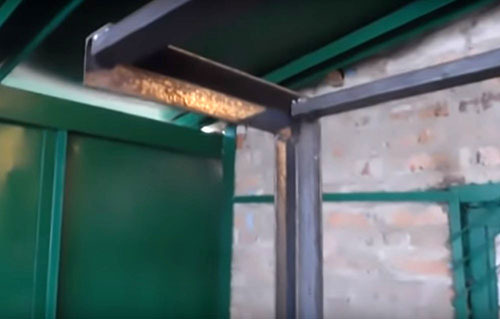 | The stands for the screen are also welded from the corner. You need to make a small visor over the table in order to later fix the lamp on it |
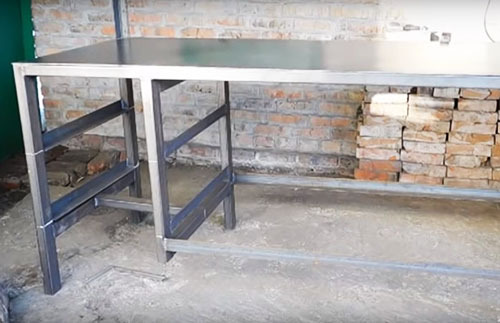 | The table top is cut to the exact dimensions of the base and welded to the corners. The edges should be carefully processed so as not to cut about them during work. |
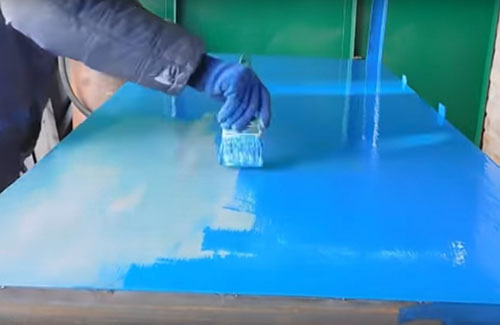 | The entire structure should be painted to protect it from rust. The best option would be to choose hammer paint, which contains epoxy resin. |
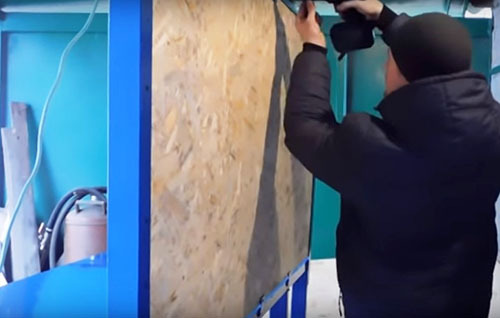 | An OSB screen should be attached to the corners of the rack, cut exactly along the contour |
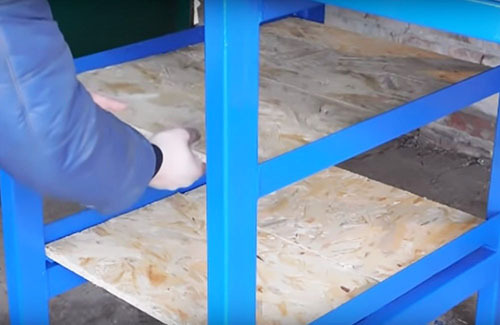 | The scraps of the sheet will go to the shelves. Here you can lay out the working tool |
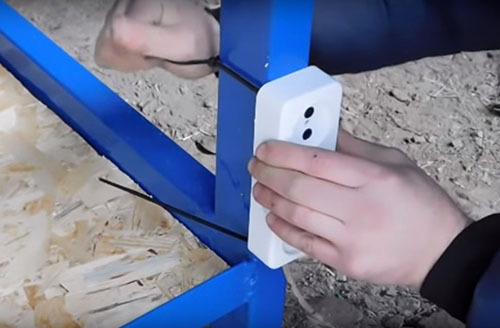 | An extension cord is attached to the table leg for connecting the tool. You can fix it with ordinary plastic ties |
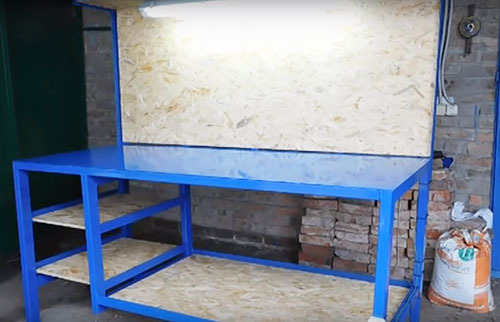 | The table is ready for work. Small hand tools can be mounted on the screen, heavy mechanisms can be put on the shelves |
As you can see, there is nothing particularly difficult in making a do-it-yourself workbench. You can make such a structure in one, maximum two days, and it will serve you for more than a dozen years.
Share your opinion about the presented models in the comments. Especially interesting if you have experience in making similar items! Share it with our readers.