- Why is puttying?
- A bit about
- drywall A bit about
- putty
wall preparation The modern market provides a lot of different materials, of which it is not always easy to choose suitable ones. Depending on whether you want to quickly complete the repair work, do everything thoroughly and for a long time or leave yourself the opportunity to often change the interior in accordance with the fashion trends and your preferences. Drywall sheets allow to perfectly level the surface for a short period of time and with minimal effort, so they are so often used for repair. Not an exception and the decoration of the walls. Below we will analyze how to prepare drywall on the walls with your hands under the wallpaper.
to the contents ↑Why putty?
The first thing that masters do when working with plasterboard walls are shpaklyuyut them. A logical question may arise: why? After all, the walls are already level. The thing is that:
- When installing the sheets, joints will be visible, as well as the places where they were attached to the screws.
- If you immediately paste a sheet of paper wallpaper on such a structure, through them all irregularities will be visible.
- But even more dense versions of the wallpaper will not help to block uneven areas, especially if a light color is chosen for them.
Important! Another important point about which many do not think: if you want to re-paste wallpaper, they will naturally have to be removed. And if the coating was without putty, the plasterboard can not withstand such a strong mechanical impact, and you will have to dismantle the entire structure.
These are the highlights that indicate the need for wall plastering under the wallpaper. Let's talk about the finishing material itself.
to the table of contents ↑A bit about the
drywall The sheet of material is represented by a gypsum board sandwiched in cardboard on both sides. The size of one sheet is standard: 2.5 meters by 1.2 meters. Therefore, to sew a large area, the sheets of material are joined together.
Characteristics of work with the material:
- GKL is characterized by a smooth and smooth surface, which does not require special efforts for its alignment.
- The joints of the sheets are processed using reinforcing mesh and putty mixes.
- Installation of GCR is performed using self-tapping screws.
Next, we'll figure out how to putty drywall under the wallpaper, but first we'll choose the right mix for work.
to the table of contents ↑A bit about
putty When working independently, it is very important to choose a quality filler. Consider the basic tips from experienced masters.
Recommendations:
- When choosing in the store, always look at the expiration date of the mixture. If it is absent, or you have suspicions that the date has been corrected - it is better to immediately refuse such a purchase.
- You should also pay attention to the purpose of the tool. For the treatment of wallpaper, we need a mixture for interior finishing work.
- Before buying, read the instructions on the packaging. There are ready-made mixtures, and there are compounds that need to be prepared and even insisted in a special way.
- If you have chosen the mixture that you need to prepare, you will need a building mixer to mix the composition to homogeneity. For the same purpose, you can also use a drill bit.
But this is not all you need to know about putty. The composition of the mixture is also important.
Gypsum
The gypsum-based mixture does not tolerate high humidity, it can crack. Therefore, its use is only possible in dry rooms.
Cement
Compositions, the main component of which is cement, tolerate moisture well. Therefore, they can be safely used for finishing kitchens and bathrooms.
Leveling
These mixtures are suitable for adjusting joints, cracks and other surface imperfections, but as a final stage of the work they will not work because of the large grinding.
Versatile
These are polymer based compounds, they are very economically consumed, they tolerate high humidity and can be used for any stage of finishing.
Important! When making a choice, take a closer look at the formulations that need to be prepared. Often the cost is lower, and the consumption is much less, because you can prepare the mixture as necessary in small quantities.
When selecting ready-made formulations, you need to monitor the tightness of the lid, otherwise - the product will quickly lose its properties.
Next, we'll figure out how to prepare gypsum cardboard on the walls with your own hands under the wallpaper.
to content ↑Preparation of
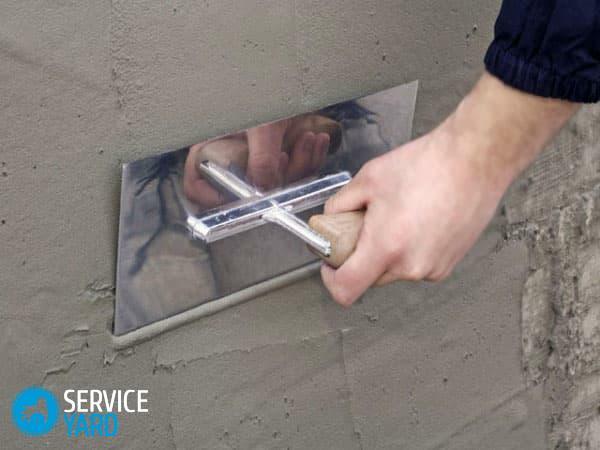
walls Before starting work, you need to remove all dirt from the GCR, and also conduct a small test on how fasten the fastening elements over the wall. To do this, it is sufficient to draw a wide rigid trowel over the wall surface:
- If it clings to the fasteners, fix it with a screwdriver.
- If self-tapping screws protrude, they are screwed in to drown, if they are heavily drowned - they are vice versa, they are twisted and moved to another location.
- If the top layer has flaked off somewhere, it is carefully cut and applied to this part with a primer.
Priming surface
Priming of plasterboard walls is necessary, because in this way you will reduce the consumption of putty, increase the adhesion of the coating and protect the wall from the adverse effects of various factors.
Important! Please note that the GCR absorbs moisture well, and accordingly - pick up the primer with the notation "for strongly absorbing surfaces".
The whole wall needs to be primed, especially thoroughly soaking the corners and joints of the sheets. Then you need to wait for the composition to dry out and find out how the plasterboard putty is made with your own hands under the wallpaper. 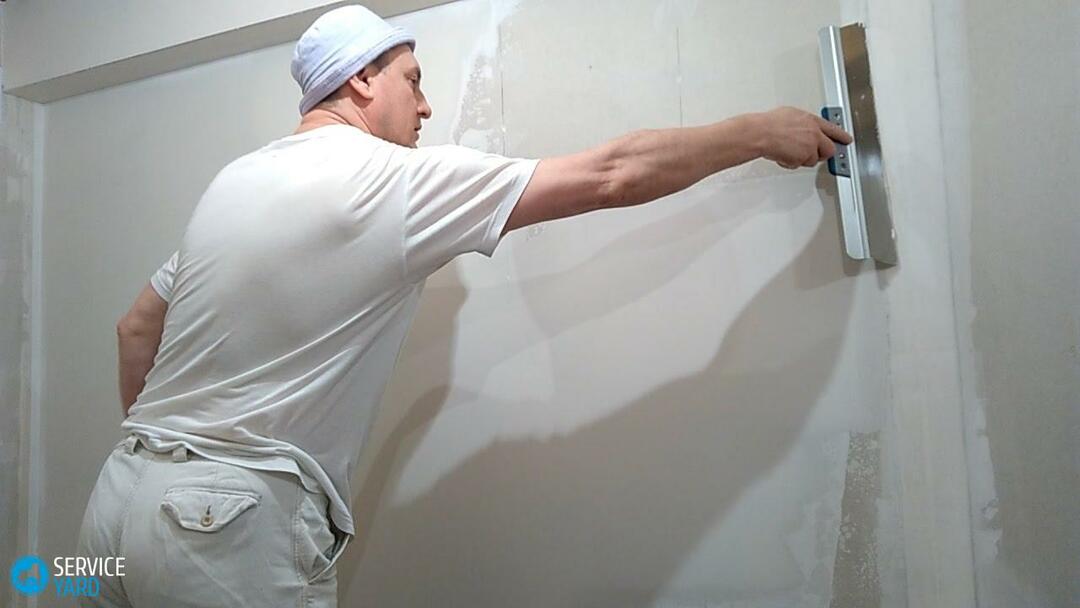
Shpakem wall
So, first, we put the first layer of putty. We need it to:
- to repair cracks and dents;
- align the scratched sections;
- remove holes from self-tapping screws;
- seal all seams and joints and corners.
Important! At the initial stage, do not be afraid to apply a little more mixture. When dry, it will shrink.
Next, we'll figure out the question of how to coat plasterboard under the wallpaper with your own hands.
We will need
In order for the work to pass quickly and successfully, we need to prepare everything necessary in advance.
What tools are needed?
- Building or usual sharp knife;
- The roller is wide and narrow;
- Trowels soft and hard, wide and narrow;
- Brush;
- Capacity for work with putty;
- Building mixer.
But without the repair materials will not work, so we will prepare them.
What is needed from the materials?
- Mesh reinforcing - serpian;
- Water-based primer, or other suitable for GCR;
- Putty universal or two types - finish and for seams;
- Metal corners;
- Sandpaper;
- Skin and respiratory protection.
Important! If you are going to use an already ready-to-use mixture, then you will not need a building mixer, but it will also have to be stirred with a small stick from time to time.
So, what steps should we take after training?
Initial work sequence:
- To completely hide the screws under the compound, apply the putty crosswise.
- To seal all seams and joints, first use reinforcing mesh, which is gently stuck in such a way that the seam is in the middle.
- Next, we begin to seal the seam, working first from top to bottom with a narrow trowel, and then - spread along the wide.
For angles, a separate technology is used.
Working on corners:
- Take a corner or plastic profile, attach it to the corner and circle it with a pencil along the borders.
- Remove the corner, we make a notch on our marks, the depth is slightly larger than the profile.
- Then cover the groove with a mixture for puttying, press the corner into it.
- That putty, which has climbed upward with indentation, is leveled and we add a little more mixture from above, so that the profile completely hides behind the composition.
Important! For processing internal corners use reinforcing mesh. After the end of the work, you should wait until the walls dry completely and re-primer them.
Next comes the final stage - finishing the walls of gypsum board under the wallpaper.
Completion:
- This stage of work is to create a thin and even layer. The mixture should be diluted to the state of sour cream.
- This finish is most conveniently done with finishing putty and a wide spatula.
- Take your time, do all the work as accurately as possible, without sudden movements.
Important! If, after the mixture has grasped, you notice a slight unevenness - you can remove it by rubbing it with sandpaper. Further - it is necessary to wait for the complete drying of the composition and again to primer the surface. If necessary, work on finishing finish can be repeated several times.
If you do all the work correctly, then you will understand that there are no special difficulties with such material as drywall. The decoration of the walls under the wallpaper on this is completed, and you can proceed with the actual work with the wallpaper. Successful repair!