- Former beauty
- Splitting or cutting
- Grinding
- Polishing
- Surface treatment
- Engraving
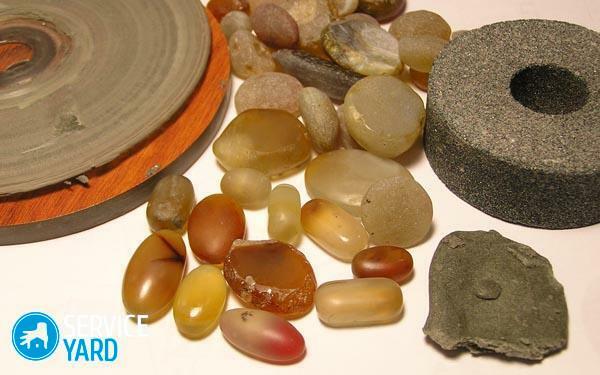
Signet rings with radiant gems and inserts, pendants, earrings, cufflinks and other jewelery with stones. Written instruments, sculptures, columns and socles and walls of buildings. In all these examples, and not only in them, the stones perfectly perform the role of artistic, sculptural and building frames, serving as the main detail for the artistically applied composition. Stone lovers collect all minerals, including ore rocks. For example: agates, jasper, silicon and the transition forms of these minerals. Today you will learn how and how to polish the stone at home.
to the contents ↑Former beauty
We will recover the former beauty of the stone with the following materials:
- Sandpaper with different grain size.
- Soft cloth or polishing wheels( for machining).
- Special chemistry for stone.
- Grinding wheels.
- Sand.
All polishing is divided into stages, each step will be described in order.
to content ↑Splitting or cutting
Cleaned and washed stones must be sorted.
Important! Experienced lovers who know their business, find in the stone such planes of cuts through which you can see the flow of colors, reminiscent of landscapes, and even portraits.
Before you start working on a craft, you must:
- Split the stone, remove all unnecessary.
- For the splitting( preparation) of large specimens, special devices should be made: a clamp with two teeth of hardened metal or a vice, in which two corners with winning teeth are mounted.
- Stone is cut with special diamond circles or diamond saws available for sale.
The machine for cutting, grinding can be assembled on the basis of an electric grinder or an electric drilling device EZS-1.
Important! It has two shaft outputs, one - equipped with a cartridge 6, the other - an emery circle or a special faceplate, with a diamond coating. The power of this device is EZS-1 0.25 kW, rotation speed 2800 min.
It is possible to operate other motors in the power range from 0.25 to 0.5 kW and the rotation speed from 1500 to 3000 min. The device is installed with the expectation that you will need to manipulate the various sizes of disks and angles of inclination. 
Things to consider when working:
- For the soundproofing of the machine, the bottom of the drawer-stand and the support of the table are covered with rubber or felt.
- A drip tray with water is placed under the machine table for regular cooling of the cutting wheel.
Important! To reduce friction, a soapy solution can be added to the water.
- The second water pan is installed under the faceplate.
- When cutting, the stone is fed along the guide bar, the position of which is adjusted to the thickness of the plate of the workpiece to be cut.
- The flow of stone - towards the rotation of the cutting circle, everything is simple.
- Water for cooling the circle can be fed and using a wetted piece of foam rubber, which is held with the left hand at the side of the cutting wheel.
Important! The right hand is served a stone. It is better to hold the large elements with both hands, and press the foam rubber together with the stone to the tool.
- For the stability of a natural rock element, the edge is preliminarily cut to obtain a support pad.
Important! As an option - you can also install the stone in a specially prepared cardboard box, pour the cement and after full hardening, cut the stone together with the cement box. If you used this type of cutting, then at its end, the cement is carefully removed.
- To cut a larger stone, it is notched, and three wedges of thin steel plates are slaughtered in the slotted grooves. Material is broken, gently striking it with wedges.
Important! In this way it is convenient to cut the elements, the size of which slightly exceeds the diameter of the cutting tool.
- If you have a cracked element of valuable rock for you, then glue the defective parts with epoxy glue before cutting it. Cracks are traced on a wet surface with a pencil - so they are better seen.
Important! Before sizing, the stone must be dried, so that no water remains in the cracks. It is done this way: it is heated over an electric stove, and then - cooled to about 60 ° C. On hot material with a brush or a wadding stick, epoxy glue is applied along the marked cracks, so it penetrates deeper and hardens faster. The stone becomes strong enough, and as a result - its cutting will be better.
At home, and used an ordinary Bulgarian, a disc on the stone. A more precise treatment of your subject will require the use of a "sawmill" type machine with a metal, preferably mobile platform.
to content ↑Grinding
Sanding paper( coarse grains) is used for grinding, in addition to paper, sand or pumice is used. This stage is completed when you see a flat horizon on the surface.
Important! Often you have to shoot 3-4 cm.
You can grind both manually and with the help of, for example, an angle grinder( grinder).
to the contents ↑Polishing
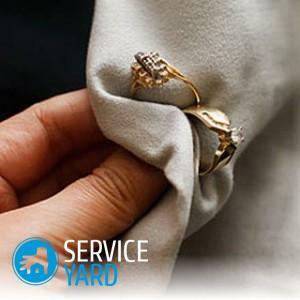
After polishing, it's time to polish the stone. At home, special tools like polishing or wax are used for this.
Most masters recommend using substances based on wax. The product is applied to the surface of the cobblestone and rubs with a cloth or polishing wheel until the gloss appears.
to the contents ↑Surface treatment
Now it is necessary to coat the cobblestone with a protective and decorative means. In the market there are many tools with different properties: some - highlight the structure of the breed, some - give the material a "wet look."
The main thing in choosing is not to be guided by prices, but to invoke the fact that your efforts do not fly out into the pipe, because a poor-quality tool can do this.
Important! Some substances in the composition can enter into a reaction and spoil the object of your pride.
to content ↑Engraving
Engraving - is possible when using a device for performing spot works, or when using a set of cutters for a stone and a hammer. In this case, after completing the engraving, you need to polish the stone using an electric drill and polishing nozzles.
After receiving this knowledge, you are ready to polish the stone at home. Again, you should remember the safety rules. If you are not confident in your abilities and you have never had experience, it is better to use the services of professionals of this case. This process is quite laborious and complex, so you need to properly prepare, and then start.


