
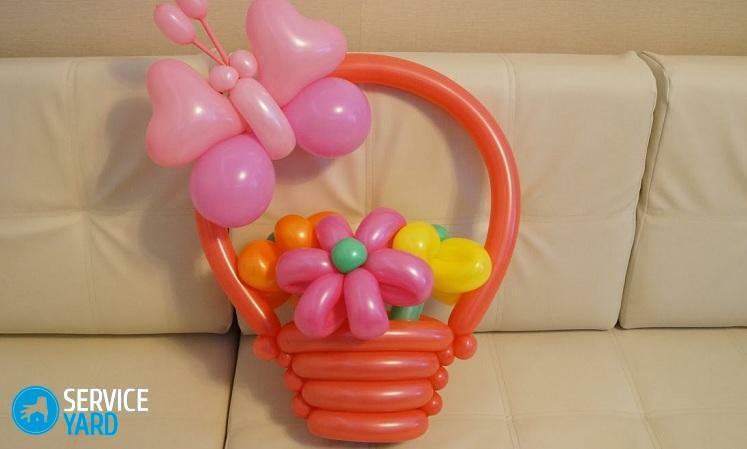
- Master-class of basket # 1
- Master-class of basket # 2
- Flowers from balls
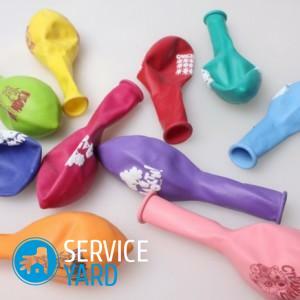
For any holiday, the most important thing is a good mood, and balloons are best used to create the necessary atmosphere. Due to their bright colors and various forms, they raise the mood for both children and adults. In addition, in recent years, an increasing number of items are being won by craftsmen. For example, you can decorate a vase of flowers, which will not only decorate the room, but also raise the mood of all participants in the process. How to make a simple basket of flowers from the balls? Such crafts are made from special long balls for modeling, abbreviated as SHDM.For a basket of flowers you will need such ShDM of different colors and a pump, and of course, a lot of patience and a little imagination. And now we'll see in detail what to do with all this.
to the contents ↑Master-class of basket # 1
There are different technologies for creating such hand-made articles. And many of them can be mastered on their own. But it's better to start with simpler ideas. This does not mean that you will have to act at the expense of design - such crafts also turn out to be very interesting, bright. And the fact that such a gift will cause a lot of enthusiasm - this is not to be doubted.
Let's consider a step-by-step master-class of baskets from balls with your own hands:
- Inflate one SHDM using a pump, twist three identical round bubbles at the end, fold them with a ring.
- Make 5 more of these blanks. It should be a six-beam design.
- The middle parts of each three are twisted into locks. This design will serve as the basis for our basket.
- Inflate the SHDM to half, with the edge twisting one small bubble. It is clamped in one of the three locks on the base, and the whole body of the element is wrapped around this lock.
- Next on the surface of this detail we twist two more parts, the last SHDM also turns into the lock.
- Do the same thing with five more details. As a result - we should get a base with knitting needles.
- Now you need to turn the base upside down - so weave it will be more convenient. We inflate the following SHDM, at the end we turn off the round bubble, we pass it to the lock on the spoke and wrap it around.
- The next five SHDM puff and twist are not round, but oblong, fasten around the lock on the spokes.
- The last element is associated with the first, the remains are cut off, and the first one is wrapped in the lock.
- We turn the basket back, we blow the next SHDM, we continue the weaving on the same principle.
- The lock obtained at the end of the tier can be hidden inside the basket.
Important! It is necessary to plan the arrangement of the tier locks in such a way that each of them is on a separate spoke. If all the locks are on the same spoke, the basket will be deformed.
- If you want the basket to be expanded, the length of the parts must be increased with each tier. To narrow the shape of the basket, the length of the elements is reduced. To obtain even walls, the parts must be of the same size.
- When all the tiers are ready to spin bubbles on the spokes and fold them into the locks.
- If you want to create a basket with a handle, then inflate one SHDM, tie it to the locks on opposite sides.
As you can see, there are no special difficulties, and the whole process will take no more than half an hour. The main thing is to adjust, and then the work will go faster and more fun.
to the contents ↑Master class of the basket №2
Before starting to knit a basket, it is necessary to prepare several balls of the same size, that is, inflate them so that the length of bodies and tails is the same. This is very simple: we inflate and tie one of the SHDM, and then taking it as a model, we inflate and tie others.
How to work:
- At work, everything should be kept on weight, the parts should be pressed with elbows to the sides, and the basket itself should be held in hands. On any table there is dust, and if the elements are rubbed against the table, they will get microscopic damage. Products created on weight live longer than those that are formed on the table.
- Before twisting, lightly press the part with your fingers in such a way that the ball in the place of twisting was not very tight and not very sluggish.
Important! In the first case, the bubble will turn out to be very tight and will burst quickly, and in the second case it will not collapse at all in the round part.
- Long bubbles within a tier should be of the same length. Therefore, before you twist, attach the SHDM over the previous part, mark the imaginary line of twisting, and twist the part along this line.
- When twisting and wrapping, bubbles do not have to rub against each other with their walls. A sign of this will be a loud squeak. If you created an artwork and it creaks, it means that your ShDM is damaged, and this design will not last long.
So, let's start making our basket:
- Inflate four identical ShDMs.
- Make a bubble on the body of the first SHDM, then a small round one, and fold it into the lock.
- Do the same with the rest of the SHDM.
- Connect all the elements together without tying, but simply wrapping the ponytails at the junction.
- On one SHDM we make a small bubble, three times we twist. On this same ball we measure the part on the lower tier and make twisting. At us it turned out on one SHDM two parts - one small and one big, and on the other - only a small bubble.
- Now twist together two elements in the joints. We make a big bubble, on the next SHDM - small. We twist, and so on all tier.
- To finish the tier, make a big pimples and push it between the two SIDs.
- When the first two tiers are connected, you need to twist the round bubbles inside the basket into the locks.
- To complete the decorative object, the round parts are rolled up on the remains of SHDM and they are folded into locks. The residue of SHDM is cut off.
- When the basket is ready, you can tie the handle from both sides.
Flowers from balls
We made the basket, now let's make flowers for it, because without them it will not be so interesting. To decorate a flower, you need two-color shim. As one of the flowers goes to the stem, at least one of them should be green. The second can be any other color, for example pink:
- Inflate the pink ball so that the tail remains about 5 cm.
- On the side of the tail twist the bubble, wrap it twice.
- Make sure that all sausage pieces are equally soft and of the same size.
- You should have six such details. Try to wrap them in one direction.
- Tie the workpiece into a ring.
- To make a petal, bend one vial in one piece, bring its ends together, wrap two times.
- Do the same with all the details.
- Align the petals in the same plane.
- Now you need to create a stalk. To do this, inflate the green SHDM.At the tail, fold the bubble and fold it in half. This is the core of the flower.
- Poke it between the petals, and your flower is ready.
In this article, we took a step-by-step look at how to make interesting crafts from balls. We hope that these ideas seemed to you successful, and you have already evaluated the result by doing this creative work.

