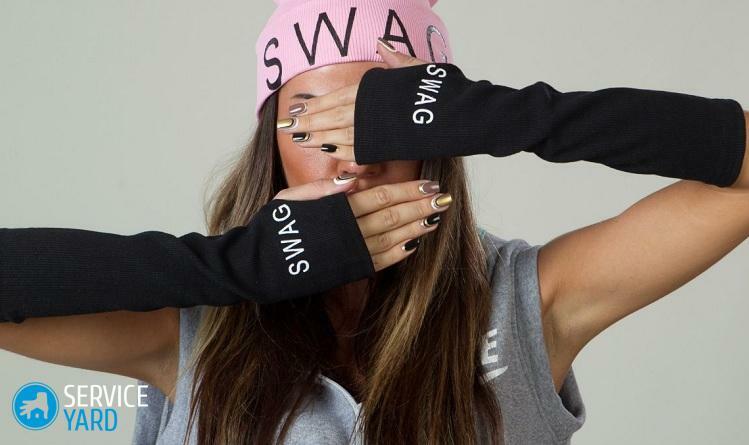
- What are gaiters and what are they wearing?
- How to make gaiters quickly and without needles?
- Sewing gaiters
- Leggings knitted with their own hands
- What yarn is better to knit leggings with knitting needles?
Leggings on the hands and feet - it's fast and inexpensive. In addition, you will not buy "consumer goods", like everyone else, but show in this subject of your wardrobe your individuality and imagination. Is this part of the toilet necessary, and can it be made with your own hands? Fans of creating beautiful and original things this article will be especially useful.
to the contents ↑What are gaiters and what are they wearing?
Leggings are an interesting accessory for women's clothing for the street. He appeared in the nineteenth century, he wore leather or cloth, put on over his shoes. A variety of gaiters are leggings( side on buttons).For a long time this type of clothing was most often used by athletes, dancers, travelers - it warmed the muscles of the legs, which is useful for stretching and other physical exertion. Today, gaiters are the number one attribute in aerobics, football, ballet and even tourism.
At the end of the 20th century, gaiters became a popular element of style in everyday street clothes. They do not go out of fashion to this day. You can wear them with shoes, ankle boots, half boots, sports shoes. You can put them on pantyhose, over jeans or sports pants. Gaiters can be very diverse: knitted and crocheted, monophonic and colorful, elegant and sporty.
Any fashionista needs to have at least a couple of her wardrobe. Of course, it's easy to buy leggings on your hands or feet, but it's better to try to make them yourself. Is it so difficult? About all the basic and easiest ways to create such an element of a fashionable bow, we will describe below in the text.
to the contents ↑How to make leggings quickly and without needles?
How to make gaiters with your own hands, if you do not have knitting skills? The fastest and cheapest way to get homemade leggings, avoiding knitting with knitting needles is to cut off the sleeves of the old sweater. For this we take unnecessary knitted clothing with sleeves, and then these sleeves are simply cut off.
But, of course, a sweater( jumper or other) should have suitable sleeves: they must be straight, tight knit. All sorts of flashlights, flared models, loose openwork binding will not work for us.
Important! Very good, if these sleeves have cuffs in the form of elastic bands. Do not forget to just inspect the old sweater for the presence of holes from moths.
Procedure:
- First, decide how long you will need. For this, measure the distance from the popliteal fossa to the lower leg with a centimeter.
- Now put this length on the sleeve, not forgetting to add a couple of centimeters to the hem.
- Place the sweater on a table or other flat surface, and then, with a tailor's scissors, cut the sleeve parallel to the cuff accurately.
Thus, you have almost ready-made leggings in your hands. It remains only to process the edges: you need to make sure that the hinges do not open, and the leggings stay on their feet and do not slip. There are several ways to do this.
Edge processing method number 1:
- On the sewing machine, you must sew the edge with a "zigzag" line. It will not pull it down and prevent its loops from unfolding. Select the thread in a tone of jersey.
- To ensure that the gaiters do not slip off while walking, insert the elastic band. It can be an elastic band or a Hungarian.
- Bend the edge by 1.5-2 cm, lay the seam. Inside this fold, insert the elastic, sew its ends. It is necessary if you like wearing gaiters so that they fit tightly around your leg.
- If you do not need tight fixation, you can skip the gum string at the top. Such are sold in the goods for sewing and come in different colors and thickness. It will be necessary to lay it in 1-2 rows, so that the top of the product is slightly compressed. Such a rubber band will be enough to wear gaiters in a priborenny form, such an accordion.
Important! Similarly, you can process the bottom edge, if there was no rubber cuff.
Edge processing method number 2:
- You can, like in the first case, process the edge of the line with a "zigzag", but do not need to turn.
- In order to keep the leggings on the leg, you need to lay a decorative string in 1-2 centimeters from the top. You will pull it together, as far as you need, and tie a bow.
- If you can, then you can tie the hem of the crochet hook. To do this, select the yarn of the desired color, tie 2-3 rows in a circle with a half-tine.
- You can add yarn-thread to the yarn, then the top of the product will be better fixed on the foot.
- If you want to add romanticism to gaiters, then you can tie a lapel in the form of a wavy front.
Important! If you are reincarnated in sleeves leggings from a sweater of thin elastic binding, then you do not need to make a gate for the rubber band, or you will get a noticeable seal. In this case, it is enough to process the edge with a zigzag or overlock.
You can also decorate gaiters with something: sew a number of buttons, sew a woolen thread pattern, add rhinestones, applique, add brushes or pom-poms to the strings.
to the contents ↑Sewing the gaiters
Leggings can be sewn to yourself. For winter, you can take artificial fur, fleece, woolen knitwear, for spring-autumn, take the fabric thinner. It is desirable that it is not loose and simple in operation.
Important! Usually for gaiters, a cut of 1 meter is enough.
Procedure:
- First, take measurements of the foot: measure the lower leg, the widest part of the calf and the leg circumference under the knee.
- Now measure the length from the popliteal fossa to the middle of the calf, from this place to the lower leg.
- From the fabric, cut a rectangle: the length should be equal to the length of the leg from the knee to the bone, and the width - equal to the circumference of the calf, plus do not forget to add 1.5 cm to the seams.
- In order for this workpiece to take the shape of a leg, you need to sew a rubber band. Sew a piece of linen under the knee, in the middle and on the bottom of the shin.
Important! Do not forget to stretch gum while sewing.
- Now it remains only to sew the edges, cut off the excess and, maybe, decorate some new leggings.
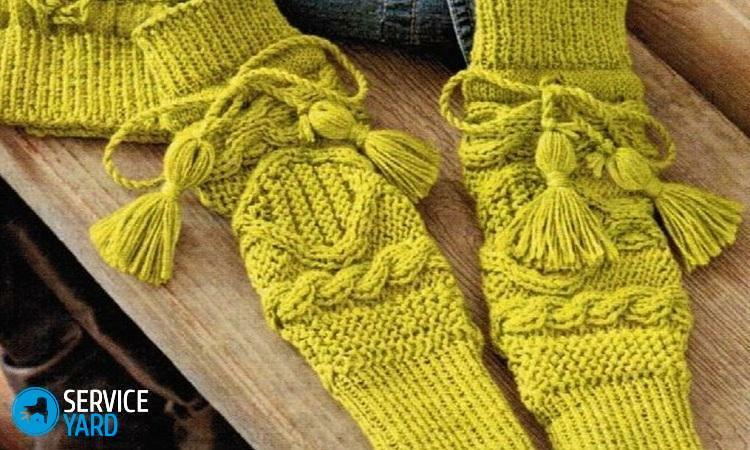
Leggings knitted with their own hands
Leggings, knitted with their own hands, will not take much time, especially if the binding is performed without a complicated pattern. For a day or two, you'll be fine. It's much easier than knitting socks - you do not have to think about the toe and the heel.
Preparation for work:
- Yarns for this wardrobe will need up to 300 grams. Choose the color, composition and thickness to your taste.
Important! From a thicker thread, the product knits faster, with a thin yarn, sit at work a little longer.
- Seamless leggings knit on five spokes, and those that need to be sewn - on two.
Important! Choose the number of spokes according to the thickness of the yarn. Usually the manufacturer recommends the number of spokes on the label for the skein of threads.
- In order to type the correct number of loops, connect a small rectangle, for example, 5x3 cm, and count how many loops are per cm.
- Knit gaiters usually from top to bottom, so measure the leg circumference under the knee, multiply the resulting length by the number of loops in onecentimeter.
Important! Calculations are carried out similarly to the following example: in 1 cm of knitting - 3 loops, and leg circumference - 35 cm. Multiply 3x35 and get 105 loops. If you will knit some patterns, it is usually indicated in the knitting pattern how many times the number of loops should be multiplied. So you can correct it.
- For knitting leggings, choose such patterns, under which the product will be elastic, it is good to keep the shape, that is, loose knitting and notworking will not do.
In magazines on knitting, on the sites of needlewomen you can find a lot of schemes with drawings( rhombuses, braids) and choose what you like, and we will offer for example a couple of options - simpler and more complicated.
Dressing and Stocking
This is the most simple way to bind gaiters yourself, if you are still a beginner in this useful business. For these primitive patterns you need to be able to knit only the facial and purl loops.
Stocking:
- Enter the desired number of loops( how to calculate - described above).
- Now decide whether your future gaiters are seamless or with a seam:
- In the first case, you need to distribute the hinges equally on four spokes. Accordingly - the number of typed loops should be a multiple of four.
- In the second - arm with a pair of spokes of the right size, and the number of loops should be a multiple of two.
- At first you can tie a rubber band. It will help the gaiters to tighten their legs more tightly and not let them slide downward( in case of stocking knitting, the edge of the product can curl into a flagellum).It can be 3-5 cm. For this, alternately, knit one face loop and one back one. After that, go to stocking.
Important! This knitting is one-sided, that is, one side will be tied with the facial smoothness, and the other - the purl.
- In order for the gaiters to get the right shape, you need to add the hinges to the level of the middle of the calf. This is done at the beginning and at the end of the row( for 2 spokes) or through a row( for 5 spokes).
- When you go to knitting the widest place, start decreasing the number of loops in the reverse order.
- At the end of knitting, when you reach the desired length, you can simply close the hinges, or you can also tie a small rubber band( depending on how you like to wear them).
- If you were knitting on 2 spokes - sew the product.
Garter Stitch
This pattern is tight and holds the shape well. It is two-sided, because it looks the same on both sides:
- First we type the required number of loops.
Important! For garter stitching, the edge does not twist into the roller. So you do not have to knit an elastic band, but just add an elastic elastic string to the yarn and so you can tie a few upper rows, or you can leave it to all knitting.
- The handkerchief pattern is simple: all the loops of each row are knitted with facial.
- As in the first case, before the middle of the roe we add loops at the beginning and end of the row, and then we subtract in the reverse order, passing the widest place.
"Spit" pattern
Such a pattern will make leggings more elegant, but the level of complexity of mating is higher. For beginners at first it will be difficult, but after a dozen rows you will remember the scheme and it will go faster. Below is an example with simple narrow braids:
- To begin, type the hinges and crochet the elastic band of the desired length.
- Now you need to place the pattern correctly. To do this, find the middle of the knitting and count 8 loops in both directions. Edges mark with knots or markers( small plastic or metal rings, pins, which mark the right places in knitting).In addition, you will need an extra spoke.
- Scheme:
- 1st row - 4 and.etc.( purl loops), 8 liters.(facial) then 4 and. P.;
- 2nd row( and all other even numbers) - according to the figure;
- 3rd row - 4 and.etc., 4 liters.etc., remove to the additional spoke and move forward, bind 4 l.etc. and 4 liters.from the additional spoke, then 4 and. P.;
- 5th and 7th rows - according to the drawing;
- 9th row - repeat the scheme of the 3rd row.
- The last row is tied with facial and close, or you can tie a small rubber band.
- For decoration we offer braids to decorate with beads( sew them in "dimples" between weaves).Pearl beads will look nice and fit any clothes and shoes.
Important! If you are good at knitting, you can tie up leggings with colored patterns. For the cold season, Scandinavian( Norwegian) ornaments can be used as well as possible. The classic option - black and white leggings with a pattern of "snowflake".Scheme you can easily find on the Internet.
to the contents ↑What kind of yarn is better to knit leggings with knitting needles?
Now in stores such a variety of yarn, that just eyes run. What kind of yarn should I choose? There are several recommendations, listening to which you can facilitate your choice.
- The choice of color tips will be unambiguously inappropriate - it's up to everyone, given their preferences and style of clothes. The only thing to note is that if you knit leggings with a color pattern, then pick up the hosiery of one manufacturer, one thickness, one series. Then the pattern will be uniform.
- The thickness of the yarn can also be different:
- For winter gaiters, choose a thicker thread, with mohair, angora wool.
- For autumn and spring take thinner.
- If you knit children or you negatively react to woolen products, purchase a special children's yarn. It is pleasant to the body and has a wide variety of shades.
- For yarn knitting yarn should be elastic, otherwise - it will not fit well, the product will formlessly crawl down.
Important! Woolen thread is more elastic than cotton thread.
The best yarn
Yarn manufacturers very much:
- Turkish firms Alize, Yarn Art, Gazzal and others are especially popular. They are good in quality and inexpensive for the price.
- European manufacturers will be more expensive, but the quality is higher.
- Not the best option is the Chinese yarn of an inexpensive segment - although it is elastic, but it uses a lot of synthetics, and the paint can shed.
Undoubtedly, this piece of clothing is quite interesting and practical, so everyone will be useful to have at least a couple in their closet. If you could not find a suitable option among the assortment offered by stores, you can always make the right model yourself. Leggings, knitted with their own hands, look spectacular and beautiful, they will ideally sit on your feet or hands. If you do not want to be afraid of needles, then make a simplified action - use an old sweater, as described above. With great certainty it can be argued that this part of the wardrobe will be to your liking, and to experiment with knits and new ideas regarding its creation you will be more than once.