- Neck bow correctly and tastefully
- Classic French bow:
- One-hip bow
- For those who are not afraid to experiment
- We make a simple bow with our own hands
- Satin bow belt with your own hands
- Nose bow, matching fashion trends
- Howit is nice to tie a belt on a dress?
Being beautiful and attractive is the guarantee of every girl. Therefore it is very important to always look flawless and tasteful. The formation of a future onion requires not only a clothing style, but also small details to take into account, which can give a bright accent and emphasize the individuality. To date, fashion trends are returning to the past. What was in the trend several decades ago, today again at the peak of popularity. This applies to the bow. He is relevant both on clothes and hair. Most often, a bow is worn as an ornament to a dress. Despite its simplicity, the bow can not only decorate the image, but also spoil it. Therefore, in order to know how to beautifully tie a bow on a dress, you need to consider not only the fashion trends, but the basic rules for the formation of your image.
to the contents ↑Nose bow correctly and tastefully
This accessory as a bow is very versatile. It can be purchased at the store, but you can do it yourself. Bows can be either wide or narrow, made of fabrics of different textures. Most importantly - it should be neat and harmoniously fit into the style of your dress.
You can attach a bow in different places - it all depends on your imagination. Most often, a bow is attached to:
- Breasts. He clings, mostly on dresses with a deep neckline.
- Rear, tied at the waist. This is the most common and feminine version of the socks of bows. Best of all, he looks in a duet with an evening or wedding dress.
- In front at the waist. This version of socks bows suitable for young girls and girls. He creates a playful and cute image of its owner.
- At the neck. Most often used as an ornament for a dress of a strict style. In this case, it is better to make it from light chiffon fabric.
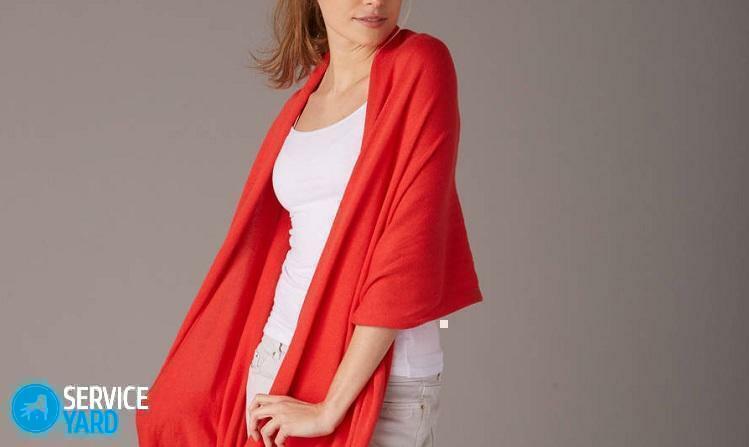
- On the shoulder. This option is suitable for self-confident women, especially if the bow is quite large.
If you have decided on the shape of your dress and the place where the bow is tied, we offer you the most popular ways how you can beautifully tie a bow on a dress.
to the contents ↑Classic French bow:
- Calculate the length of the ribbon so that 2 loops of the same size are produced.
- Place both loops on top of each other.
- The upper loop stretch under the formed "cross" and gently tighten into the nodule.
- Straighten and give it a presentable look.
Important! This technique of tying a bow is familiar to you from childhood, since it is similar to tying shoelaces.
There is one more option, as it is possible to simplify or modify this accessory:
- Place the two ends of the ribbon with loops facing each other.
- Fix in the middle with a brooch, a decorative pin or sew beads, while fixing the bow itself.
Important! In this method of tying bows, you can use fabrics of different textures. The main thing - do not forget that the equally tied bows will look completely different, depending on what type of fabric you used.
to the table of contents ↑One-hip bow
This method of tying bows has been popular for many years. Despite its simplicity, it possesses refinement and aesthetics:
- Make two loops in the same way as in the classical version.
- Take one end of the loop and wrap around the other. You must pass the knot in half.
- The second end you need to pass through the node completely - so that it flows down.
For those who are not afraid to experiment
There are several more options on how to beautifully tie a bow. In comparison with the previous ones, they are more complicated. But if you master these methods, you will not refuse from them:
- Four hinges. It is done according to the classical scheme. Only on the previously tied 2 loops, tie in 2 more new ones.
- Multilayer. For this method, you need to make several bows of two or four loops. Then collect all the details with a pile and fasten them with a pin.
Important! You can use fabrics of different colors and textures, but you should take into account that the maximum number of layers should not exceed 7.
to the contents ↑Make a simple bow yourself
In order to make a bow on a dress by your own hands,not required.
Materials for work
Before you get started, you should prepare:
- stitched on both sides of the material - it can be chiffon, silk or satin;
- needle with thread - the thread should be the same color as the fabric.

MASTERIM
When everything is ready, go directly to creating a bow:
- Prepare the number of loops you need. In order to make a loop, you need to take a small length of the tape and attach both ends to it using a stitch.
- Collect all the loops and sew in the middle so that they do not fall apart.
- When everything is ready, straighten each eyelet so that your bow has a presentable appearance.
Important! This version of the bow can be used not only for the dress decor, but also as an accessory for the hair.
to the contents ↑Satin bow belt bow
In order to make a bow of satin ribbon on the waist, you should have: an
- atlas, 20x50 cm in size;
- scissors;
- needle with thread in fabric color;
- sewing machine.
MASTERIM
When everything is ready, go directly to the tailoring of the product:
- First, the fabric should be ironed well.
- Next, you need to cut out rectangular fabrics with the size: 18x22, 18x15.5x8 cm( future jumper).
- We take the largest rectangle, fold it in half from the inside out, we cut off sections about 1 cm apart. Do not touch the side. Do the same with the smallest detail.
- The second rectangle is also folded and spread out. Only postponement should be done in all sections( except one) in the form of a trapezoid.
- Both parts are twisted in the face.
- Press both parts. On the jumper unscrew the allowances on the seams and fix them with an iron.
- Place the first part with a longitudinal seam to the outside. Finish the ends.
- Now you need to cut the allowance, leaving the distance from the seam about 3-4 mm, and unscrew the part.
- Fold the next bow in the middle. Using a thread and a needle, sew the crease formed.
- Without breaking the thread, sew the second part folded in half.
- Wrap it with a jumper and secure with a pin. We are doing all the work from the wrong side.
- What is superfluous - cut off and manually stitch.
- Already ready-made bow is straightened and leveled.
Important! This kind of bows is most appropriate for young girls and adolescent girls.
to the table of contents ↑We wear a bow, corresponding to the fashion trends
Thanks to such an accessory as a bow, you can emphasize your advantages and hide your shortcomings. We offer you a few recommendations that will help you with the wearing of this accessory:
- On tall and thin girls the dress with a bow on the back looks harmoniously.
- For girls with a long neck and beautiful contours of the face, a bow tied around the neck is suitable.
Important! The bow tied around his neck hides his age and is young.
- If you are the owner of an ideal waist, without excess wrinkles, you can wear a bow at the waist level.
- Luxurious and elegant look long dresses with a train, an open back and a bow on the back at the waist.
Important! You can tie a bow not only on the fabric. They look great on the belts. Often, we refuse to purchase this accessory only because we do not know how to tie it up beautifully. But the belt can not only be a bright detail, but radically change and improve your image.
to the contents ↑How beautiful to tie a belt on a dress?
Belt in the wardrobe of a modern woman is not only a way of fixing, but also an opportunity to emphasize yourself, to make a bright accent, to decorate even the most unattractive dress.
Therefore, before you choose a belt, you must clearly navigate your style of clothing:
- Business style. Here, strictness must be observed. Therefore, give preference to thin and discreet belts. As for the color palette - contrasting and neutral colors - black, beige, white, gray, dark blue or brown - will be appropriate.
- Romantic style. To create such an image, tie a belt around the bow, front, side or back.
Important! If you have a lush or voluminous dress, choose your belt, tied in a bow from behind.
- Casual style. In this case, it all depends on your imagination. You can use both thin and wide bands, monochrome or with different patterns and ornaments. The main thing is not to forget that all this in a duet with a dress looked harmonious.
Important! Very stylish looks the use of several identical thin belts. They can be either monophonic or have different colors.
- Do not give up wearing a belt if you do not have the perfect figure. There are small tricks that will help you not only be in the trend, but also visually hide your shortcomings:
- If you have extra centimeters on the sides, hips, wear the belt under the chest.
- If you have beautiful hips and want to draw attention to them, then tie the belt with a bow on the side.

Kinds of belts
To date, the range of choice of this accessory is incredibly great. It can be woven from threads, braided from beads, from chain mail, laces and various leather strips. But the most popular, practical are belts sewn from leather or light fabrics.
Despite the richness of choice, the main types of belts are distinguished:
- Classic. Its width is not more than 5 cm. It is mainly made of leather or suede, fastens on a buckle.
- Corset. This accessory is designed to highlight, emphasize the waist. It can be worn as with evening dresses, and in a casual style.
- Sash. Very long and wide belt. It is wrapped several times around the waist, and the ends are tied in the form of a bow.
Ways to tie a belt on a dress
There are a few simple but very effective ways of how to beautifully tie a belt on a dress:
- Single knot. Pass the end of the belt through the buckle, insert it down under the strap, bring it up, then down again, again point the tip under the strap, pull it into the loop.
- Loop-node. The end of the belt is threaded through the buckle, then down under the strap, then stretch upwards through the loop of the girdle, thread into the large loop.
- Loop free. Put a long belt twice, lead behind your back so that the loop and the ends of the belt are in front of you. Thread the ends into the loop, tighten it.
Important! For this method, it is recommended to use leather belts. Materials such as silk and satin do not fit here.
If you want something even more original, try the ideas below.
Polubant:
- Start the belt behind your back so that the ends are in front of you.
- Place the right end on the left, start from the bottom up.
- The end that was taken from above, bend downwards on the outside, after - start under the second.
- We measure 15 cm from the intersection with the free end, we make a fold. You will get a "ear" polubanta.
- The "eyelet" is threaded into the knot that you made in step 3.
Flower
For this method, you need a belt with a width of 15 cm or more:
- Knot the half-bunt.
- "Ear" of half-bunt take in the middle and push under the knot.
- You have a loop in two semicircles. Due to the presence of folds on it, it visually resembles a flower.
Important! In order for the belt, tied by this method, lasted a long time, it is necessary to fasten the "flower" with a pin.
We tie a belt on a dress with a bow
In order to tie a belt to a dress in the form of a bow, you do not need much time. We bring to your attention the way how you can decorate your outfit with a beautiful and magnificent bow:
- Align the belt and pick up its ends. Place the left end over the right and circle it. The left end leads perpendicularly up, and the right end - down. You should get and drag on the first node.
- Lower end of the belt fold in a loop "polubant".
- Pick up the upper end, circle the bottom polande so that the front side of the girdle remains on the outside. Further - extend the free end into the formed loop. You got another half-bunt. In order to get the second bow, you need during the stretching, slightly twist and pull out the front side outward.
- Polubant stretches in a horizontal direction, in order to tighten the knot.
- Align the finished bow.
Experimenting with style and image, you do not need to have a huge wardrobe and wear a new outfit daily. You should have only a few belts. They can differ in style, material and accessories. Thanks to this accessory and the ability to tie it beautifully, you can change your image every day, while remaining in the same dress.