
Contents:
- Where to start?
- Smoothing collar and sleeves
- Backrest and shelves
- Another way
Neatly ironed things look good on their owner. But ironing them is not always easy. Especially it concerns shirts with a long sleeve. A good hostess should take this skill. To do this, it will take some effort and how to practice.

Where to start?
To make the ironing process easier, it is advisable to adhere to the following recommendations.
- This element of the wardrobe is important to properly dry. Do this, you need to carefully spread it on the shoulders.
- You should start ironing before the thing dries completely. If this does happen, then it is necessary to sprinkle it from the spray gun. To moisture distributed evenly, it is desirable to put the shirt in the bag for a short while. With viscose should be handled carefully, so that no stains from water remain.
- The ironing mode should be selected correctly, being guided by the material of which the shirt is made. For example, for pure cotton, the temperature should be 150 degrees. If cotton with the addition of polyester, then on the iron should be set to 110 degrees, cotton with linen is processed at 180 degrees. At the same time, steam is used. But for the cut fabric it can not be used, and the ironing temperature is 110 degrees. For pure flax you need 210 degrees, for viscose 120. Some fabrics, such as linen and cotton, require stronger pressure than others.
- With dark and shiny shirts working on the wrong side. This will preserve the color and prevent the appearance of shiny bands.
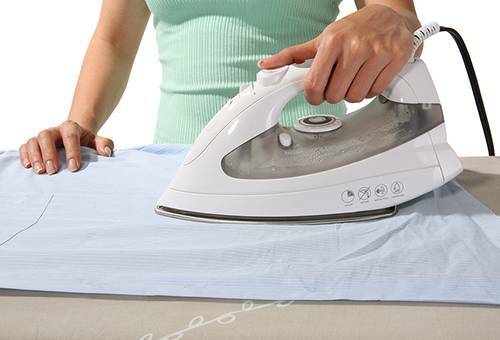
Today, housewives can use technical innovations to simplify their task. Even the most simple and inexpensive irons have functions that allow you to choose the right temperature and turn on steam. It is more convenient to iron on a special board, and not on a simple table. Well, when there is a small ironing board, designed specifically for sleeves. The spray will also be useful: it is useful for moistening the overdried tissue.
advice When using stripping, it is worthwhile to monitor the cleanliness of the water. This is especially important for light shirts.

Smoothing collar and sleeves
Prepared for ironing, you can start the process. But here there will be a question, with what to begin and in what order to process parts of the shirt. Some landladies often first of all stroked the back. But most agree on the fact that it is more convenient to start with small elements, such as a collar. Then go to the sleeves, back, shelf. Especially this method is suitable for inexperienced ironers. It will allow not to crush already ironed parts.
The process of ironing a shirt with a long sleeve begins with the processing of the collar. First of all, the iron is passed along its inverted side, then it is turned over to the front side. Correctly act in the direction from the edge to the center, this will not give rise to unaesthetic folds. You can not iron on the fold, the gate runs the risk of losing its appearance.
After this, they are taken by the sleeves. Begin with cuffs, iron them on the same principle as the gate. That is, conduct an iron on the wrong side, then on the front. On some shirts there are double cuffs. They need to be deployed and properly ironed from one side and the other, excluding the folds. Then fold, making sure that the hinges match one another, and smooth the folds.
After the cuff, you can take on the sleeves themselves. Properly iron them should be so that the shooter does not turn out, it's ugly. To achieve the desired result, this part of the shirt should be placed on the table or ironing board and leveled. The iron must be operated from the middle. After this is done, the sleeve is lifted and turned so that the edge moves to the center. Such manipulations will allow you to get a neatly ironed cloth without arrows and any bends. Also come with another sleeve.

Backrest and shelves
When the sleeves are put in order, proceed to the back. It is considered to be the simplest part, as there are no small details on it. But certain tricks are present here. How to act correctly? It is necessary to start ironing from the right seam to the left. First of all, the iron is treated with a seam, then the backrest near it. This will allow you to smooth the seams between the shelf and the backrest. After this, the shirt is turned over to stroke the coquette and the middle part of the back. Then they turn over again to get access to the second part of the coquette and another seam, once again to walk on the back.
The ironing is almost finished, it remains to stroke the shelves. Begin with the one on which the buttons are located. The shirt should be spread out, the top should be treated and, moving as necessary, to iron out the remainder. Particular attention is paid to the areas around the buttons. Just pat the second shelf. Finally, the shirt is ready, and you can admire the result, if everything was done correctly. After the thing has cooled down, it can be moved to the closet.
Another way to
If you want, you can try ironing the parts of the shirt in a different order. For example, start from the back. To do this, you need to unbutton the buttons and arrange the shirt on the board so that no bends appear. Act better with the wrong side, after the back should go to the sleeves, shelves and finish the collar. Another method: start with one sleeve, go to the shelf next to it, then back to the other shelf and sleeve, and finish off again with a collar. These methods are not as convenient as the first, but someone can like it.
It's not so easy to iron a shirt properly, you need to know some tricks. But you can learn this, you need only desire and practice. Over time, a skill will appear. To get a well-ironed shirt, you need a minimum of effort. About folds and creases can be forgotten.
We recommend that you read an article on how to properly iron men's shirts