- How to seal the sole of an autumn or winter footwear?
- How to glue a hole in the sole of summer shoes?
- Repairing sports shoes
- Repairing the tread
- Repairing the heel of the sneaker
- Repairing the soft outsole
- Repairing the top of the shoe
- How to sew the patch properly?
- Rules for storing glue for shoes
Well, who among us did not encounter such a problem as a bursting sole? The situation is very unpleasant, because not everyone knows how to glue the sole on sneakers or on any other footwear. Can be attributed to the master, but it will not be worth a lot, then the thought comes to mind to solve this problem independently. To do this, you must know about some of the nuances that are specified in this article.
to the contents ↑How to seal the sole of an autumn or winter footwear?
In the role of improvised means to make repair of the soles of the sneakers is suitable:
- glue, for example, "Moment";
- epoxy sealant "Crazy handles";
- agent with polyurethane Desmokol.
Each of them is accompanied by an instruction, on which it is necessary to navigate during work.
Important! Also you have to consider that these funds are somewhat toxic. If any of them hits the mucous membranes, they should be immediately flushed with a stream of ordinary running water.
Sequence of the work:
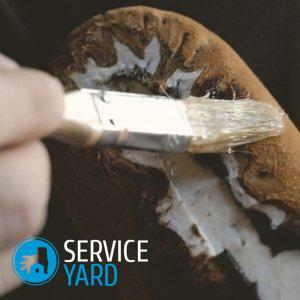
- Since winter or autumn footwear often has the soles of the honeycomb structure, then for the beginning you will have to deal with the honeycombs. The rubber that covers them, you must take off on an area that will remove all the accumulated dirt from the holes. It happens that access to the honeycomb comes from the insole, which during cleaning of the holes will have to be completely and completely eliminated.
- Honeycombs, pour micro-pores with small cuttings, and then fill with silicone sealant, carefully sealing.
- Before you start gluing the bursting sole, you will have to wait, in order for the sealant to dry and harden.
- Next, cut a piece of rubber or micropores, which in size can enter the hole if it is bulky, or press out small holes with a mixture of sealant, as well as sawdust micropores.
- According to the size of the shoes, cut out the sole of a thin piece of rubber, glue it with an already prepared adhesive over the entire area of your shoe.
- Put your boots or boots under the press.
Important! The time that is needed to completely dry the glue is indicated in the instructions to it.
to the contents ↑How to glue a hole in the sole of summer shoes?
You need to act on exactly the same algorithm, but the hassle is somewhat less.
In the event that the sandals are glue, you will get a rubber sole in the professional workshop and paste it yourself with the help of rubber glue. This can be done if the shoes have a solid foundation.
Important! If to the summer shoes sole solely attached to the contour, in this case, sandals you have to throw out.
to the contents ↑We repair sports shoes
In case if the training process takes place in the gym, you will not have to give up your favorite pair of sneakers. Of the domestic types of glue is best to use epoxy, which is designed specifically for shoes. Its cost is relatively low.
Imported adhesives:
- The most suitable variant of the adhesive is the American adhesive Seamgrip. By means of it rubber rubber boats are glued. In case you managed to buy it, you will not have to part with your favorite pair of sneakers for a long time, because this is the only glue that completely solves the problem of how to glue the sole of the sneakers. But its cost is quite high.
- Imported epoxy adhesives of the Done Deal type are slightly better than domestic glues, but they can not be promised for durability when using them.

How to proceed to glue the sole on sneakers:
- The edges of the hole in your sole should be carefully cleaned and degreased with a solvent.
- When all is dry, apply a properly diluted epoxy mixture.
- If the hole is large, put a fiberglass mesh into it, called a sickle.
- At the time when the glue dries up, place the hole on the outside with a paint tape to ensure that the sole remains completely flat.
Tread repair
A sharp knife is needed for repair of the tread - it is best to take shoemaking, coarse-grained sandpaper or a grater made of a piece of tin from any tin can with punched holes in it.
Repair is carried out as follows:
- To begin with, cut out a piece of hard rubber hard and patch it in place.
- With a grater and a knife, patch the wedge.
- Surface must be rough, so it is better to treat it with sandpaper, and then wipe with a solvent for degreasing and dry.
- After that, apply two to three layers of glue on the surface. Glue the adhesive carefully. The drying time of the first of the layers is about 20 minutes, the second - at least 2 hours, but better not less than 6-8 hours.
- Then glue the heated surfaces over the electric tile or gas before the smell of the glue, quickly apply them to each other, firmly press and hold in for a few seconds until they have completely cooled down.
Heel repair sneaker
If the protector is thoroughly worn, gently tear it from the surface of the sole, cutting it in places where it is impossible to tear it off. You can wet these places with a solvent, in order for the tread to come unstuck.
Drag the outline of your sole onto the cardboard, draw the erased edges, and then cut out the pattern. A new protector can be made from any rubber mat, which is found in any hardware stores.
Important! During bonding, thoroughly clean the surfaces to be joined, but otherwise, the technology of gluing itself is the same.
to the contents ↑Repairing the soft sole
If you have a soft sole, then before adding a new protector, increase the soft soles to the required thickness using microporous rubber.
to the contents ↑Repair of the top of the shoe
During the repair of the top of the sneakers, much depends directly on its material. In the event that the top is made of natural or artificial leather or suede, then they crack at the folds or simply wipe.
On cracked as well as bursting places, glue or sew a patch from a much thinner and more elastic material than top, for example from suede, or artificial leather.
Important! But it is better not to allow the formation of cracks. To do this, lubricate the natural skin with a shoe cream, suede brush dry with a stiff brush, and also with a school wash band, try to lift the pile.
In order to clean the natural leather and suede from dirt, it is better to use a slightly damp rag and under no circumstances to wash them with running water. By the way, shoes that are made of artificial leather try not to wear during sub-zero temperatures.
to the contents ↑How to properly sew patches?
In those moments when the threads that fasten the details of the shoes are torn, then the thread layer is restored using the previous holes. You can use a paper clip to stretch the threads, but the needle is best from the syringe, slightly dulling the tip of the syringe so that the needle can not cut the thread.
to the contents ↑Rules for storing glue for shoes
The shoe repair glue that has remained can be stored until the following unpleasant events, most importantly - adhere to several recommendations:
- Keep the glue in a dark, cool place, but in no case in the refrigerator to avoid condensation.
- Store the tube with adhesive in an upright position.
- Attach a sticker to the tube with the date of its opening.
- Wipe the tip of the tube with a lint-free cloth to extend the life of your glue.
- After use, carefully tighten the cap.
- During storage, be sure to adhere to the temperature and humidity. The optimum storage conditions for the adhesive are 22-24 C at 50-60% humidity.
Important! Read carefully the storage instructions of the brand you selected for the adhesive mixture.
Now you know not only how to glue the sole on sneakers, but also how to repair sports shoes for any other problem. We hope you managed to save your budget and you were able to cope with the defect of your favorite pair of shoes yourself.


