- How to design a kitchen design?
- What tools are needed for assembly?
- How to make a kitchen set?
- Assembly of furniture
Modern kitchen sets differ not only in their high functionality, convenience, but also attractive appearance, but their cost is not always affordable for most consumers. Yes, and non-standard dimensions of the kitchen, too, often do not coincide with the goods presented in the furniture salon. Therefore, the question arises, how to make a kitchen set with their own hands?
If you still decided to make the kitchen set yourself, then first of all you need to make a draft of the future furniture and make the correct measurements.
to the contents ↑How to design a kitchen design?
The most important step is the drawing of the headset. To do this, use a pencil, tape measure and paper, on which the drawing will be created. The project should reflect a clear plan of the premises, with the specified parameters and dimensions. It should also reflect the location of all communications.
Form of furniture set
 The design should clearly outline the shape of the headset. It can be:
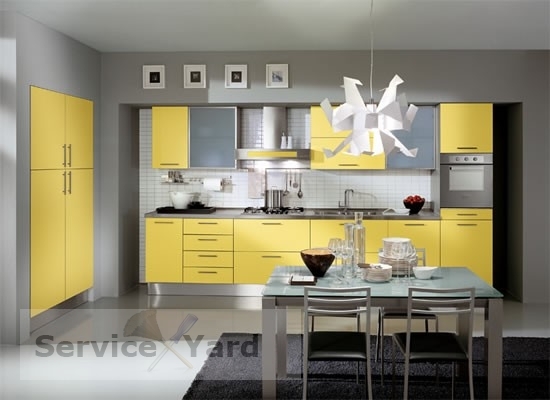
- Linear. Contains a certain number of tables and cabinets, located along one wall of the kitchen. Sometimes you can place two direct headsets on parallel walls, if the area allows.
- U-shaped. This form is ideal for a small kitchen, where you need to use the space to the maximum.
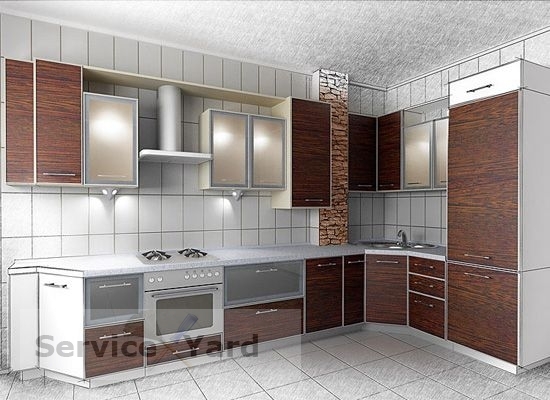
- L-shaped. This type of headset is distinguished by its comfort and convenience, as all areas are easily accessible.
Separate the zones
To make the kitchen furniture functional, and you were comfortable and comfortable in the kitchen, select several important areas:
- workplace;
- a place for a sink;
- the place where the hob will be located;
- storage area for dishes;
- storage space for products.
Important! It is necessary to take into account the layout of the refrigerator in the layout, since it should be installed as far as possible from the hob. As for the gas stove, it should be placed no more than 2 m from the gas pipe. If you plan to place in the kitchen appliances: washing or dishwasher, they must be installed in close proximity to the water supply and sewerage.
Determine the dimensions of
To transfer the project of the furniture set to the drawing, it is necessary to make measurements. Successful pre-measurement is half the distance traveled during the self-manufacturing of the kitchen set. With straight( linear) cuisine, everything is quite simple: use a tape measure to measure the length of the wall.
Important! Measure in two, and preferably in three places: at the chest level, closer to the ceiling, and 150-20 cm from the floor, because in different areas there may be deviations. If there are discrepancies, then for the main take a smaller amount.
If a gas stove is used in the apartment, it is also necessary to measure it and make appropriate corrections to the design of the headset.
To properly make a kitchen set with your own hands, for a corner and U-shaped headset, measurements must be made at each location of the elements. In this case, you need to consider:
- height of the working surface( the figure is set depending on the growth of the hostess, it is recommended to consider the left-hander or the right-hander);
- precise dimensions of household appliances, which you intend to build or install separately;
- in the kitchen design you also need to consider what materials, texture, color and frame of furniture you want to use, what kind of lighting and where you will be located.
Tips:
- If it's hard for you to come up with a kitchen design, then use ready-to-implement ideas posted on the Internet.
- If the old kitchen set suits you in size, then you can take their measurements for the basis of the new headset. To remove such measurements, the old headset must be dismantled and measured every detail.
- If you have problems with drawing, and you can not fully display the appearance of the headset, then use special computer programs that are interactive editors that create 3D images.
What tools are needed for assembly?
Correctly selected tools will allow you to speed up the process of assembling a kitchen set with your own hands. So do not skimp on their acquisition, in addition, they will definitely need you in the future. In order to independently make a kitchen set you will need:
- drill;
- Roulette;
- nails and a hammer;
- screwdriver;
- level;
- elbow;
- electric jigsaw;
- electric saw;
- electric cutter;
- pliers;
- set of files;
- screwdriver;
- hacksaw;
- construction knife;
- iron.
To make a kitchen set yourself, you will also need a workbench and a sturdy table.
Important! Together with the tools, you will get protection: glasses, gloves, respirator.
to the contents ↑How to make a kitchen set?
 The furniture has its own fashion. For example, today designers recommend choosing natural material or using fashion plywood. In our time, environmental friendliness is the main trend.
Choosing the material for the base
The following materials are usually used for the manufacture of the furniture:
- The whole tree is the most durable, eco-friendly and aesthetically pleasing option, but also the most expensive of all possible materials.
- Painted MDF - is characterized by high strength and long service life, but the price for MDF is also not the lowest, although quite affordable;
- Particleboard without coating - only for rear or side walls;
- Laminated chipboard - a fairly acceptable material for the manufacture of the headset, besides it has an attractive price;
- Postforming is one of the most practical materials, it has good durability, but its drawback is that it is plastic, not natural material. The palette of colors is bright and catchy, so it is quite difficult for some to choose the right coloring.
Important! The most common option for solving the problem of how to make a kitchen set with your own hands is MDF.Some often use a solid wood for the outer parts of the headset, but the internal parts are made of MDF or chipboard without coating. This type of use looks attractive, and will not hit the budget with inexpensive materials for internal parts.
We choose table tops
For table tops you can choose the most different material:
- artificial stone;
- natural stone;
- wood;
- glass;
- plastic;
- steel.
Important! If you plan to make the top of the headset of stone, then order the countertop from the manufacturer, and then install the part on the assembled cabinets.
Fittings
For the manufacture of furniture you will definitely need and accessories:
- handles;
- loops;
- retractable mechanisms;
- fasteners;
- legs.
Important! Do not skimp on the accessories, if you decide to make a kitchen set yourself - it must necessarily be of high quality. This completely depends on the reliability of the structure, its durability and safety.
to the table of contents ↑Assembling furniture
There is nothing complicated in the assembly: the most important thing is to make the preparatory work: to drill the holes and to work the ends of the parts with the edge.
Edging instruction
Edging with melamine edge requires confident movements, speed and accuracy. If you do this work yourself, then get a roll of the edge. Choose the color according to the color of the case. The edge is internally treated with hot melt adhesive, which is glued on heating.
In factories, such pasting is done by special machines, and at home it can be done in two ways:
- Thermo gun, setting the temperature at 100C.
- With iron.
Important! Hair dryer can not be used, because it does not give the necessary temperature and the process of banding is long enough, and the dryer for this work is not designed.
 For gluing you will need:
- iron;
- fine file;
- two pieces of fabric;
- edge;
- stationery knife.
Perform the following steps:
- For convenience, place the part horizontally so that the desired end face is facing you, and put the other end of the part into the wall.
- Cut a piece of edge from the roll with a margin of 2-3 cm.
- Apply a piece of edge to the end.
- One piece of fabric roll in 2-3 layers.
- Place the fabric on the edge.
- Heat the edge with an iron through the fabric( set the iron temperature to medium mode).The heating time is a few seconds.
- After heating, remove the rag, and press the edge of the other piece of rag to cool it.
- Cut the excess edges with a knife.
- Process the joint of the edge and the part with a file( in this case the edge will not detach from the accidental hook).
Preparation of parts:
- After the edge, arrange the drawings in front of you, so as not to miss any details.
- All the details are marked, then the assembly will pass quickly and qualitatively.
- Begin the assembly with the markings for fasteners.
Important! When drilling holes on doors, shelves, make sure that through holes are not formed.
Assembling the cabinet:
- To assemble the kitchen cabinet with your own hands, use the principle of the box: to the horizontal surface, attach the vertical ones.
- After you have assembled the cabinet, immediately install the shelves and other items.
- If it is necessary to fasten the legs, turn the cabinet upside down, and to install the doors, place the cabinet on the rear wall.
- The facades should be mounted open. To do this, ask the assistant to hold the door while you are doing the marking.
- Handles to the lockers are last attached.
Assembling the
headset Before you begin assembling the headset in the kitchen, finish all the repairs and prepare the room.
Important! About wiring and communications, take care in advance so that during the installation of furniture do not switch to additional work.
To properly assemble the headset, follow these rules:
- Mounting starts from the end module( if the kitchen is L-shaped - from the corner).
- Install and level the headset level.
- All cabinets are fixed with ties.
- The worktop must be stacked after the lower row of the headset is fully installed( level, do not forget to control the horizontal).
- Attach the table top to the cabinets with screws.
- If necessary, for a sink in the countertop, cut a hole of the appropriate dimensions.
- Install a sink, faucets, connect plumbing.
- After the lower row of furniture is installed, go to the assembly of the top of the headset.
Important! By standards, the distance to the bottom of the cabinet from the countertop must be at least 65 cm.
- When installing the upper cabinets, be sure to use the level, leveling them horizontally.
- Install the hood and other household appliances in the last place.
- Attach the hinges and hang the doors - a kitchen set assembled with your own hands is ready.
Important! If the kitchen passes the pipes, then in advance in the frame of the headset, drill holes for them.
Making furniture with your own hands, you will not only save, but also learn something new and exciting. You yourself will make a unique interior thing that no one else will have. Such furniture will be made really with a soul, which means it will give you pleasure during use.
