

- How to paint the ceiling? Choosing the paint
- The main properties of the quality dye
- Water-based paints
- Tools required for the work
- Preparation of the ceiling for painting
- How to paint the ceiling?
- Tips for high-quality painting of the
ceiling The ceiling is a very important and responsible stage of the repair. And before you paint the ceiling, you need to thoroughly study the proposed options for paints and the technique of applying them to the surface. The construction market offers a wide variety of colorful materials, which is suitable for residential premises, as well as for office, non-residential. Due to the different structure and the resulting effect after application, it is very difficult for an ordinary buyer to choose in favor of a particular dye. But this, so to speak, only the visible part of the iceberg. Ahead is not an easy task to properly paint the ceiling, the result of which will depend on the appearance of your housing.
Ceiling - this is part of the room, which, entering the room, immediately pay attention, so the quality of the painting should be at the highest level. In this article, we will look at all the details of its finish, let's talk about how to paint the ceiling better to achieve a perfectly smooth and smooth surface without divorce from paint and other defects.
to the contents ↑How to paint the ceiling? Choose the paint
Before buying a paint, determine for yourself what effect you want to achieve after applying it to the surface. There are several types of paint, they differ from each other in the appearance of the final result, as well as in the application methods.
Matt:
- After treatment, the surface has a matt( not shiny) surface.
- This variant of paint and varnish materials has a wide demand, it is easy to apply and does not require additional care.
- Paints of this type can hide minor irregularities and flaws on the surface.
Semi-gloss
The paint has a slight gloss, the ceiling acquires a pleasant flicker.
Important! Cheap variants of the dye are not recommended to be wiped with soapy liquids - on the surface, then divorce is formed.
Glossy
It's difficult to work with glossy paints, the surface should have a perfectly smooth base. All the irregularities and roughness on the ceiling are very noticeable and spoil the appearance.
Important! It is better to use this type of paint on ceilings with a large area, as well as in non-residential premises.
to the contents ↑The main properties of the qualitative dye
So, what effect the surface will have as a result of staining, we sorted out. The next step in choosing an emulsion is to familiarize yourself with the basic requirements for the finishing material:
- The material must be environmentally friendly, as you will apply it in a residential area.
- We recommend to stop your choice on waterproof varnish versions. Thus, you can carry out wet cleaning and use it in rooms with high moisture.
- Steam permeability of production is another important nuance. This property contributes to resistance to fungus and mold.
- Resistance to temperature changes is especially important for finishing the ceiling in the bathroom.
- For independent surface finish, give preference to matte paint and varnish compositions. They will hide small irregularities and errors of the painter.
- Pay attention to the due date - frozen or overdue products are not suitable for repair.
- If possible, paint the ceiling in any light shade, except white. It is on the white surface that the lack of coloring is most noticeable.
Important! Detailed study of the composition, as well as the properties of the dye, all the above listed requirements correspond to water-dispersion paints. This product is environmentally friendly and practically odorless. Due to its properties it can be used for finishing children's rooms. & Lt;
to content ↑Water-based paints
Water-based paints also have a different composition and are divided into the following categories.
Acrylic
Acrylic dyes are an excellent option for finishing the living room and bedroom, and have the following series of features:
- Wear resistance and durability.
- Affordable product cost.
- Easily applied to the surface.
- For a long time, they retain rich color.
Latex
Suitable variant, than to paint a ceiling in a bathroom or on kitchen. Have the following properties:
- Water resistant.
- Elasticity of the paint allows you to hide on the surface of cracks and irregularities up to 1 mm in size.
Important! The cost of latex dyes is slightly higher than the previous version.
Silicone:
- The products have the highest cost among the entire range of paints.
- The products have the best performance. Elasticity and durability of coatings - one of the main indicators of the quality of silicone paints.
- Do not have a sharp unpleasant odor.
Important! Before buying the dye, make sure that it is intended for internal work, because in products for external use, toxic additives may be present. Such information should be indicated by the manufacturer on the package of the goods.
to the contents ↑Tools required for the work
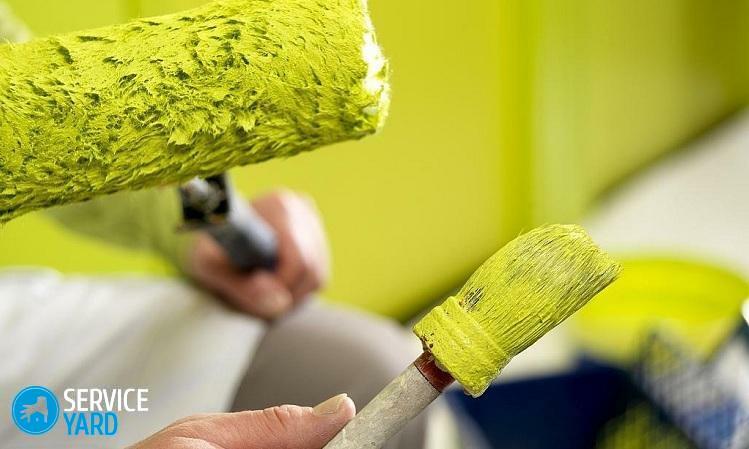
In order to finish the workmanship qualitatively and spend a little time, take care of the painting tools beforehand. For this you will need:
- Roller.
- The brush is narrow and wide.
- Plastic tray for paint.
How to choose a roller?
Do not paint a large and even surface with a brush. Brush is useful for painting the corners and decorative elements on the ceiling.
When buying a platen, pay attention to the following nuances:
- The length of the rod for convenient work should be from 25 to 40 cm.
- The roller must be with a pile, and the rougher the finish, the lint should be longer. So the paint will penetrate into all the irregularities and evenly color the ceiling.
Important! Velor and foam rollers categorically exclude. They absorb the colorant too much, on the surface, as a result, bubbles and stains form.
- Squeeze the roller with your hand: if it deforms, such an object will not be able to carefully coat the treated area with an emulsion.
- Look at the seam of the bead. Too coarse seam will leave on the surface of the strip.
- The pile of the cushion should hold firmly. If the fibers get out, the pile will remain on the surface during processing.
Important! Acquire a roller with a telescopic handle - painting the ceiling with a tool with a small handle will be extremely inconvenient.
to the contents ↑Preparing the
painting ceiling After you have purchased the dye suitable for work in the paint department, you should prepare the ceiling for painting.
Sequence of work:
- First of all, before the application of the paint, it is necessary to prepare a perimeter for the work. To do this, remove all the furniture, or lay it and the floor with an oilcloth.
- Preparation begins by removing the old whitewash or other cover.
Important! Whitewash and water-based paint wash off with water, water resistant - spatula or special grinding machine.
- Next, treat the ceiling with a primer - it promotes better adhesion between materials.
Important! The primer will additionally strengthen the old base, and also have an antiseptic effect.
- Apply primer with a special roller in a thin layer in two stages.
- Once the primer has dried completely, proceed to filling the cracks and other defects that were formed during the cleaning of the old coating. Putty put a thin layer on the entire surface, use a wide spatula for work.
Important! Masters recommend that when preparing the ceiling first apply the putty starting, and the second layer - the finish coat.
- To achieve a perfectly smooth and smooth coating, fine-grained emery paper sand the treated perimeter.
- After completing the preparation, apply one more layer of filler, thus reducing the material consumption and improving the absorption of the paint.
Important! In the case of a large drop in the ceiling, we recommend to coat it with gypsum board, only after that putty.
to the contents ↑How to paint the ceiling?
Once the ceiling preparation is complete, you will have a suitable surface for applying the emulsion. So to say, the most difficult stage of finishing the surface is already behind. Next, you should know how to properly paint the ceiling with your own hands.
Sequence of work:
- First of all, it is necessary to prepare the coloring material. As a rule, in shops water-dispersion paints are sold in white. If you want to make a surface of a different color, you can add a special color to the container with paint.
- You can colorize the paint in the store with a special device or at home yourself. To do this in a small amount of paint, add a little color and mix. If the desired shade has turned out, add proportional colors to the bulk of the dye.
- In a special tray for roller work, pour a small amount of paint.
- To avoid streaks on the surface or splashing, on a special area, squeeze out excess dye.
Important! If previously you did not have to work with a roller, practice on an unnecessary surface or wall, which in the future, paste the wallpaper.
- Professional masters recommend starting painting the surface from the opposite corner of the window. Apply the paint evenly with a thin layer, moving the roller along and back, with strips of 8-10 cm overlap.
Important! Do not attempt to paint the entire surface for the first time and do not work the roller too long in one section.
- After applying the first coat, allow it to dry thoroughly, only after that apply a second coat.
Important! Each successive layer of dye is applied perpendicular to the previous one, in this way an ideally painted surface is obtained.
- Places where the roller is difficult to paint, the area is covered with paint using a brush.
Important! Painting stretch ceilings is exclusively acrylic and is carried out only if the surface has no joints.
- This completes the painting process, leave your ceiling dry.
Tips for high-quality painting of the
ceiling In addition to the basic rules for surface preparation and direct application of paint, there are a few more secrets about how to get an ideally painted ceiling:
- The finishing coat is applied in the direction of the window. Thanks to this application, the light from the window will hide the joints on the ceiling.
- In case of an incompletely painted surface area, it is not necessary to paint the defect separately. It is necessary to apply an additional layer of paint to the entire ceiling.
- Do not skimp on the quality of the primer. Due to this economy, the emulsion will absorb and soon completely fly away.
- Check the quality of the treated surface by examining it from different angles, or take an assistant who will look at your work from the side.
- Apply the paint quickly, surface treatment of 20-30 square meters.m should not take more than 30 minutes.
- Dye should be wet on wet, otherwise - the surface will be completely covered with strips.
As you can see, painting the ceiling with your own hands is quite easy. All you need to do to a beginner master is to carefully read what colors the ceilings in the apartment, and also to observe a simple sequence of works, which we described in detail in our material. Without a certain knowledge of the finish of the ceiling to achieve a qualitative result, unfortunately, will not succeed. We hope, our advice and recommendations will help you make the surface of the ceiling beautiful in a short time!