- Technique Viking knit
- Recommendations how to make a chain with your own hands
- Weaving from individual rings
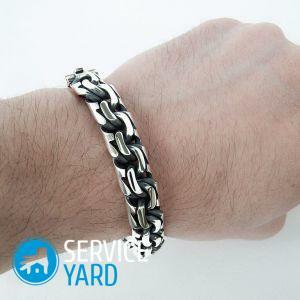
If you want to wear an exclusive and original version of jewelry, you do not need to buy them. It is possible to create such decorations with your own hands. So, if you set out to make a chain yourself, then you will have to apply a certain skill and use some skills to create a beautiful and original thing. In this article, we'll look at how to make a chain of wires yourself.
to content ↑Technique Viking knit
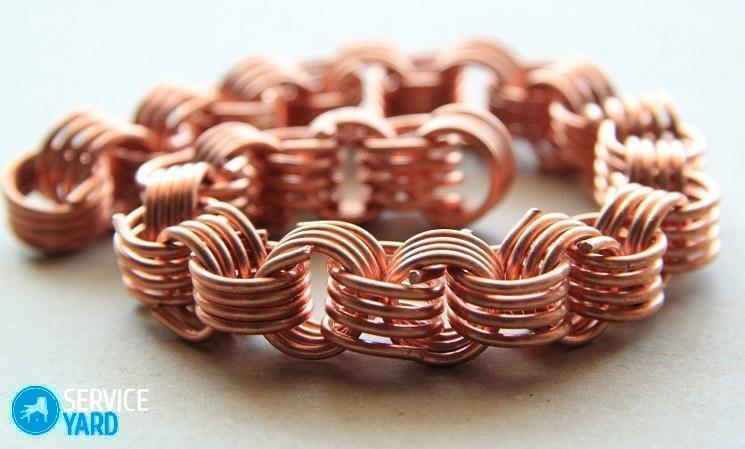
Viking knit is an ancient way of weaving chains that does not require soldering. In this case, the chain is made from a long piece of gimp that can always be built up as needed.
Important! In Russian, this name is translated as "Viking knots" or "Viking weaving".This technique of weaving got its name because of the found first decoration of this kind in archaeological burials, which belonged to the ancient Vikings. After this find, there were others who were even more ancient. However, it is now believed that initially such a weaving technique was mastered in the city of Trichipoli, which is located in India.
Such a chain can be made, as an ornament, stylized in antiquity. In this case, to create an antique decoration, you need to prepare the following items:
- thin wire, it is usually best to use copper;
- pencil;
- scissors;
- ruler.
How to make a chain at home in the Viking knit technique:
- First of all, it is necessary to prepare the base on which the very beginning of the chain weaving will be superimposed. To do this, cut a piece of copper wire about 40 cm long and wrap it around the ruler 5-6 times.
- After that you need to remove the coil from the ruler, fix the loops, wrapping around them the end of the gimp, which is free.
- Next, open the fixed loops in the "flower".It is necessary to carry out such a procedure very carefully, so as not to accidentally crumple our loops.
- Then such a "flower" should be bent around the pencil.
- Cut another piece of wire with a length of about 65-70 cm, and you can begin the process of weaving. To do this, leave a small free end of the wire, make a loop around one of the "petals."
- Then you need to make a second loop, thus stepping back one "petal" to the right side. Exactly the same way continue from top to bottom.
- Next, you need to make 4 more loops and go back to the first "petal".
- Now go to the next row. In this case, you need to make the next loop, hooked on the first loop of the previous row.
- We continue to knit, clinging each time to the eyelets of the previous row. We carry out this process until the remaining tip of the wire is about 10-15 cm.
- Now we need to perform the procedure of increasing the gimp to be able to knit further. To do this, it is required to cut another piece and turn it under a vertical row of loops.
Important! When in the process of knitting we reach the area of wire extensions, it is necessary to grasp the new wire together with the loop of the previous row for dense fixation.
- We send one more circle, again we come to the site with a new wire. Now you need to make the correct procedure: to do this, a new piece of wire must be removed from the left side of the loop upward, and the old working wire hook on the right side of the loop and take it to the lower direction.
- We use old copper braid on several circles of knitting together with the loop of the previous row for fixation, after that we cut off and continue braiding the chain from the wire with our own hands.
- This principle continues to knit. When, in your opinion, the thread appears to be of sufficient length, the associated product must be removed from the pencil.
Important! To determine the length of the finished jewelry, we must not forget that the bundled product can stretch about twice.
- And now the most crucial moment: you need to grab your fingers by the ends, stretch the weave and see how it will change.
Completed knitting, decoration is ready! We detach it from the auxiliary loops and can be used at our discretion.
to the contents ↑Recommendations on how to make a chain with your own hands
Let's consider the following recommendations for making an antique decoration with your own hands.
Tip 1
If you buy an ordinary metal crochet hook and a soft wire, then showing some skill and skill, you can tie a decent chain of the necessary length. It is important to match the thickness of the hook to the thickness of the bender.
The method of knitting a wire chain is very simple:
- When the first loop is made, the next one must be picked up by the hook and pulled through the previous loop.
- Threaded loop is stretched to the required length.
- This procedure of drawing the loop from the loop is repeated as many times until the product is of the desired length.
Important! The thickness of the hook must necessarily correspond to the thickness of the wire. Otherwise:
- If the hook turns out to be much thicker than the wire used, huge holes will be produced.
- If the hook is thinner than the wire being used, then the knitting process becomes more complicated, since the hook will not be able to normally grasp the loops.
Tip 2
How to make a chain yourself? If you want to make a chain of brass, steel or copper, then the wire must be pre-annealed, so that the metal becomes soft and supple. To do this:
- Prepare a template in advance and use a wooden plank with four cloves hammered into it with the tips outwards.
- Nails, which are located in the form of a diamond, determine the shape of the chain links.
- Applying the template, you need to bend the S-shaped links in succession, since the tip-hinges should have an elongated shape.
- Chain links are connected as directly with each other, and using rings that are performed as a winding of a pencil wire, with each bite you need to bite off the wire cutters.
Important! Before connecting the chain links, they should be treated with sandpaper and a file for safe use, as burrs can scratch the skin or leave puffs on the clothes.
Tip 3
You can also make by yourself a chain of silver wire. The manufacturing procedure is exactly the same as when creating an ornament from ordinary wire.
to contents ↑Weaving from individual rings
How to make a chain of wire:
- First you need to cut the prepared wire into several small pieces that have a length of about 5 cm.
- Then bend the tips and force them against the flat part of the pliers. There should be a piece of wire, whose round ends have a curved shape.
- Next, take the resulting piece of rotting pliers at the midpoint, bend it in half, clinging one loop to the other.
Important! Pliers must necessarily be exactly in the center, otherwise - two loops can not converge. As a result, uneven links are obtained and the chain looks ugly.
- After the two loops came together and the flat part of the pliers was pressed, one link was ready.
- After this, it is required to thread a piece of wire in the loop of the first link and repeat this procedure.
Important! The number of links determines the length of the finished product. Therefore, it is necessary to calculate the length in advance and thus decide how many links you need for this decoration.
If the first time nothing happened, then you can practice, and you will succeed. And then you will begin to master more complex weaving techniques, creating more and more perfect and refined ornaments that will definitely attract attention to you, because analogues simply will not exist. And everything that looks interesting, causes genuine admiration.