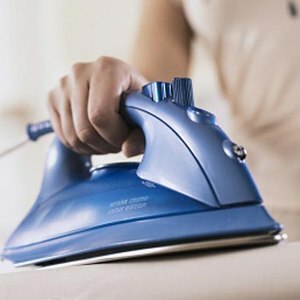
- Methods of ironing
- How to iron different types of fabrics?
- How to iron clothes properly?
- How to iron clothes properly?
- How to iron things for newborns?
In our age of technology to iron things has become much easier. Manufacturers produce multifunctional irons that allow us to save not only time and effort, but also not to spoil clothes with thoughtless ironing. Every housewife should know how to iron things properly in order to prolong their life and not even new clothes to return a pristine decent look.
to the contents ↑Ways of ironing
There are 3 main ways to properly iron things:
- Dry - produced without wetting from the wrong side or the front. This method is applied to nylon and capron.
- With humidification. Smoothed products are slightly sprayed with water or rolled into a damp towel for uniform moisturizing and ironed with a hot iron.
- With steaming. This method is used with a moistened cloth and a conventional iron. If possible, you can resort to a special iron with the steam function. This method can not be used for leveling things that shrink, for example, viscose fabrics.
Important! In each case, choose an ironing method by experiment, but experiment first on a piece of cloth or from the wrong side.
to the contents ↑How to iron different types of fabrics?
 Before ironing clothes or any type of things, consider carefully the tag on things and find out the necessary temperature regime, which depends on the composition of the fabric. Products from different materials require their processing:
- The linings( satin, twill, silk) do not withstand wet processing, as they lose their gloss and water stains form on the fabric. Lining fabrics are ironed on the wrong side.
- Synthetic fabrics try to iron as little as possible. Use at work only a warm iron. Synthetic fabrics are not moistened completely, use wet cloths for individual areas, iron the synthetic material through the lining cloth.
- Jersey only iron as a last resort, using a wet cloth and a warm iron. The material is stretched, so when working, move the iron so that the product is not deformed. Products with relief patterns iron through linen cloth, without pressure.
- Silk fabrics - iron slightly damp. If they are dry, wrap the material in a damp cloth for 30 minutes, and then iron. It is impossible to spray a product from silk, as drops of water can leave spots that will appear later. Silk iron from the wrong side through a thin fabric. The exception is silk of light colors - they should be ironed from the front side.
- Silk raw is used for sewing mainly curtain and decorative products. To iron such material necessarily in a wet condition from the inside of the canvas through a very hot iron.
- Artificial silk. Products of artificial silk after washing do not hang on the rope, and wrap in a dry towel or sheet that absorbs moisture well. Smooth the product from the underside with a moderately heated iron.
- Products made of nylon can not be ironed, so after washing, hold the product under running water from the shower so that all folds are smoothed.
- Viscose fabrics should be ironed only dry.
- Chintz iron on the front side, this will give it a glossy shine. When ironing from the inside, the cotton will acquire a matt tone. Moisten the dry cloth. If you want to give the product stiffness, then soak the thing in water with gelatin( 1 tablespoon gelatin per 1 liter of water).After the procedure, do not unscrew the product, but dry it by wrapping it in a cloth, and while the thing is wet, iron it with a hot iron. After such processing the dress will look more elegant, since the stiffness will emphasize the details of the style.
- Terry products: towels, sheets, dressing gowns are not recommended to iron, as they lose their qualities during ironing, become stiff and poorly absorb moisture.
- To properly iron things from velvet and plush, conduct the iron only on the wrong side of the material. Attach one end of the fabric or product to the table, and the other with a slight pull on the left hand. Moisten the wrong side and quickly draw on it with a hot iron. Crumpled, dented velvet or plush seats, while holding the product pile down over the dishes with boiling water.
- Knitwear. Things made from knitwear require special attention, since with improper processing they easily lose their shape. Smooth them slightly moist from the wrong side, using a damp cloth. Iron apply consistently to new areas, not moving on things. The smoothed out item leave to cool, spread out on a table.
Important! Be sure before you iron things, determine the composition of the fabric on the tag on the product, because:
- linen cloth at 190-230 C;
- cotton products - 165-190 C;
- natural silk - 115-140 С;
- viscose 85-115 C.
How to iron clothes properly?
There are several rules for how to properly iron things that will help you greatly ease the whole process:
- The ironing board is positioned so that the light falls on the left side, and the cord does not interfere with the process.
- If there is no ironing board, then use the table, covering it with a blanket.
- The need to iron is from right to left, starting from the widest part of the clothing towards the narrow one.
- Drive the iron along a straight thread along and along a straight fabric, otherwise you will unevenly pull it out.
- Do not pull the fabric when ironing.
- Spread out the thing exactly as it should look ready.
- First, iron out the small details( collars, sleeves, pockets, cuffs, laces, embroideries), and then - the rest of the product.
- Clothes from dark fabric always iron from the wrong side.
- When leveling the non-sewn product, remove from it an inconspicuous line, thread, pins that can be printed on the product. Unshielded product iron at each stage of production, as well as after the completion of all work.
How to iron your trousers?
The ironing of things like trousers all the time causes certain fears among the mistresses: to make arrows or not, how to level the places near the pockets and many more questions without answers can cause the spoiled thing. That is why, it is better to know in advance what to do and how to do it, and act on the recommended algorithm. Then ironing things will be much easier.
After washing the trousers must be smoothed:
- Start from the wrong side. Ottuzhte all the seams, lining and pockets.
- Remove the trousers on the front.
- Prepare the cheesecloth, moisturize it and spread on those sections of the product that you will iron.
- Shape the upper part and belt.
- Fold the pants so that the side and inner seams match.
- First, iron the inner sides of the pants, and then - the outer ones, smoothing the folds well.
- If the pants are stretched to the knees, then from the underside, moisten this place with water, and then turn it to the front side.
- Place a dry cloth between the damp cloth and trousers and iron.
- After handling the trousers, hang on the hanger and allow them to cool.
Important! Smoothed wrinkles will retain their appearance much longer if the cloth from the wrong side is moistened with a solution of starch. Remove the remains of starch from the iron with salt.
To keep the arrows for a longer period, they should be rubbed with soap from inside and smoothed through the gauze, lightly moistened with vinegar.
How to iron a shirt?
For ironing to be as effective as possible, the shirt should be slightly damp, and the iron is well heated. Start ironing from the collar, carefully straightening and ironing it, first - from the inside, then - from the outside. Iron lead from the corners to the middle. Smooth the shirt on the front side in this order:
- Collar( both sides).
- Backrest.
- If there is, flirt.
- Sleeves.
- Before.
Important! When ironing the cuffs, be sure to fasten them and spread them on the ironing board. It is necessary to iron the cuffs on both sides. For ironing sleeves, you can use a special small board, this will simplify your work.
Dresses and skirts
- At the skirt or dress, firstly iron the upper part: neckline, collar, shoulders, and then, the hem.
- Iron at the beginning across, and then along the product, along the way stretching the tip of the iron formed wrinkles.
- Vertical recesses are pressed to the middle, and the thoracic - down.
- So that when processing the dress on the fabric, darts and seams are not printed, first smooth out the dress as a whole, and then, bringing the iron under the allowance, gently smooth the remaining traces.
- If the product is made of thick fabric, then the hem should be carefully, without stretching the fabric, slightly stripping the binder.
Important! Before washing skirts and dresses with corrugated and pleated, swipe the edges of all the folds with large loose stitches, dry things on the hanger, carefully spread them and stretch the folds. With this preparation, ironing the folds will not present difficulties.
Classical costumes
 To properly iron a suit is a whole science. But if you stick to some secrets, you will 100% cope with this task:
- Suits iron through damp gauze, so that the fabric does not shine.
- Jackets and jackets start to iron from the sleeves: first iron the lining using a small extra board.
- Then - round, from side to side, press the top of the jacket and the floor, then, iron the collar, backrest and lining.
- Lastly, iron the sides.
- Pants iron more often than a jacket. With daily wear, the front arrow line is quickly lost. Tie ironing is not recommended. To refresh and straighten them, wrap a loose jar with hot water untied with a tie.
Important! You can not iron your jacket. You can just hang it over the basin with the steam and leave it to hang.
Little tricks and useful tips
- A dress that can not be ironed with a hot iron, hold it over a basin of hot water. After the product has evaporated, hang it on the hanger to dry it. Then iron it with a hot iron.
- The scorch from the iron on the silk fabric can be removed with a slurry of baking soda and water: wipe the stain with the product, and after it dries clean the soda with a brush. Rinse the entire product in cold water.
- The arrow on the trousers will stay longer if you iron the trousers through a cloth soaked with a weak vinegar solution, and then, once the pants are dry, treat them again with an iron through wet, thick paper.
- Do not hang things up straight into the closet, but let them hover and cool to keep them in shape longer.
- Do not iron clothes with stains, otherwise such dirt will be very difficult to remove.
- To make the pockets and edges of the product more compact and compact, iron them with a compact: align the edges, cover with a slightly damp cloth and put the iron on them for 2-3 seconds. Then - cover with a dry rag and squeeze until completely dry.
- If the seam should be pulled out, cover it with a damp cloth. With your left hand, gently pull and straighten, and with your right hand, treat the seam with an iron. If it is necessary to shorten the stretched seam, iron it with heat through a moistened cloth, pressing the iron from time to time, letting the steam soak the entire fabric. Continue the procedure until the fabric drains completely.
- If at the time of ironing you have burned the cloth, soak the stain with a solution of boric acid, and then stretch the product in water at room temperature.
- The sore spots can be removed with the help of onions: cut the head of the vegetable and rub the stain. After treatment, rinse the material with detergent solution.
How to iron clothes properly?
Volumetric sets for sleep, which must be leveled after washing, some cause a persistent desire to postpone this procedure, because you have to spend a lot of time and effort. But, if you know how to iron the clothes properly, you will be surprised at how simple and quick it is possible to finish all household chores and fix the items for the bed.
We offer some of the easiest tips to help you make your work easier and make it effective:
- Cotton linens are moistened with a sprinkling of hot water, as the cold water drained bed linens soaks up worse.
- Roll the wet laundry into a roll and leave it to rest for a while to evenly moisten, and then start the ironing process.
- To return the original shape to the products, which is broken by washing, align them by pulling the ends.
- Large things: duvet covers, tablecloths, sheets fold in four and iron each part separately.
- Bed linen is ironed on the front side, and the areas with embroidery are on the underside.
- When ironing towels, napkins, handkerchiefs, tablecloths, start processing from the edge, and then smooth out the middle.
How to iron things for newborns?
For our grandmothers ironing of children's things was mandatory, since such treatment helps to protect the baby from bacteria. In the modern world, every mother decides this question for herself, depending on her beliefs. But in favor of the fact that ironing things for newborns must necessarily, says the following:
- During the ironing, you can kill all those germs that fell on the clothes of the newborn during drying on the balcony.
- The umbilical wound of a baby is a kind of gate for infection, so until the wound does not heal, do not risk and iron all children's things.
- In a newborn baby, the skin is very tender, and the ironed things are much softer than those that have not been ironed.
- The stitches after ironing will not rub the delicate skin of the newborn, and diapers will not be so tough.
- New, newly purchased items must be washed and ironed, as only such treatment will remove all factory and warehouse contamination.
- The ironed things look much neater than washed, but not ironed.
Important! Whether it is worth ironing things on both sides is asked by many. In this way our mothers and grandmothers always insist, because they consider the method of bilateral ironing the most correct. In fact, children's things are enough to iron only on the side with which they are attached to the body of the baby.
So do not add to yourself unnecessary worries - how to iron things of newborns, read our recommendations below:
- Before starting ironing, be sure to sort your clothes according to the type of fabric and the temperature regime.
- Start the ironing process from things with the smallest temperature regime and go gradually to things with a higher temperature of ironing. So you do not have to waste time adjusting the temperature of the iron. You can use the same method when ironing adult things.
- Since all things and diapers are made of cotton, then before moistening, moisten them with warm water from the spray gun, or use an iron with stripping during processing - and the laundry will be smoothed out faster, and the bacteria will all die.
- When ironing, use a special mode on the iron for cotton.
- Carefully iron things from the side that touches the skin of the baby. Diapers in the first time it is better to iron on both sides. So the child will be more comfortable and safe.
- After ironing, always let the little things lie down and cool down, then fold them and put them in the closet. If you add hot clothes, then it forms wrinkles, creases and an unpleasant smell will appear.
Important! So that in the process of ironing children's things you do not get tired either your hands or your back, choose a comfortable, adjustable in height, board. Get a good iron with a steamer. This will shorten the ironing time by at least 3 times.
We hope that thanks to our advice and recommendations, ironing for you will turn into an exciting and enjoyable procedure. In the end, work with the iron can be combined with viewing an interesting film or listening to music. Then the time behind the ironing board will pass unnoticed.