- Main varieties of curtain rods
- Curtain rod made of metal
- Curtain rod made of polyurethane
- Curtain rod made of wood
- Curtain rod for curtains made of plasterboard
- How to make a curtain rod for plastic curtains with your own hands?
- Curtains and curtains with their own hands
- Step-by-step instruction how to sew curtains
- Sewing lambrequin
Do you want to make a cornice for curtains yourself? This is a great solution! After all, sometimes bought a cornice is quite expensive, and so you want to save a little. While not always this cornice can meet expectations. Perhaps you will not like its boring design, color and fasteners, or just want to add something? Agree, this happens quite often. Therefore, we advise you to make the cornice yourself at home. Believe me, there is nothing complicated in this. To do this, you need to stock up with the necessary equipment for the eaves and just collect this design together. And you can make the cornice almost from scratch. In this article we will tell you how to quickly and simply assemble a functional cornice from conventional PVC pipes, how to sew the curtains yourself, without spending much time and money. Stay with us and we will tell you in detail.
to the contents ↑The main varieties of curtain rods
In order to understand how to make curtain rod for curtains with your own hands, you need to familiarize yourself with the main types of this design.
Classify cornices according to the following characteristics:
- By type.
- Material of manufacture.
- Installation site.
- The number of rows.
Installation location
Cornices can be placed on the wall or on the ceiling. Previously, used the wall mount cornice, and now people prefer to mount the structure on the ceiling. This choice is due to the fact that the wall cornices, under the weight of the heavy curtains, can be cut off, and the ceiling curtains are held firmly on the ceiling with special fasteners.
Rowness
The cornices can also be divided according to the number of rows that are necessary for curtains. Today, multilayer structures are popular. They allow you to hang, for example, curtains and tulles on one solid cornice.

Construction:
- String cornice. The most common option. In this design, the curtains move along the tension strings, which are hidden by the decorative strip.
- Tubular cornice. Used for a long time and we are familiar with since childhood. The only downside is that over time the surface of the ledge can lose its smoothness, therefore, the rings that hold the curtain begin to move poorly.
- Framed cornice. The most modern material from all the above cornices. The design consists of a profile with grooves, which, as a rule, hang on the ceiling, sometimes on the wall.
Materials
Cornices can be made of such material:
- Metal.
- Plastic.
- Tree.
- Drywall.
As you can see, the variety of cornices is very large and there is, so to speak, what to choose from. Next, we will tell you in detail about each cornice, its advantages and disadvantages, and how to make curtains for curtains with your own hands.
to the contents ↑Curtain rod for metal curtains
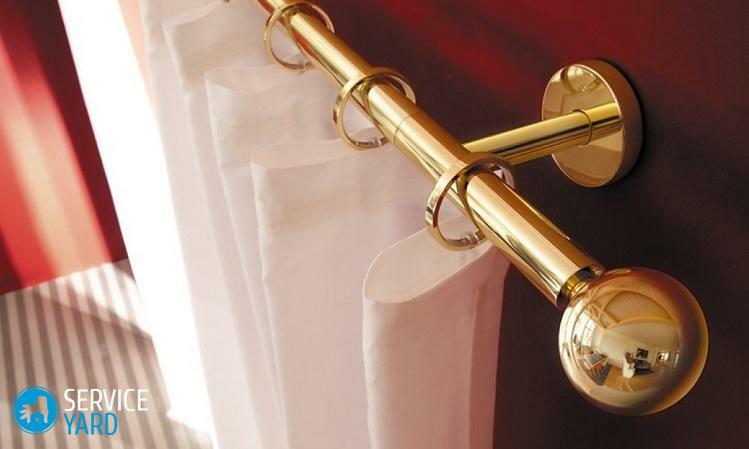
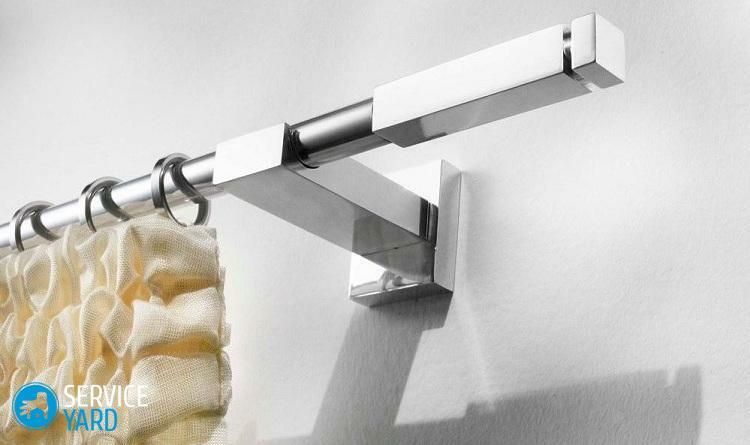
This is quite simple execution of such a complex design. Metal cornices are used, as a rule, for heavy curtains and multi-row compositions. Everything is not as difficult as it seems at first glance. Cornice made of metal is very expensive, so do not rush to buy it. You can make this design yourself at home:
- For this you need to buy a metal profile, hooks and fix the cornice to the ceiling.
Important! Do not forget that the number of bars in the profile should be the same as the number of supposed curtains.
- A tubular cornice is made of metal. This requires an aluminum or stainless pipe and mounting brackets. You can take a metal rod and put the plugs on the edges using wooden door handles.
Polyurethane curtain rod
Plastic cornices are well suited for light curtains, since this material is not capable of withstanding a high load. The most common option is the tubular cornice. Make a curtain rod for your curtains with your own hands on the villa is quite simple. And to find materials for its manufacture - especially, for example, to buy in the store plumbing.
Important! Cornice made of polyurethane is a material with positive characteristics, unlike all other polymers:
- Polyurethane, like any plastic, is absolutely not afraid of water, so it can be safely used, for example, in a bathroom or a bathroom.
- The material is light enough, durable and resistant to high temperatures.
- Such characteristics allow you to hang the cornice of polyurethane in almost all conditions and stick to almost all bases, including plasterboard structures.
- To install such a cornice, only a profile of polyurethane and hooks for curtains are needed. Excellent flexibility of the material allows you to give it any shape you like.
Curtain rod for
wood curtains Decorative elements of the interior with the effect of aging are gaining popularity. Even new objects are converted to old ones, using the technique of surface wear and decoupage. Curtain rod for curtains, in this case, is no exception - on the contrary. Wood is used to create different planks for one of the types of construction.
To make a cornice made of wood, adding a variety of decor elements to your discretion, it is very easy:
- We cut out the bar of the required length and width from the sheet of the chipboard. After that, we paint or paste with self-adhesive film of the desired color.
- If it so happens that it is impossible to cut out the necessary length from the sheet of chipboard, it can be attached additionally, using special glue or furniture braces.
- We fix the bar to the ceiling using metal corners. For this design, as a rule, single-row or multi-row strings are used.
Important! You can use another option for making such a cornice. To do this, you need to take a suitable wooden stick, walk on it with sandpaper, sand and insert into brackets, which you can also do with your own hands.
to the table of contents ↑Curtain rod for
drywall curtains Such cornices are very popular for creating a modern interior. But for the production you need the necessary materials and tools, a small building experience.
The following are the main features of the cornice from this material:
- This design has the appearance of a box in which additional lighting can be connected using spotlights.
- Most often, a niche is made for a tension or suspended ceiling.
- The main purpose of the cornice from plasterboard is to hide the cornice and the top of the curtains from prying eyes. That's why it is made on the width of the window opening or across the entire wall area.
Important! The installation of a similar niche for the eaves needs to be done at the stage of making the ceiling, as it is much more convenient than mounting after all the work done.
As you can see, there are a lot of options for making curtain rods for curtains. Only it is necessary to show imagination, to put a little effort, and a stylish object of the interior will emphasize the impeccable taste of the owner.
to the contents ↑How to make a cornice for curtains from a plastic pipe with your own hands?
For the kitchen or utility rooms, you can independently manufacture the cornice using a long-forgotten plastic pipe. Such cornice is good for curtains on rings or loops, created with their own hands. For its manufacture, several tubes are needed( depending on the required length), special holders and materials for fixing this structure.
Important! Curtains for plastic cornice can be sewn as an "hourglass".For this we fix the cornices on the upper and lower leaves, stretch the canvas and pull it together in the center.
Below we will gradually consider how to make a cornice for curtains and a plastic pipe:
- First you need to find a tube of the necessary length to cover the window or doorway, several corners of PVC, a pair of pipe segments and metal holders.
- Next, you need to measure the width of the window opening.
- It is necessary to add approximately 20 cm to the obtained measures, we obtain the length of our future cornice.
- Now we gradually start assembling the structure. First, put the corners on the edges of the plastic pipe.
- Small segments, approximately 15 cm, we insert into the corner, in order to leave a gap between the wall and the cornice.
- After - fasten metal clips to the ends of short tubes.
- We paint the cornice, for example, in gold, silver or other color.
- After complete drying of the paint, fix the finished cornice to the wall.
That's it, the work is over! We got a full curtain rod for the curtains with our own hands. It is done quickly, and most importantly - your forgotten plastic pipes will be used in your interior. Agree, this is a very profitable solution!
to the table of contents ↑Curtain and curtain sewing by the hands
Curtains are a type of curtain for which a translucent or dense light fabric is used. Sometimes curtains are called such designs, which are attached to the curtains.
Important! Both options are correct. The designation of the word, translated from the Dutch language, means the curtain and the structure to which it is attached.
For sewing curtains use such fabrics:
- Tulle.
- The veil.
- Organza.
- Muslin.
- Chiffon.
Today it is easy to buy ready-made curtains of different types and models. Their choice is large enough. We will tell you how to sew curtains and arrange them according to your refined taste and preferences. Sometimes for a window of non-standard size it is very difficult to find a suitable curtain, and sew it much more economically and more pleasantly.
General principles for sewing curtains
In order to sew curtains, it is not necessary to have a lot of experience in cutting and sewing. The main thing is to correctly measure, prepare the fabric and the necessary tools. Believe me, everything will go further, like clockwork, you just have to start!

How to take measurements?
- First you need to measure the length of the cornice.
- After - measure the distance between the cornice and the floor.
Important! If you need long enough curtains, then add another 10-20 cm to the length.
- If you need to sew curtains with allowances for creases, then add the total length to the length of the cornice.
- If you want a curtain with magnificent drapery, then you need a length of fabric, like three lengths of the cornice as a whole.
How to choose the right material for curtains?
In order to choose the fabric for sewing curtains, it is necessary to take into account all directions of the world. For example:
- In a room located on the south side, it is better to use a thicker and opaque fabric as a curtain.
- If the windows go to the shady side, then you can stop on a thin and light fabric.
Important! Do not forget that such fabrics as chiffon and veil, when sewing on a sewing machine can form an accordion. Therefore, the line should be done slowly and with special care. For such works it is better to use more sparing modern machines that have the function of sewing on a thin fabric.
to the contents ↑Step-by-step instruction on how to sew curtains
Of course, in a shaded room, curtains made of dense fabric will make the room dark and gloomy. But along with this, such an ordinary curtain will add sophistication to the interior, so the solution to this problem is the curtains curtain created by yourself. It can be sewn multilayered and at the end decorated with lambrequin. Your room will be beautiful and elegant, and the pleasant rays of the sun will delight you every day.
Stage 1 - purchase and cutting of fabric
Let's look at the calculations for building patterns for curtains. For example, we take a canvas of standard size 1,2-2,2 meters:
- In order to calculate the amount of fabric, you need to use the formula: the width of the curtains is divided by the width of the fabric, we get the number of strips.
- Next, multiply the resulting number by the length of the curtains, including the allowances for the seams. For example, the width of the curtain is 9 meters, its length is 3 meters. In a roll of fabric, say, 1.5 meters. At us it turns out: 9/1, leaves 5,6 strips of a fabric.
- Now multiply the number of bands by the length of our curtains: 6 multiply by 3 and get 18 meters. Thus, in order to sew a curtain measuring 9 by 3 meters, you need to take 18 meters of cloth with a width of 1.5 meters.
Important! This method can be used for a single curtain for the entire width of the window, and for several curtains. For curtains of two halves, only one half of the cut fabric should be sewn. In order for the cut to be fairly even, use chalk or a slice of soap.

Stage 2 - sewing curtains
We will acquaint you with a step-by-step instruction on sewing curtains with your own hands:
- First we sew together the rectangles of the fabric so that in the end we teach the canvas of the necessary size.
- In order for the seams to be less noticeable, we make an indentation from the edge of the fabric and process each seam with an overlock.
- Each edge, except the bottom one, is turned approximately by 1-1.5 cm.
Important! If for curtains you use a thin fabric, then the hem should be quite small. When you bend from 1 cm or more, the edges of the curtains will look sloppy.
- Before processing the edges of the fabric, it is necessary to pinch them with a needle with a round eyelet, mark and then iron. The lower edge is bent approximately 5-10 cm.
- In order to process the upper edge, you need to make a hem about 5 cm on the wrong side, and using pins, attach a braid to it.
Important! If the braid has a width of more or less than 5 cm, then the width of the fold should be equal to the width of this braid. If you want to sew curtains for a wide braid, then when buying, you need to take into account the size of the hem.
- Now sew the tape on the curtain.
Important! To prevent the curtain tape from wrinkling, try sewing stitches in one direction.
- At the end of the work we tighten the cords in the braid, collect the curtain into the folds, beautifully straighten them and tie the knots at the ends of the side cords.
Curtains are ready for use with their own hands!
to the table of contents ↑Lambrequin sewing
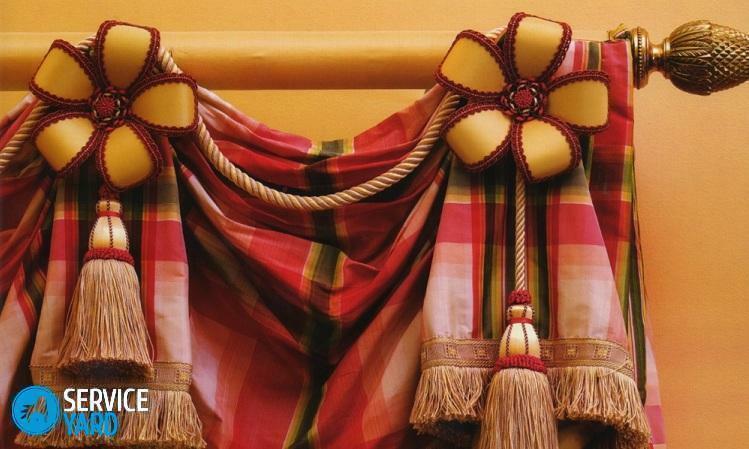
There is a wide selection of different lambrequins on the market, so first you need to decide how you want to decorate the kitchen, living room or children's room. Lambruck can be in different designs: arches, waves, cylindrical, drop-shaped, with folds or jabots, decorated with braid or ribbon. In a word, you can make lambrequins with your own hands in different designs, as soon as your imagination allows. Examples of ready works for the creation of lambrequins can be found on the photo. There are so many of them that believe me, there are plenty to choose from.
We offer you to familiarize yourself with the basic recommendations for lambrequin sewing:
- Lambruck must be secured separately from curtains and curtains, as regardless of the window curtain, it will always be on the same place.
- It is easy and simple to sew horizontal lambrequin. To do this, you need to cut the strip along the width of the window, attach the braid to it, trim the lower edge with a tape and completely assemble the braid.
- It is much more difficult to create such an element of lambreken as a svag, since it is necessary to create a pattern for its sewing.
Important! In order to properly build a pattern, it is necessary to cut the svag at an angle of 45 ° to the direction of the filament strand. The consumption of fabric in this case will not be quite economical, but the svag will lie exactly with soft folds, without untidy creases.
- The width of the elements of the pattern directly depends on the length of the cornice. For example, if you want to make a lambrequin of three svag, then sew them with a slight overlap, that is, overlap.
Of course, creating a curtain rod for your own curtains is not an easy process, but sometimes these efforts are worth it. Now you know how to make a cornice with your own hands, using the most common materials available. And your stormy fantasy will help beautifully decorate this design to your taste. Knowing all the steps for sewing curtains, you can easily sew beautiful curtains, and maybe lambrequin. Why not? We wish inspiration and new achievements!


