- Frame from cardboard
- Frame from magazine pages
- Frame wrapped in thread
- Frame for spring themes
- Frame as a gift
To find a beautiful frame for photography, embroidery or painting is still a quest. How many have to go around the shops to successfully choose the frame, suitable for design, size and shade? There is a good option - to figure out how to make a frame with your own hands and deal with this process personally. Since the frame for photographing a tree does not suit every needlewoman, we offer you simple options. Detailed master-classes on manufacturing of frames you will find in this article.
to the table of contents ↑Cardboard frame
Everyone can make a frame from cardboard - this does not require a lot of time, no special skills, no special materials.
For work you will need:
- Cardboard - better corrugated.
- Fabric or paper for decoration - to choose from.
- Buttons, beads, rhinestones, seashells and other decorative accessories for decoration.
- Brush for glue, glue PVA.
- Stationery knife and scissors.
- Ruler and a simple pencil.
Important! It is not necessary to make a rectangular photo frame - round, oval, irregular in shape, with curls and curves, too, look very beautiful and original. Here everything will depend only on your imagination.

Procedure:
- Place a photo in the center of the cardboard sheet, circle the picture with a pencil.
- Inside the resulting rectangle, draw another one with sides 1 cm smaller( this will be the "window" for the photo).
- Draw a rectangle outside the outlined photo - these are the margins of the frame( they should be equal to the width).
- Cut the front of the frame.
- Circle it on another piece of cardboard.
- Draw a rectangle inside the one that turned out, with sides 2 cm less - this will be the back part.
- Cut it out.
- Determine how much tissue or paper you will need to decorate the craft, and cut it so that you can bend the edges inward.
- Spread the PVA glue on the front of the frame and glue the prepared paper to it, then allow it to dry properly with the glue.
- Attach the back of the frame to the edges of the decorative material - do not glue the side or top sides so that you can poke in the photo.
- Decorate the finished product by gluing the necessary decorations.
- Make a loop or stand to hang the article on the wall.
Important! If in the process of working to make a frame with your own hands, you do not have enough cardboard, then for the back side of the product you can use plain paper or paste two stripes of cardboard from the back of the window.
to the contents ↑The frame from the journal pages
This hand-craft not only looks original, but it can also be made completely free, because its main element is magazine pages that you can tear out of any unnecessary magazine.
For work you will need:
- Pages of old unnecessary logs.
- Cardboard.
- Adhesive PVA.
- Thread for sewing.
- Scissors.
- Ruler.
- Stationery knife.
- Pencil.
Procedure:
- To make a photo frame with your own hands, prepare a sheet of cardboard or thick paper about 20X25 cm in size. Measure off the edges of the sheet 5 cm and draw a "window" in the size 10X15 cm in the middle.
- Cut out the "window" with the clerical knife.
- Begin to twist the magazine pages as tightly as possible into the tubes. To fix them and prevent unwinding, use PVA glue.
- Prepare a colored thread and start winding it on the twisted pages of the magazine. Continue until you get many similar pieces.
- When the workpieces are made, bend them at a 90-degree angle in the right places and secure them to the cardboard frame with glue.
- Prepare a small piece of cardboard for the stem. Cut out two strips of cardboard and glue them to the back of the frame so that you can insert a photo between them.
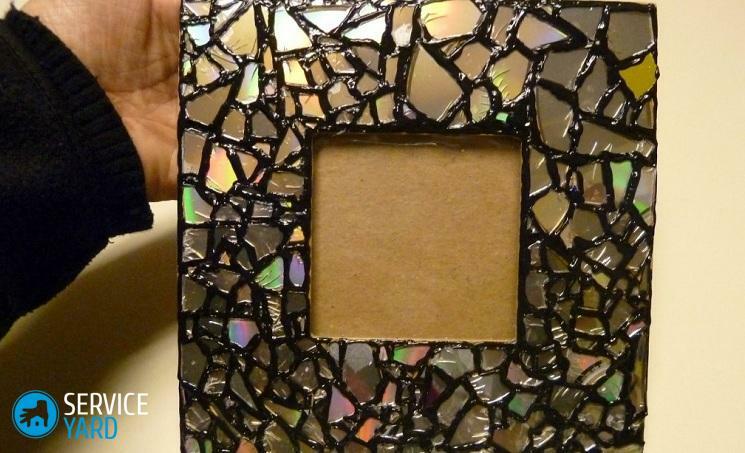
Frame wrapped in a thread
Another option to make a frame with your own hands is to flatter it with a thread.
You will need:
- A simple frame for photos with smooth edges.
- Several multi-colored threads.
- Adhesive PVA.
- Scissors.
Procedure:
- Prepare the workpiece and apply a small amount of glue on it.
- Begin to wind the frame gradually with threads of different colors.
- Add a photo.
Frame for the spring theme
This frame is made on a spring theme. She looks romantic and gentle.
You will need:
- Simple frame for photo.
- Artificial flowers.
- PVA glue or glue gun.
Procedure:
- Divide the artificial flowers into inflorescences( if desired, flowers can be made independently of paper or fabric).
- Apply the flower petals to the frame using an adhesive or glue gun.
Important! To be more convenient, try to glue the petals starting from the corner of the frame, then gradually fill the entire frame.
- Use lace, braid or beautiful paper to glue the edges of the frame.
Frame as a gift
Sometimes it is very difficult to pick a gift, but what could be better than a present made with your own hand. So, in order to make a frame with your own hands as a gift, you will need:
- A simple wooden frame.
- A piece of cloth.
- Ruler.
- Adhesive PVA.
- Scissors.
- Brush for glue.
Procedure:
- Prepare a piece of fabric on which to put your frame. Cut off as much fabric as you need to close the edge of the frame from the front and back.
- Now cut off excess fabric from the middle of the sheet.
- Place the hand-crafted item on a rectangular pattern, cut out the squares from the corners - so you will ensure neat angles.
- Caution, using PVA glue, glue the fabric to the sides of the product, but be careful that it does not wrinkle. It is necessary to do this on both sides of the frame - both from the inside and from the front.
- Make diagonals in the corners of the frame. To do this, you need to cut each corner inside your frame.
- Fold the fabric and glue it to the inside. It is possible to cover with a cloth the reverse side of the product - here at will.
- After complete drying, decorate it with ribbon, lace or whatever you want.
As you can see, it's very easy to make a photo frame with your own hands. You just have to spend some free time, show a little imagination, and a bright, interesting, original frame will please you always.