
- Sew a tunic with a solid-sleeved sleeve without a pattern
- How to sew a tunic with solid-cut sleeves of a large size?
- Another couple of nuances
Beginners are constantly looking for some new and at the same time simple ideas to realize them personally. A real find for them can be a tunic with a one-piece sleeve. The pattern of this product is quite understandable, it is not difficult to transfer it to the fabric. In this case, it is not necessary to cut out sleeves separately, and this greatly simplifies the task for beginners. In this case, such a thing is considered quite necessary and useful in any wardrobe. Therefore, in this article, we will look at some of the simplest master classes for sewing such tunics.
to the contents ↑We sew a tunic with a whole-sleeve sleeves without a pattern
The tunics themselves are incredibly comfortable, that's why every woman dreams of replenishing her wardrobe with such a thing. Especially they are relevant for expectant mothers, because their figure is constantly changing, and such clothes can be worn even before the birth itself.
Even the person who first took a needle and a thread in their hands, will be able to sew such a product. Apply very little effort, and you will get a chic tunic with a one-piece sleeve. Pattern in this case, we do not need.
So, let's get going:
- Take your old T-shirt or tunic, lay it on the fabric that you bought to sew a new tunic.
- Then make notes according to the outline of your thing, be sure to leave allowances about two centimeters on the seams.
- As we sew a tunic, please note that in length it should be bigger than a T-shirt. In this matter, you need to determine individually, how long you want, and do so.
- Now gently trim the bottom of the product in such a way that the side edges turn out to be round. That is, in this version the tunic on the sides will have small cuts.
- Now we sew the back and front parts of the product. Since we sew a tunic from a stretchable fabric, sew it better with an overlock.
- Then treat the bottom of the sleeves. It is necessary to tuck the edges, secure them with sewing pins, and then stitch them on the sewing machine.
- Under the same scheme, treat the edges of the bottom of the tunic itself. But do everything very carefully, because if the material stretches too much, you may get unevenness.
- Pay the most attention to the processing of the side cut at the bottom edge.
The tunic is ready!
to the table of contents ↑How to sew a tunic with solid-sleeved sleeves of large size?
Now we will learn how to sew a tunic with a one-piece sleeve large. Why the large size? The answer is simple, because they are more often worn by girls in position and ladies trying to hide the shortcomings of their figure with the help of such clothes. Outwardly it will look very attractive and stylish. It is guaranteed to become your favorite thing in the summer wardrobe.
Important! The tunic, resembling a kimono, looks pretty elegant and disguises any problem areas of the figure, at the same time emphasizes the waist, conceals the full hands, will not restrain movement.
Pattern
So, our pattern is designed for such parameters:
- Breast circumference - 110 cm.
- Hip circumference - 116 cm.
- Waist circumference - 92 cm.
- Breast height - 32 cm.
Important! If desired, you can at your discretion adjust the length of the product, starting from its growth. The fabric, by the way, is better to choose not too dense, but also not too soft that it well kept the form.
Materials for the work of
For tailoring you will need such materials:
- Flizelin.
- The fabric is 145 centimeters wide and 165 centimeters long.
- Pattern.
Important! Note that the pattern is given without taking into account the allowances for seams. Therefore it will be necessary to add:
- one and a half centimeters at the seams and all sections;
- at the edges of the slices and the bottom of 3.5 centimeters;
- in the belt section 1 centimeter.
Components
The pattern will consist of the following parts:
- Two details of the front of the tunic.
- One detail with a fold for sewing the back.
- Two parts of the front neck flare.
- One piece with a fold for the neck of the backrest.
- An additional detail for the manufacture of the belt.
Important! To carve the obtachku, you need to circle the back of the neck and transfer, cut out the individual parts. Before embarking on the tailoring, you need to glue all the details of the fake to flizelin.
Course of work on tailoring:
- We grind the chest darts on the front halves, press them downwards.
- On the central seam we grind the front halves from the beginning of the incision marking to the very bottom.
- Fold the front part and back to each other face, perform shoulder seams.
- We press the allowances along the edges of the sleeves on the wrong side, we impose on the front side.
- We apply all parts to the shoulder seams.
- We process the neck of the product by obtilation.
- We grind the side sections of our tunic on the sides to the cuts.
- Press on the wrong side of the allowance for the hem of the side cuts and the bottom of the tunic, we impose on the front side, deviating from the edge of 3 centimeters.
- Fold in half the belt face inward, cut off the sections, while leaving a small piece unshielded.
- We turn the belt and carefully sew the hole manually.
The product is ready!
to the contents ↑Another pair of nuances
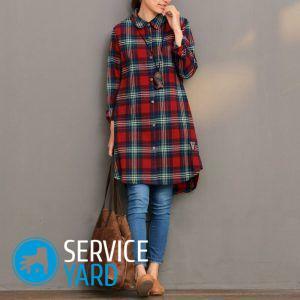
These tunics perfectly match trousers and skirts, as well as short, wide and narrow pants. The neck can be decorated with beads, lace, pebbles and even pieces of genuine leather.
As it turned out, not only in theory, but in practice there is nothing complicated in sewing tunics on their own. Therefore, it is better not to waste your time, running around shopping, because you can sit down and sew just such a thing, which you have long dreamed of, from the best fabric, the right size and style. Create and do not stop on the results!