- What can be a cabinet?
- What do you need?
- Dimensions of the cabinet
- Cupboard for the puppet clothing with your own hands from plywood
- Other door design options
- Decorating the cabinet
- How to make a wardrobe for dolls out of the box?
- How to make a paper doll cabinet?
- How to make a wardrobe for dolls from matchboxes?
- How to make a hanger for dolls out of paper?
Arrangement of the puppet room is an exciting activity for both the child and parents. Of course, miniature tables, cribs and armchairs can also be bought in a toy store, but they are sometimes more expensive than the doll itself. But in order to create an environment with their own hands, no investment is required, and the interior can be even more interesting than that offered by professional toy designers. How to make a wardrobe for dolls? Some variants will be discussed in our article.
to the contents ↑What can be a cabinet?
Dolls - like people, and they have a variety of furniture. For example, depending on the size of the doll and the materials available under the arm, you can make different items of furniture for storing things and clothes:
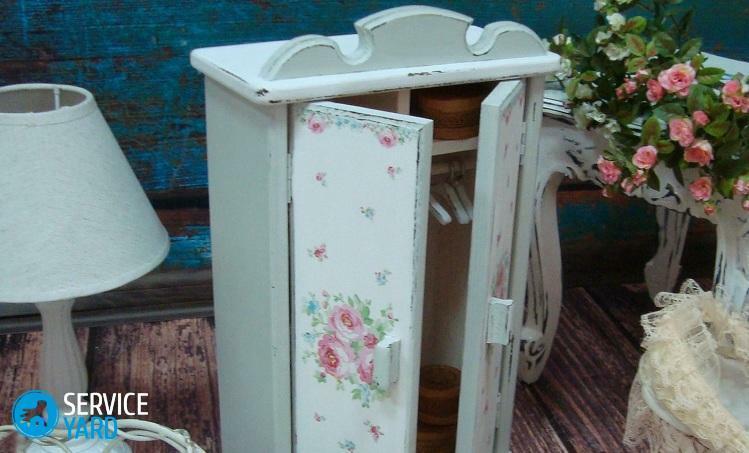
- Chiffonier. Chiffonier is a wardrobe for dresses, coats and other items of a doll wardrobe. It has a rectangular shape, it has doors and a bar inside. You can even make a wardrobe from several compartments - large with doors and smaller ones, with drawers, and glue a "mirror" on the inside or outside of the door.
- Chest of drawers. The chest of drawers consists of a table top surrounded by a multitude of drawers - they can be on the bottom, side, or even from above.
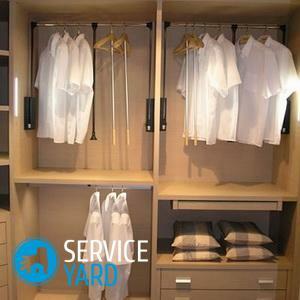
- Hanger. The simplest clothes hanger is a few rails, but you can make it another way - in the form of a panel on which miniature hooks are attached.
- Cupboard for dishes. The cabinet for dolls for dishes is similar to a wardrobe, but inside it does not have a bar, but shelves.
What do you need?
Make a doll cabinet with your own hands is not difficult, but first you need to see what materials and tools you have. You will be useful:
- cardboard boxes - from under shoes, juice or milk;
- plain cardboard;
- corrugated board;
- pieces of plywood;
- pieces of self-adhesive film;
- colored paper;
- acrylic or gouache paints;
- varnish;
- beads;
- small buttons;
- hooks for clothing;
- miniature door hinges;
- scissors;
- fret saw;
- hacksaw;
- ruler;
- shoe knife;
- glue PVA;
- glue "The Moment."
In a word, a lot of things you probably have - these are the items that constantly accumulate in the apartment, and the landlady usually do not know where to put them.
Important! The only exception is door hinges of very small size, they are not used very much. But such can be found in the store of goods for needlework.
to content ↑Cabinet dimensions
They depend entirely on the size of the doll:
- For Barbie, it is best to make a cabinet about 30 cm high or slightly smaller.
- But for Anabel such a store for clothes will not be enough, she needs a cabinet about 45 cm high, or better - a little more.
- For miniature pupae, there will be enough boxes for juice, baby food, corn flakes, etc.
- If your daughter Anabel or Baby Bean - look for a box from under boots or some household appliances.
- For large dolls, furniture can be made from plywood.
Cupboard for puppet clothes with your own hands from plywood
This is the most durable option, although you need some skills in working with joinery tools. It is very good, if there is a ready-made plywood box - for example, from cubes that have long been lost.
If there is no such box, it can be done quickly to get a doll cabinet by yourself:
- Define dimensions - width, height and depth.
- Draw a large rectangle on the piece of plywood with sides equal to the height and width of the cabinet.
- Draw two rectangles, whose sides are equal to the height and depth, for the sidewalls.
- Draw a "floor" and a "ceiling" - their parameters are equal to the width and depth, plus the allowances - on the sides adjacent to the sidewalls, they make up twice the thickness of the plywood, and on the longer - just the thickness of the plywood.
- Cut the workpiece with a jig saw or a small hacksaw.
- Strip the cuts with sandpaper.
- On the sidewalls, mark the places for the holes under the crossbar - they should be placed strictly symmetrically.
- Drill holes, but not so as to pierce the sides.
- Make a crossbar - grease a sheet of cardboard with glue and twist from it a tube, the length of which is slightly more than the width of the cabinet( it must enter the holes).
- Glue the crossbar - this is best done immediately, while all the rest is not assembled.
- Glue to the back board of the sidewall, upper and lower panels.
Important! Chiffonier can be on screws or studs.
We decorate the doors of the
The puppet cabinet can have only one door - this is the easiest way to do it:
- Take out a board that is the size of a back.
- Strip it with sandpaper so that there are no rough edges, and put on a pair of miniature door hinges.
Important! For two doors, of course, you need two plywood rectangles that are 2 times as wide as the back.
How to make handles?
Sometimes small door handles can be found in the shops of goods for sewing. But they are not always sold, so you have to get out of the situation differently.
See what you have in the box with different little things. Suitable for you:
- wooden beads of suitable size;
- pawns from an incomplete set of small chess - however, other figures also fit, if only they were the same;
- if the closet for a large doll is kegs from a lotto;
- chips from the board game;
- wooden buttons with "ears".
Important! In extreme cases, the handle can be made from cardboard - it's just a tube.
How to attach?
You can simply stick the stick. However, in this case you will have to repair your creation quite often. But nothing prevents drill holes and paste details. So they will hold out much better.
to the table of contents ↑Other door options
The closet for puppetry should not necessarily be closed with plywood doors. This is the furniture for the game, in which there should always be at least a little room for imagination. However, for real furniture, such methods are also suitable:
- curtain made of fabric;
- curtain made of thick threads.
Option 1
The curtain is best made from two cloths, and the fabric is taken one that does not need to be swept, like tulle, tulle and anything else like that. You need:
- 2 flaps;
- thick hard threads like "iris";
- 2 cloves;
- hammer.
First you need to decide where the cord will be attached. Best of all - from the outside of the side:
- Mark the points where to drive the carnations.
- Kill the carnations - you can screw in instead of the screws, which hold together the details of the mechanical watch.
- Cut 2 rectangles out of the fabric - better if they are wide enough to lay them up with beautiful assemblies.
- Sew the upper edges with thick threads, a notch suture.
- Make the build.
- Tie the thread from both sides to the studs.
- Close the carnations with decorative pads - for example, plywood florets or self-adhesive film elements.
Option 2
You can make a curtain for the doll cabinet with your own hands, for example, from synthetic twine:
- Cut a long thread for the base - it should be such that it can be pulled and tied.
- Slice a lot of threads for the curtain itself - each should be twice as long as the curtain itself.
- Tie short strings to the base.
- Base the attachment to the studs or screws.
- Equalize the edge.
- Fasten the fasteners with decorative pads.
Important! Such a curtain can be striped, if you take threads of different colors.
to the table of contents ↑We decorate the cabinet
It is not necessary to decorate a plywood wardrobe if the material has no visible flaws. You can simply cover it with varnish. But nothing prevents showing their slumbering designer abilities.
You can decorate:
- with a painting;
- application;
- burning out.
Painting
To paint sidewalls and doors, it's best to take acrylic paints. What about ornament? You can find something suitable on the Internet, for example, elements of the vegetative pattern. Then do this:
- If you are not so sure about your artistic abilities, circle the elements of the ornament in pencil.
- Cover them with paint evenly.
- Apply a fine brush with additional lines - veins of leaves, mid-colors, antennae.
- Allow all this to dry and varnish.
Application
It can be made from paper or self-adhesive film. This is somewhat simpler than painting:
- Elements are better to take the simplest - circles or ovals, from which you can make an interesting floral pattern.
- Before you glue, experiment by placing the elements in a different order.
- It is better to cover the paper application with varnish.
Important! In the same way, you can also decorate the cabinet door for dolls made from cardboard.
Scorched design
An ancient method of decorating wooden furniture - burning. It is best to use a special device consisting of a needle and a block with a thermoregulator. Drawings can be very different, but for miniature furniture it is better to choose those where there are no complicated plots and very small details.
to the contents ↑How to make a wardrobe for dolls out of the box?
For such a locker, you need any cardboard box In addition to the actual box, you need:
- the remains of wallpaper or colored paper;
- empty matchboxes;
- toothpick scoops for sandwiches;
- wooden beads or buttons with "ears";
- wire;
- paper clips;
- foil, if you want a wardrobe with a mirror.
Preparing the basis
Before making a cupboard for dolls from the juice box or from under the shoes, we must prepare the box itself.
Option 1
At the shoebox, remove the lid, straighten and cut the folds - it's best to do it with a sharp knife, so that the edges are even. From the cover can be made:
- partition;
- doors.
Important! If it is a partition, then for the remaining parts you need a few sheets of solid cardboard - well, vice versa, respectively.
Option 2
At the juice box, carefully cut the front wall. If the box with a round hole on the top - remove the plastic insert, which is screwed on the lid. In fact, nothing more to do and do not need - the thicker the load-bearing parts, the better.
From the cut out front part you can make a partition:
- Cut the cut off wall in half, combining the long sides.
- Long edges bend outward 1 cm.
- Glue the part, but do not touch the allowances.
- Hold the partition for a while under the press.
- Glue the partition into the cabinet.

We decorate the inside of the
In one half of the locker you can make a hanger, and in the other - drawers. Depending on the size of the wardrobe, the crossbars are suitable:
- skewer;
- any round wooden stick;A cocktail tube or a paper roll.
It is best to paste it into the walls.
In the second half can be drawers:
- This will require several empty matchboxes.
- External parts of them simply stick one on another.
- To make the drawers easy to open, on the sliding parts make the semicircular notches under the size of the child's finger.
Important! There may be other design solutions. If the box is tall and narrow, the boxes can be placed below. Worse, if there are no match boxes, but it's not a problem - you can make shelves of cardboard boxes glued together in several layers.
Doing doors
Both doors are made in the same way:
- Cut out 4-6 cardboard strips in length equal to the height of the cabinet, and a width half the width of the wardrobe for doll clothes.
- Glue strips between each other in 2-3 layers - glue it is necessary to spread the entire surface.
- Hold the workpieces under the press until they are completely dry.
- Glue handles - for example, small wooden buttons with "ears" or wooden beads.
- Place the doors on the miniature hinges, 2 on each side.
Feet
Puppet furniture can be without legs. But if there are large beads, pawns from old little chess or just wooden bars of the appropriate shape - why not make a toy cupboard look like a real one? The main thing - that the legs were the same and were at equal distances from the corners.
Cupboard for dolls with their own hands made of cardboard is almost the same. From the cardboard you must first glue the box and attach the doors and other parts to it, that's all.
to the contents ↑How to make a paper cupboard from a paper?
If boxes and sheets of plywood are not at hand, you can make a wardrobe for dolls made of paper. Do not be surprised, from newspapers and old wallpaper, even country houses do, and they stand for several years.
You will need:
- templates;
- the remains of wallpaper;
- newspaper;
- adhesive PVA;
- press;
- water-based paint;
- artistic paints;
- varnish;
- door hinges and handles;
- legs.
Cut out the cardboard templates for the back, doors, sidewalls, top and bottom panels:
- Using the template, cut 10-15 pieces for each part.
- Glue each workpiece in layers.
- Hold it all under the press until it's dry - the blanks should be straight and dense.
- Assemble the wardrobe for the dolls just like the one that is made from the box.
- Paint it with water-based paint.
- Draw with artistic paints - for example, a tree, or make a painting.
- Top with lacquer.
- Attach the doors and feet.
How to make a wardrobe for dolls from matchboxes?
Boxes can be glued:
- kitchen cabinet;
- chest of drawers.
Option 1
For a kitchen cabinet you need 5-10 empty matchboxes:
- Remove the "boxes" from the "covers".
- Stick a few "covers" one on top of the other.
- Paste the sidewalls and the upper plane with a self-adhesive film - white, gray, cream and other "kitchen" colors.
Important! The same film can be pasted and those parts of the "boxes" that will be visible from the outside, but these details can also be painted with gouache.
- In the "drawers", make cutouts for the finger.
- Insert the "boxes" into the "covers".
- Glue the legs.

Option 2
For the chest you need the number of boxes, which is divided into 3:
- 3 "covers" glue together with sidewalls.
- Others also glue three.
- Glue the tiers.
- The sides and top can be pasted with a brown self-adhesive film.
Important! You can make a chest of drawers with a mirror. To do this, you need a piece of cardboard and a sheet of foil. From the cardboard cut out the workpiece of arbitrary shape, for example, semicircular, cover it with a film under the color of the chest, and in the middle attach a "mirror" of the foil.
to the contents ↑How to make a hanger for dolls out of paper?
Puppet hangers, like human, can be of different types. For example, in the form of a crossbar, lying on two supports. For this you need:
- paper( you can take old wallpaper).
- glue PVA;
- metal spoke( as a template, but you can do without it).
Hanger in the form of a letter P
How to make a hanger for dolls made of paper?
- Place the sheet of paper with the wrong side up.
- Well glue it with glue.
- Fold the tube.
- Do the same with two more sheets.
- Determine which tube will be the crossbar, and which are the supports.
- Glue the whole structure in the form of the letter P.
Important! If the edges are even, the hanger will stand and so. But you can make it more stable by drilling holes in two cubes and pasting the ends of the supports in them.
Hanger with hooks
The base for it is done in the same way as for a paper cabinet, that is, a template cuts out several layers for the main part. Layers are glued together, held under the press. Further the process is as follows:
- Paste the future hanger with colored paper or self-adhesive film.
- Use a universal adhesive to glue several laundry hooks onto it.
- Hooks hooks can be closed with miniature decorative elements( for example, beads or beads.)
Are you sure that it is possible to make a doll cabinet and its filling very simply, from improvised materials? Now start creativity, the process will surely be fascinating and interesting for you.do not forget to bring your child to him - let him also bring a couple of his creative ideas.