- Cast-iron bath
- Steel baths
- Installation of a bath on bricks: acrylic
. No matter how praiseworthy marketers modern shower cabins with a lot of "bells and whistles", the old kind bath does not lose its relevance. Only in a fragrant foam bath can you relieve fatigue after a difficult, eventful day. And it is not so important what exactly this product is - cast iron, acrylic or steel. It is important that the bath well withstands loads and does not bend. Unfortunately, the legs that come complete with the product can not please with great stability, so you have to make a more reliable support yourself. Theme of the article: how to install a bath on the bricks. If you do everything correctly, the problem of instability of the bath will cease to be actual for you forever.
to the table of contents ↑Cast-iron bath
Despite the fact that there is a large assortment of composite products on sale, cast iron baths, due to their good quality and durability, still remain popular. Of course, you can not discount such disadvantages as the large mass of the bath and the complexity associated with the installation. In addition, if you mount the bath on complete legs, the design is rather shaky. We have to build additional brick supports. For safety.
Important! A bath of cast iron can be installed by building brick props along the perimeter of the product, at the corners or edges of the container. To save bricks, most often make under the bottom of the bowl 2 supports. This is enough. In the middle part of the bowl the support is not needed, since cast iron is a rigid material. Therefore, under the bathroom it will be possible to equip the economic niche.
To ensure that the bath does not move during operation, the bricks are laid in such a way that a special bed is formed in the center. Sometimes on the Internet you can find advice that the rear support should have an excess over the front by 10-20 mm to create a slope towards the drain. In fact, this is superfluous, since the design of the bowl provides this bias. The discharge of water into the sewerage system will be unimpeded. In addition, the horizontal installation of the bath will help you avoid the difficulties with mounting the tiles.
Important! If you do not plan to use complete legs, and install the bath only on bricks, then it is recommended to lay the bath on a brick bed under the whole bottom.
For noise absorption experts recommend blowing the structure with foam from polyurethane.

Installation of a cast-iron bath on bricks - the procedure of actions
First of all, free the room from objects that can interfere with work. Before you put the bath on the bricks, make all the necessary measurements. To make the cast iron product do not damage the door jambs, pre-wrap them with a soft material.
You will need to work:
- Red bricks - 20 pcs. Cement brand 400.
- Sand.
- Tile adhesive.
- Mounting foam for sound insulation.
From the tools you need a conventional construction trowel and a container for the preparation of mortar.
Important! The work needs to be done carefully and carefully, because any alterations are associated with considerable difficulties.
So, the algorithm of actions:
- Put the bath in the room and install it on the complete legs.
- Assemble and assemble the siphon with overflow. It is better to do it right away. After the bathtub is mounted, it is much harder to do this job.
- Pour the bottom of the bowl with soundproofing material or blow out with polyurethane foam. It is important that the foam does not protrude beyond the perimeter of the product. Otherwise - to install a bath close to the wall will be quite difficult.
- Measure the distance from the bottom of the bath legs to the bottom of the bowl. This is the height of the support. Another distance - between the complete supports of the bath along the length, corresponds to the length of the bed. In addition, you need to take into account approximately 10 mm tolerances.
- Install the bathtub close to the wall with a slight inclination toward the tailgate. Place the marks on the marker.
- Prepare a mortar: 1 part of the cement is 4 parts of sand. After this, dilute the mixture with the required amount of water.
Important! If half the volume of cement is replaced by a tile adhesive, a plastic solution is obtained, which is much more convenient to work with. The construction is quite strong.
- Lay the masonry out of the brick, not forgetting the slope to the rear board. To form a bed from the sides, lay half the brick. The masonry will freeze for one or two days.
- Place a layer of mortar 20 mm thick on top of the brickwork.
- Apply a layer of tile adhesive to the vertical surfaces of the sides of the bath at the junction with the walls.
- Place the tub on a brick bed, pressing to the wall as hard as possible.
- Check the gradient. If necessary, adjust it with the legs or pieces of bricks.
- Throw the grout in a place where the bottom is adjacent to a brick base.
- Connect the siphon and check the operation of the bath. Fill the bowl with water, and then open the drain hole. It is necessary for the water to leave completely.
- Blow up the front part of the bottom with construction foam.
Important! The height of the side of the bath, installed on the bricks, should not exceed 700 mm. Otherwise - the use of the bathroom will not be comfortable.
to the table of contents ↑Steel baths
The order of installation of a steel bath on bricks is the same as for a cast iron product, but there are also some nuances:
- The steel product has thinner walls, it is much lighter than cast iron. Over time, this advantage can turn into a flaw. With a long bath, it can deform in the middle. Therefore, an additional support is made at the center of the product.
- The second point is the additional fastening of the steel bowl to the adjoining walls with the help of anchors or dowels with a diameter of up to 8 mm.
- If you absolutely want to equip a niche under the bathroom, you can use the "lodge" for a bowl, welded from steel pipes up to 25 mm in diameter.
- For better stability of the structure, put the steel product on the mounting foam layer.
Important! When installing a bath of metal, do not forget to connect the ground.
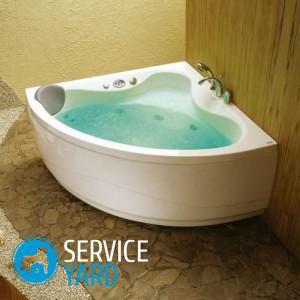
to the contents ↑Installing a bath on bricks: acrylic
A small weight of an acrylic product is a kind of nice bonus for installation. However, to think that such a cup does not need additional supports, at least, it is naive.
How to install an acrylic bath on bricks?
- The optimal option for an acrylic product is a brick bed along the entire perimeter of the bottom. Saving bricks in this case is rather doubtful, since the bowl can go cracked.
- It is necessary to provide a niche to provide access to the siphon so as not to disassemble the structure for repair work.
Knowing how to put a bath on the bricks, you will make the operation of this product much more comfortable. The work, as you see, is not difficult, it can be done independently.