Lighting in a garage or workshop is very important. To a greater extent, the level of injury when working with various tools depends on it. After all, it is one thing when a master strains his eyes to see a detail (attention is focused on this), and completely different when everything is visible without any problems. The solution to this issue is offered by the author of the YouTube channel. Sergei, who found a way to combine the base of a conventional light bulb with an LED spotlight.
Read in the article
- 1 What to make an adapter for a spotlight
- 2 Wiring installation, switching with plinth
- 3 Making a PVC base for the adapter
- 4 Fitting the base to the spotlight and assembling the adapter
- 5 Checking the adapter before connecting a spotlight to it
- 6 Assembly of the floodlight, power supply, some nuances
- 7 Advantages of an LED floodlight over a conventional lamp
- 8 Let's sum up
What to make an adapter for a spotlight
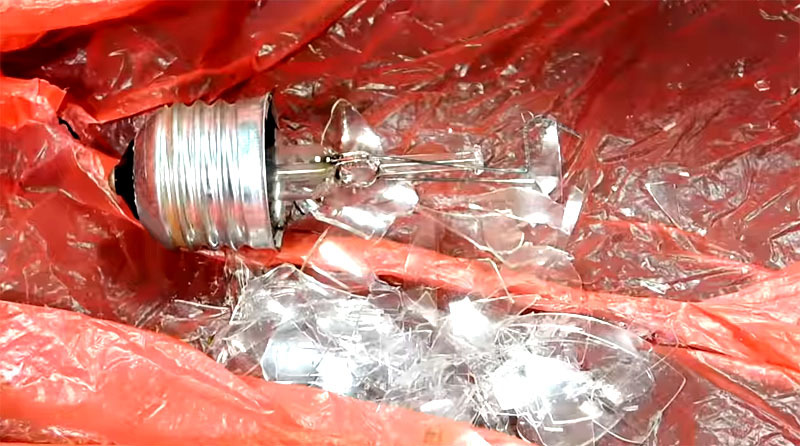
All LED floodlights are supplied without any plugs or sockets, so you need to consider how to attach this or that adapter to them. The most convenient option would be to adapt the lighting device to the standard E27 cartridge, provided that its weight is small. To do this, you need a base from a conventional incandescent lamp, which has already burned out.
In order not to get injured, you should wrap the burned out light bulb with a rag, and then gently break the glass of the bulb with a hammer. The rags will prevent the fragments from scattering and will not allow the person to cut themselves. After the flask is broken, it is necessary to remove all glass debris with pliers. When doing this work, do not forget about personal protective equipment such as gloves and glasses.
Wiring installation, switching with plinth
In order to be able to easily connect the spotlight, it is necessary to mount the wiring. Here, not only a soldering iron will come in handy, but also an electric drill. First you need to drill a hole in the central contact of the base (drill with a diameter of 1 mm), into which a tinned wire is drawn from the inside and soldered. The excess that sticks out of the center is easily bite off with side cutters.
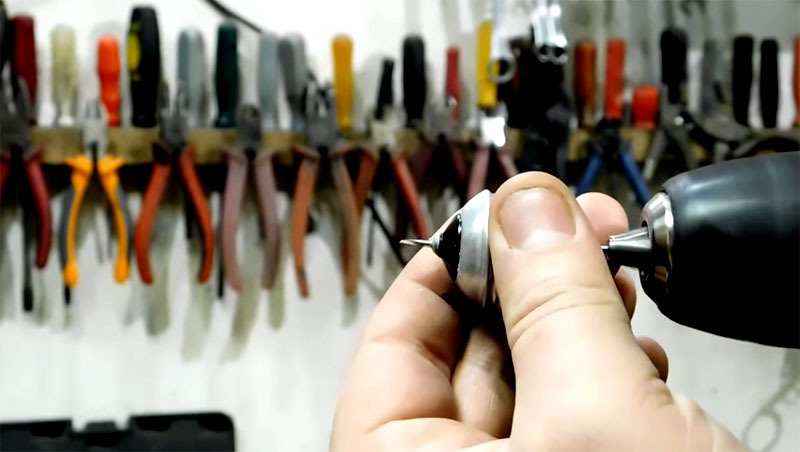
It is advisable to use wires of different colors. The fact is that the adapter will not always be used to turn on the spotlight. It can also be used for other electrical appliances, where accurate knowledge of the phase and neutral conductor is required when turned on. Again, we are talking about correctly mounted systems, when the phase is suitable for the central contact of the cartridge, and the neutral is suitable for the screw part.
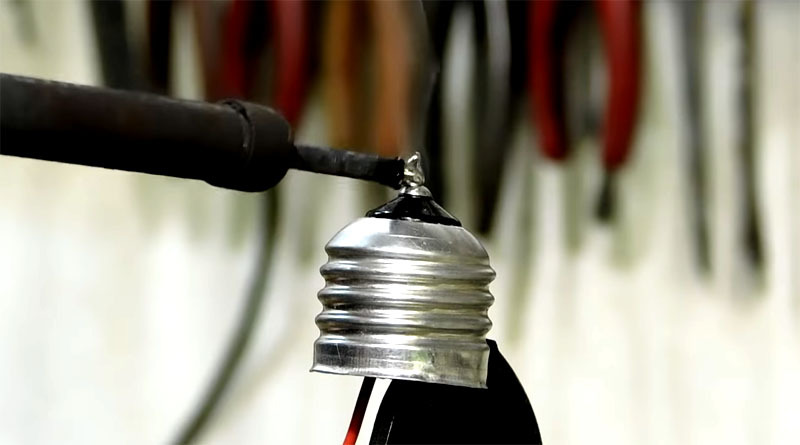
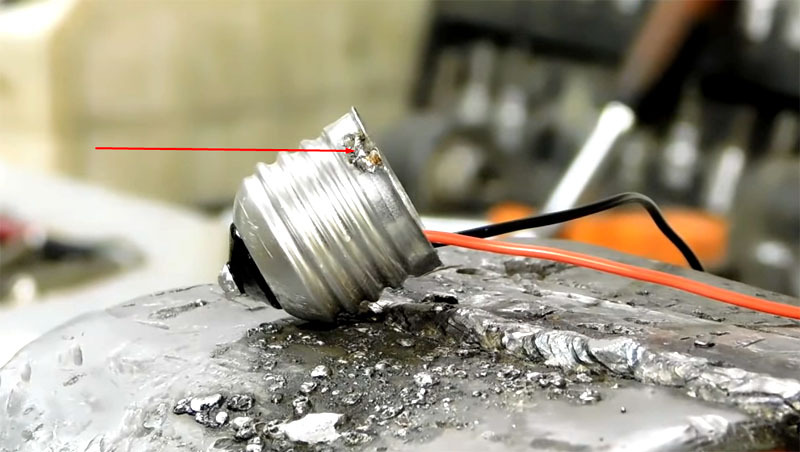
Further, with the same side cutters, a small notch is made on the side. The second wire is clamped into it, which is also soldered. The soldering here must be of high quality. Even though LEDs do not consume a lot of power, poor contact can start to get warm.
Making a PVC base for the adapter
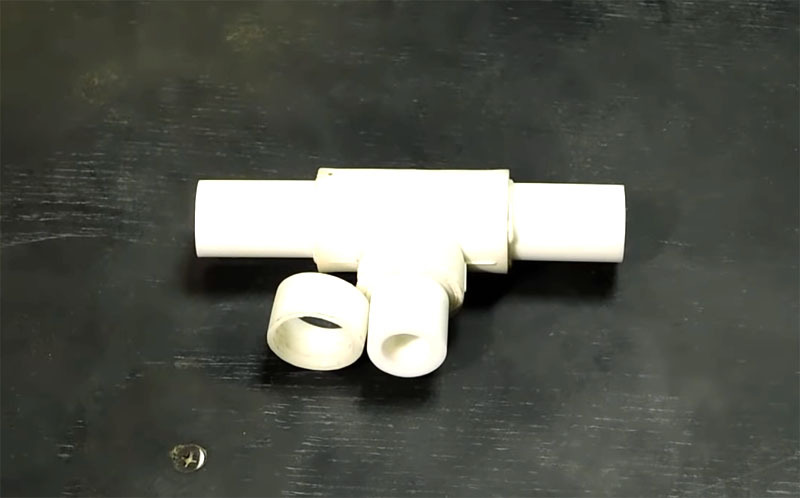
For the manufacture of the base, you will need a tee with PVC pipe sections already soldered into it. Of course, you can make a similar part yourself, but it is better to contact the plumbers and wait a bit. Very often, these "parts" can be found after training novice plumbers to solder pipes. Yes, and professional masters make mistakes, you can't do without it. So it's worth spending a little time waiting. Although the material on such a basis will take a minimum, which means that in finances (if everything is acquired), large costs are not expected. Well, the absence of a soldering iron (ironing) for PVC pipes is not a problem at all. Any plumber in the slightest will help you with such a trifle.
Fitting the base to the spotlight and assembling the adapter
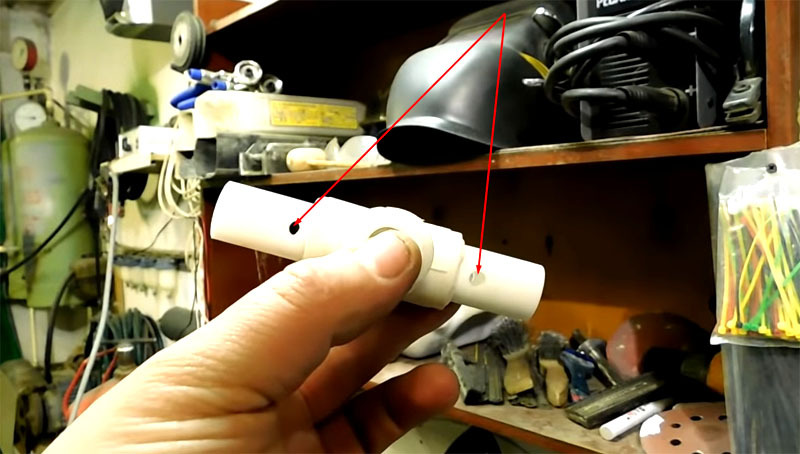
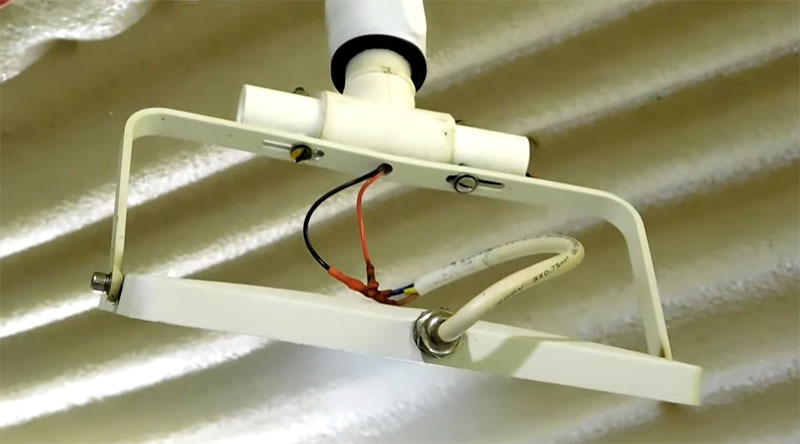
In order to secure the plastic tee to the bracket of the spotlight, a couple of holes are required. The base is attached to the bracket, the places of the holes are marked, after which it remains only to drill them in the plastic pipe. This is easy to do with a drill or screwdriver with a 5 mm drill.
The next step is to stretch the wires from the base into the base. They must pass through the central part with an outlet to one of the sides. The base itself is firmly mounted on the central section of the plastic tee. Additionally, it can be fixed with a hammer and center punch. It will not hurt even to screw a small screw through the base into the plastic, which will prevent the metal from turning on the plastic.
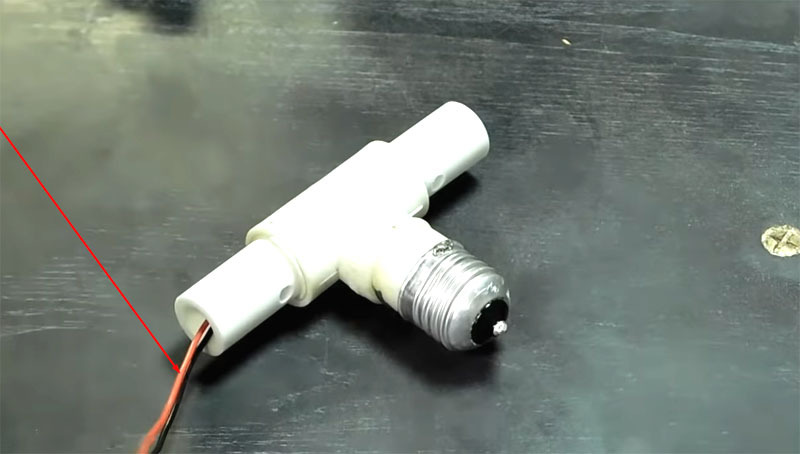
Checking the adapter before connecting a spotlight to it
Before connecting the floodlight to the adapter and screwing the base into the socket, it is necessary to check the assembled product. For these purposes, you can use a conventional tester or multimeter set to short circuit test mode. First, each wire is checked for integrity, after which the resistance is called between one wire with the contact of the other on the base. Here the device should show zero values. In fact, these are elementary activities, but some novice masters may not know about them.
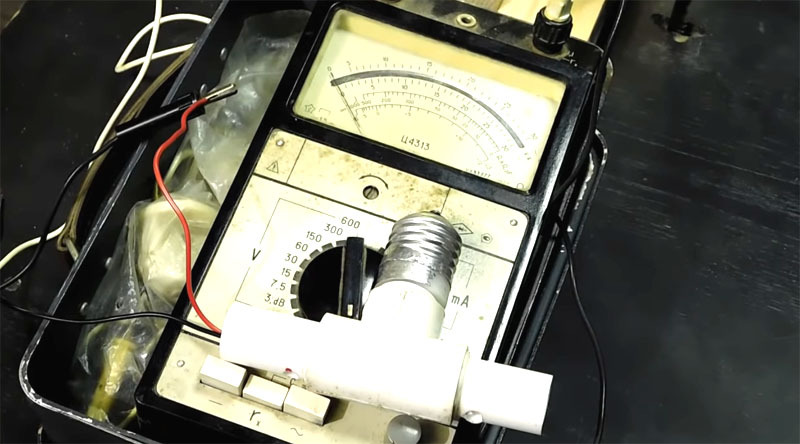
If everything is in order, you can proceed with the final assembly and supplying power to the floodlight.
Assembly of the floodlight, power supply, some nuances
To connect the spotlight and the adapter, you can use ordinary bolts and nuts that will fix the parts through the previously drilled holes in the plastic. By the way, the cartridge on the ceiling must be secured thoroughly. Even if the LED floodlight is lightweight, it is still heavier than a conventional incandescent lamp.
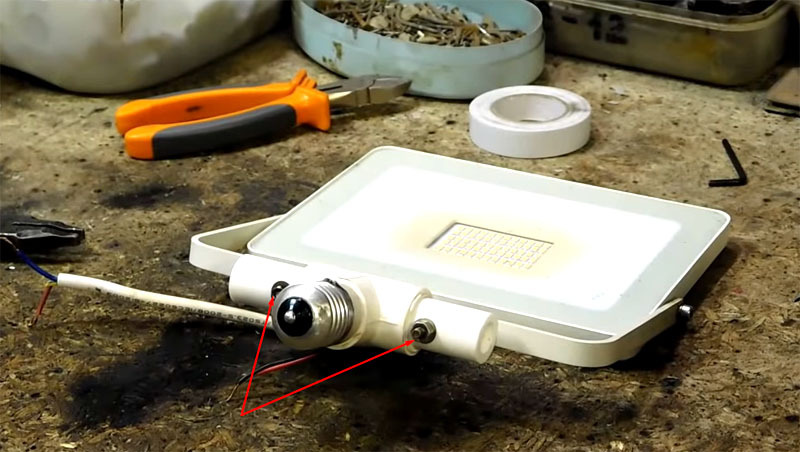
After the elements are bolted together, you can proceed to connecting the power wires. Here it is quite possible to do with the usual twisting, insulating the contacts with a heat shrink tube. This method is quite reliable, but it has some drawbacks.
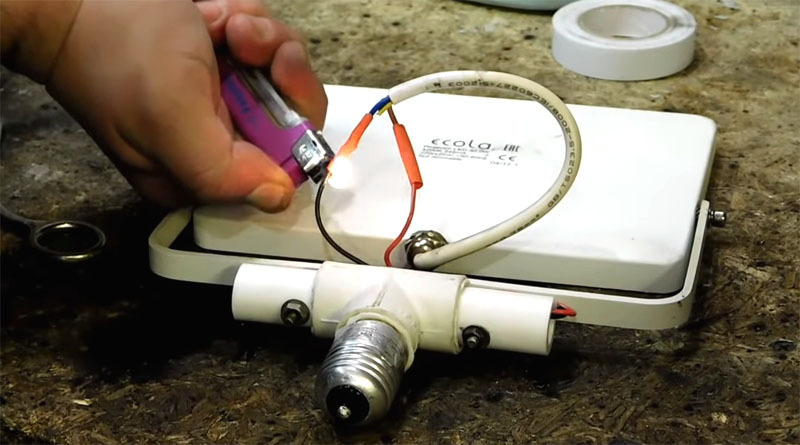
This option is suitable if the connection is not planned to be disassembled. Although in such a case it is better to completely solder the twist. But it is possible that from such a tee there will be additional conclusions like an outlet or another lighting device. In this case, it is best to use terminal blocks, and the screw ones will be out of place here. WAGO terminal blocks are much more convenient to use. If you use reusable products, then the connection can be disassembled and assembled as quickly as possible.
Advantages of an LED floodlight over a conventional lamp
If we consider just such a connection, then there are a lot of advantages. Tight fixation of the cartridge will allow you to change the direction of the light flux in the desired direction, however, only in one plane. But if we supplement the connection with two plates fastened with a bolt in the center, it becomes possible to adjust it already in two planes. The lighting gets significantly brighter with less energy consumption, and this also cannot be discounted.
Let's sum up
There are a lot of ways to connect a spotlight in a garage. However, if you need a stationary installation of an LED device with the ability to turn off, this option is very good. In addition, it does not require any financial investments, which can also be attributed to advantages. There is also the option of connecting through an outlet with the subsequent fixation of the spotlight in the right place, but here there is the problem of an interfering wire, which also needs to be removed somewhere. One more thing. In the version proposed today, you can always replace the spotlight with an ordinary lamp within a minute, if suddenly it will be necessary.
We really hope that the information presented today will be useful not only for beginners, but also for experienced home craftsmen. After all, a lot depends on the illumination of the workplace, and first of all, the safety of work. Despite the fact that we tried to present everything as detailed as possible, it is possible that something was overlooked. If so, we ask you to summarize the issue in the discussions below. HouseChief editors will definitely clarify all the incomprehensible moments as soon as possible.
There you can also comment on the article or express your personal opinion about whether it is worth making such adapters, or whether it is easier to purchase them at the nearest store. I would also like to remind you about the evaluation of the article. Please do not forget about her, because any opinion is important to us.

