CONTENT
- 1 Rules for the selection and preparation of an installation flash drive
- 2 Creating a bootable USB flash drive with Windows 10 using a proprietary utility
- 3 Burn Windows 10 image by copying to media
- 4 Other ways to create a USB flash drive with a Windows 10 image
- 5 Why Bootable Media Creation Is Interrupted: List of Popular Errors
Rules for the selection and preparation of an installation flash drive
The first thing that users pay attention to is the manufacturer, as well as the amount of free space on the gadget.
USB stick technical parameters
If we are trying to create a Windows 10 image, 4 GB options will not be enough. Indeed, in addition to the downloaded operating system, you need to download drivers and some software.
Windows 10 has great capabilities, and accordingly, it will have an impressive weight. For such purposes, you should purchase a device from 8 GB of memory.
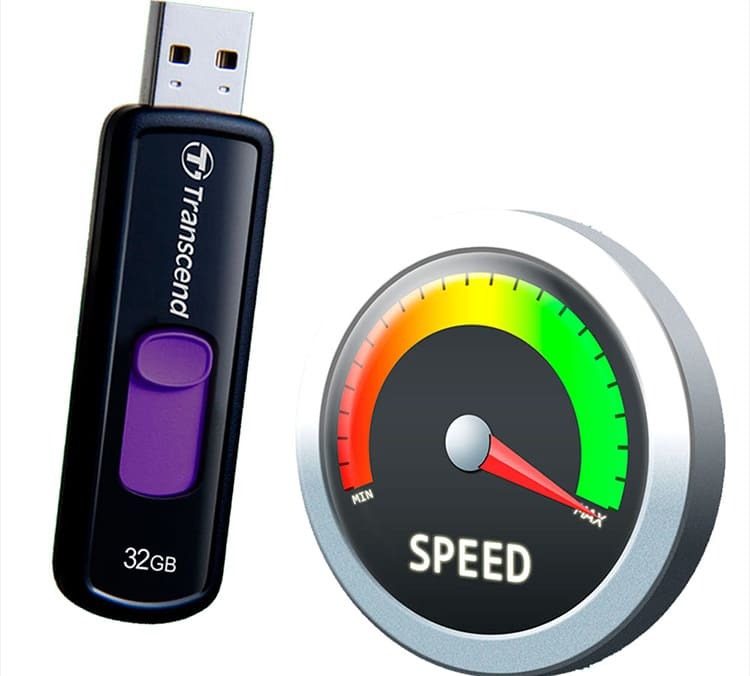
As for the speed characteristics, the most successful are the options that function through USB 3.0. This is a relatively updated type of slot that is present on every new laptop or system block. If previously there were standard USB 2.0 connectors, and their write speed was 21 Mb / s, then the new indicators for the recording process are 30 Mb / s.
At the same time, the speed of reading information for the updated USB 3.0 is 68 Mb / s, and 34 Mb / s for a connector with 2.0 parameters. This is a significant difference that can be decisive in the process of playing a bootable USB flash drive by computers.
Existing ways to format bootable flash drives
To ensure that there is no extra data on the drive, except for the Windows image, it is pre-cleared. As a rule, manual deletion is not enough, so experts carry out full formatting. There are several methods to help you do this.
- Directly at the time of recording. When the program image recording starts, the system automatically prompts you to format the storage device. It is better not to ignore this approach, since the user does not need to manually set the disk cleanup parameters.
- The traditional way before you start recording. All you need to do is open the drive's context menu, then click on the "Format" button. Further, it remains only to select the action format "NTFS" or "FAT 32".
- Through the Rufus app. This method is similar to the first, however, the user does not need to agree with the action, since the program parameters produce formatting by default.
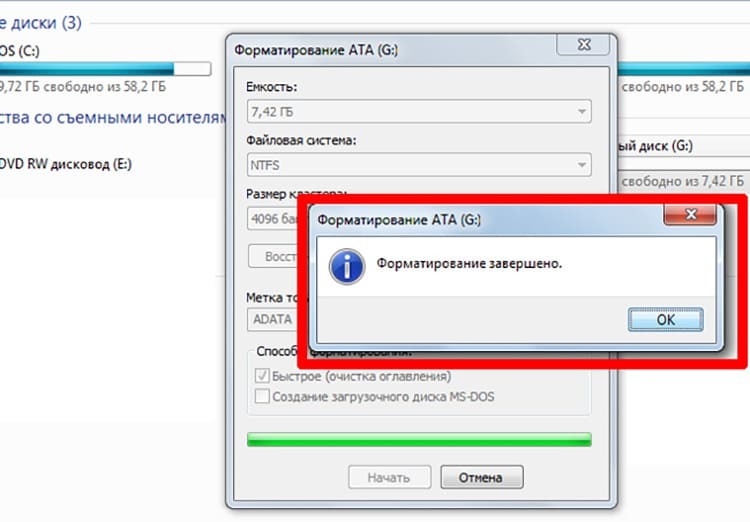
Do not forget that you need to start the process of deep cleaning the flash drive only after making sure that all information that may be useful is previously saved on a computer or other carriers.
Creating a bootable USB flash drive with Windows 10 using a proprietary utility
Among the many software tools, there is a special proprietary application through which it is easiest to prepare an operating system image. This is because the software does everything automatically without the need to download the software. Let's see how it works in practice.
- Prepare a USB stick with at least 8 GB of memory. Be sure to do manual formatting, making sure that no important information is left on it. Then run the Windows 10 Installation Media Creation Tool.
- Insert the USB drive into the connector, and then check the box next to the entry "Create installation media for another computer." Confirm your action by clicking on the "Next" button.
- In the next window, three free fields will appear, in which the OS type, architecture and release series are written. All fields are required. Click on the Next button again.
- On the next page of the program, select the bootable media. Place the marker next to the USB item, click "Next" again.
- Select the required flash drive from the entire list (if there are several of them in the connectors), then confirm the action and wait for a certain period of time. After it expires, the program will give a signal that the creation of the Windows 10 image is ready.
The use of this utility is allowed solely for the formation of the recovery program Windows 10, while the computer must be connected to the Internet.

Burn Windows 10 image by copying to media
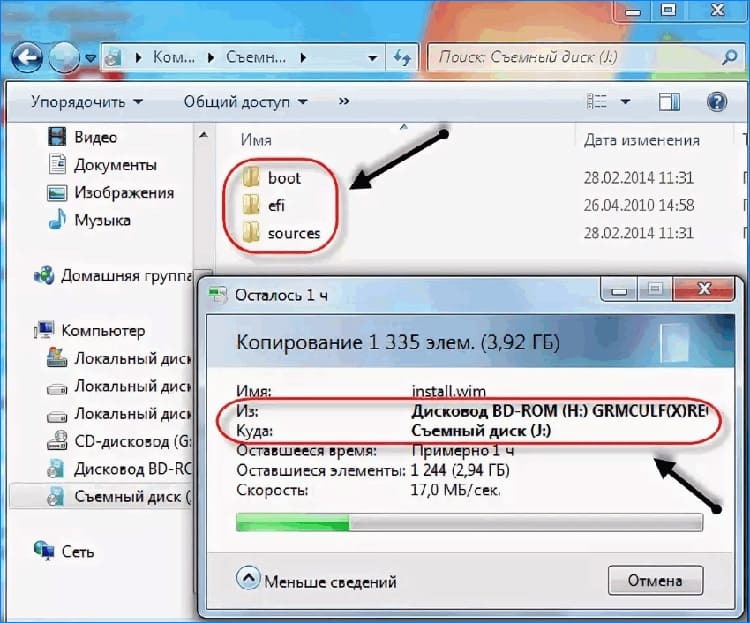
Let's assume that a specific program image exists on the computer in a specially designated folder. To transfer it to a USB flash drive, you do not need to know special rules and follow special requirements. The whole algorithm is built in a few simple steps.
- Open the operating system image in a file.
- We format the USB flash drive installed in the connector according to the Fat format type
- Next, we open the drive.
- We place the flash drive window and the image window side by side on the desktop.
- We copy the information by dragging the image from one folder to another.
- We are waiting for the completion of the duplication process.
As a result, we get a fully working bootable USB flash drive. Now, with its help, you can not only restore the corresponding operating system, but also install it on a PC.
GOOD TO KNOW!
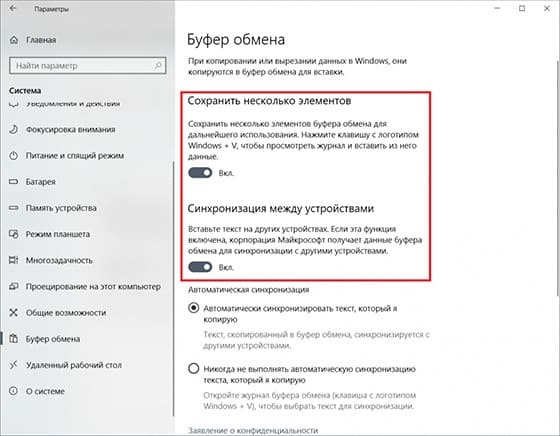
In case there is a problem with the clipboard performance on the PC, this method is not recommended. This can lead to incorrect transfer of files and folders.
Other ways to create a USB flash drive with a Windows 10 image
In addition to the simplest methods, in which almost no user participation is required, there are also separate options for downloading the Windows 10 OS image to a removable USB drive. The following methods will be relevant if, for some reason, it was not possible to use the previous two. Their inoperability may be due to the imperfection of the computer and the low speed of the Internet.
How to create a Windows 10 image recording through the Rufus program
Initially, by downloading this program and granting it the right to use personal computer data. The advantage of this software is its fast work with files and large-scale images.
- We connect the flash drive to the appropriate connector and launch the program. It automatically selects all the USB disk settings. The user only has to click on the "Select" button to find the corresponding ISO file.
- Find the operating system image in the PC directory, click on it and press the "Open" button in the dialog box
- Next, click on the "Start" button and wait until the formatting and the process of recording the bootable USB flash drive image are finished.
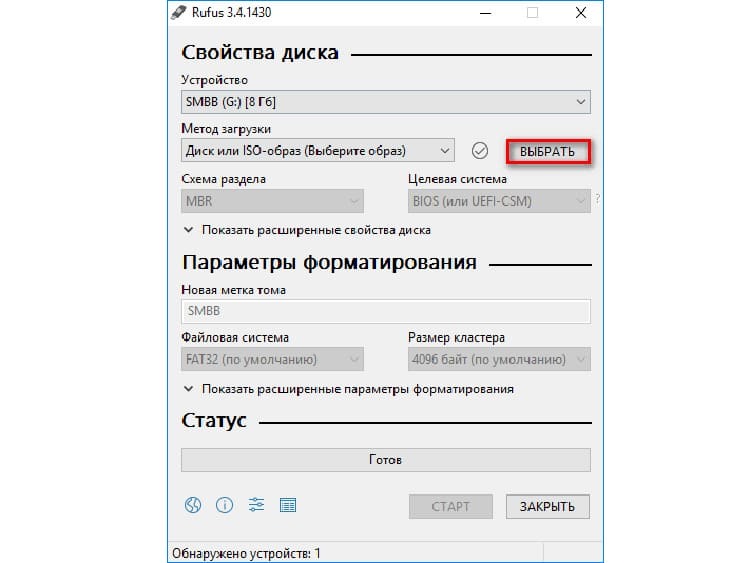

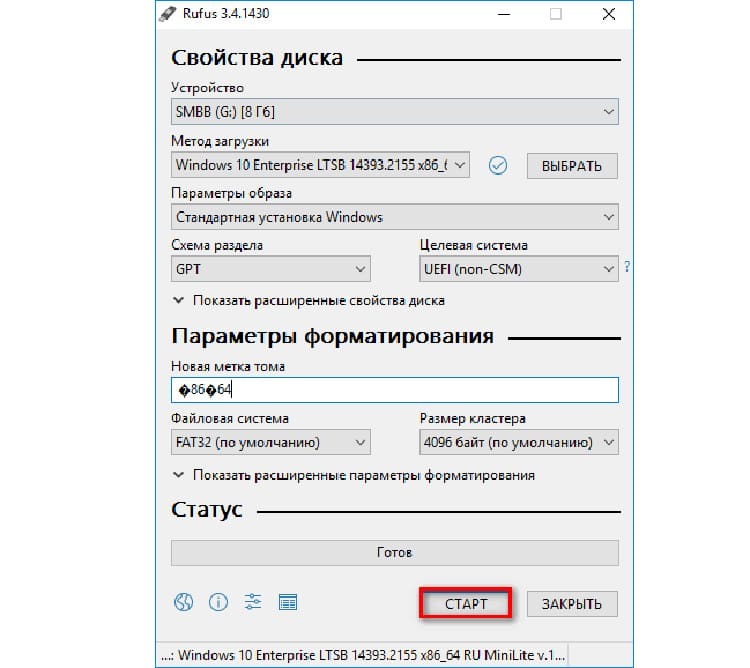
After completing the manipulations with the drive, you can test the functionality of the software on any laptop or PC with a working BIOS platform.
Using USB Download Tool to Burn Windows 10 Image
In order to use the specified utility, it is necessary that the size of the drive is at least 6 GB (free). It is not difficult to use the program, since only one interface is used to confirm all actions.
- We launch the program and prepare the downloaded file.
- Click on the "Browse" button to select the appropriate image.
- Next, click on the "Next" button.
- A window appears where you need to select "USB Devise".
- We confirm the need for formatting twice and wait for the end of the recording.
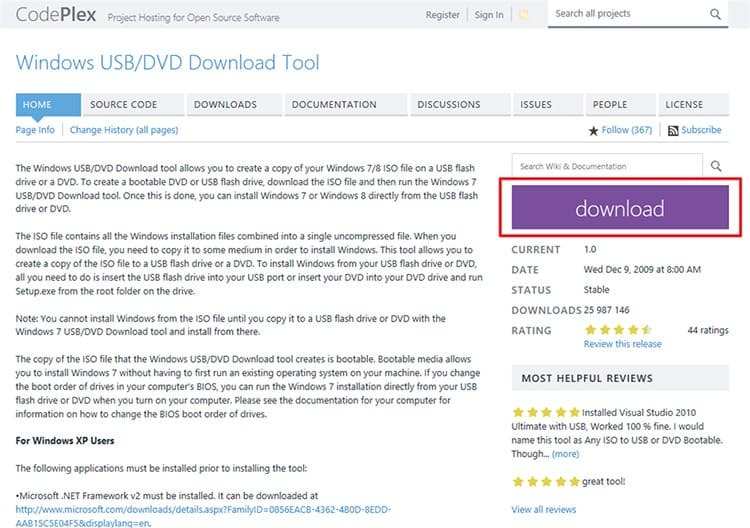
After that, we remove the media from the slot and use it for our own purposes.
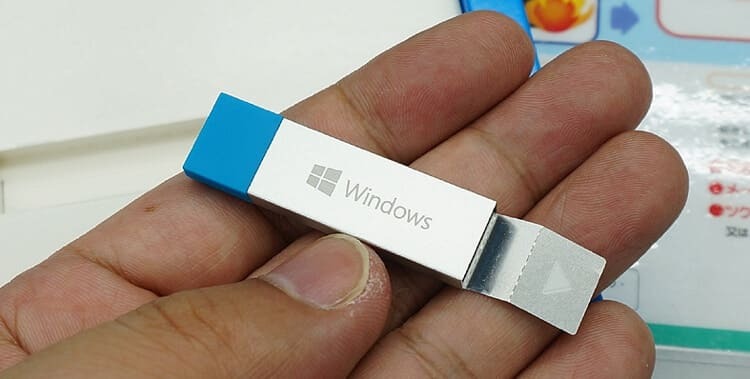
Creating a bootable USB flash drive with Windows 10 through the Ultra ISO program
If the user is just an amateur and does not plan to repeatedly use the proposed utility, then it is enough to download its free version with a trial period for a week. To create an image, proceed as follows.
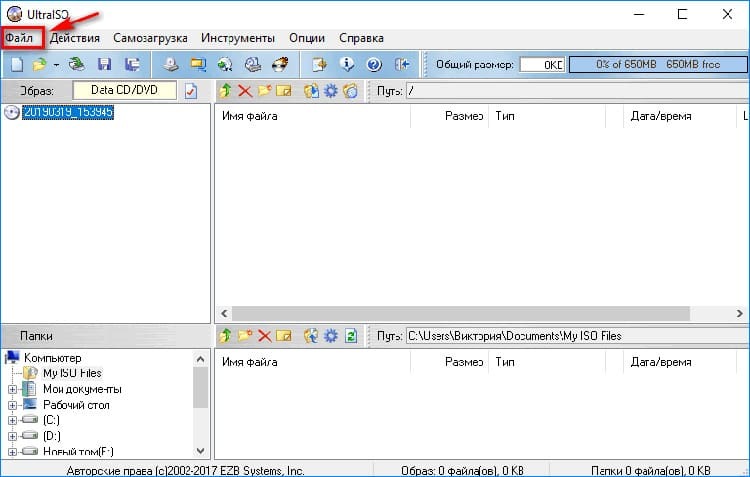
- We load and run the program on the computer, after placing the removable media in the appropriate slot. Next, in the main menu of the program, open the "File" item.
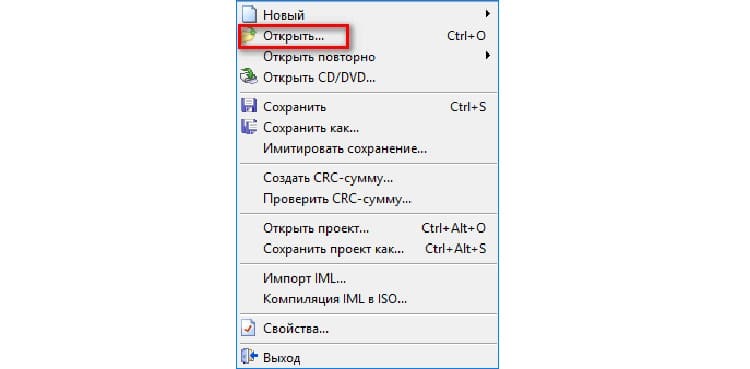
- In the pop-up context menu, click on the "Open" item.
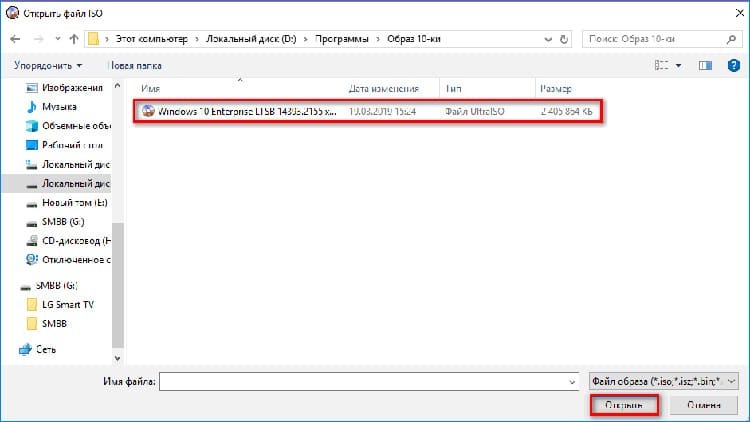
- Using the internal folders of the computer, we find the required image in the "ISO" format. Double click on it or click on the "Open" button.
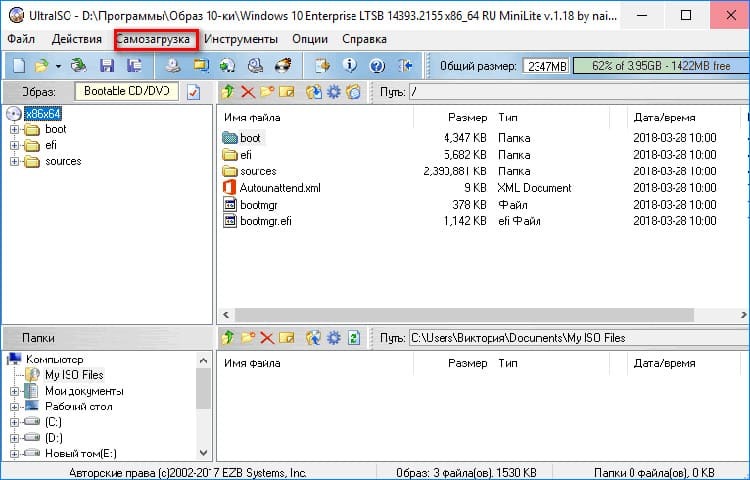
- Please note that all folders and files contained in the image have been copied into an empty window. Now click on the "Bootstrapping" button.
- Click on the button in the pop-up menu "Burn disk image". The next window opens, where you need to set all the settings, as shown in the photo. Press the button "Write".

After that, a message will appear stating that all data from the flash drive will be deleted. We confirm our consent and wait for the end of the recording.
GOOD TO KNOW!
Watch the status of what is happening in the lower block of the program. The final phrase should be: "The recording was completed successfully!".

Method of downloading an image to a USB flash drive using WinSetupFromUSB
This utility works in the same way as Rufus. Both software have a similar interface, so all the user needs to do is to repeat all the settings from the method described earlier. The only difference between the programs is the menu language. WinSetupFromUSB only works in English.
How the Media Creation Tool works for recording windows 10
An excellent analogue of some of the previous tools. The program works on a Russian-language interface, therefore it is convenient for most users. If you need to record an OS image of the 10th version, you need to take into account that the platform must be updated.
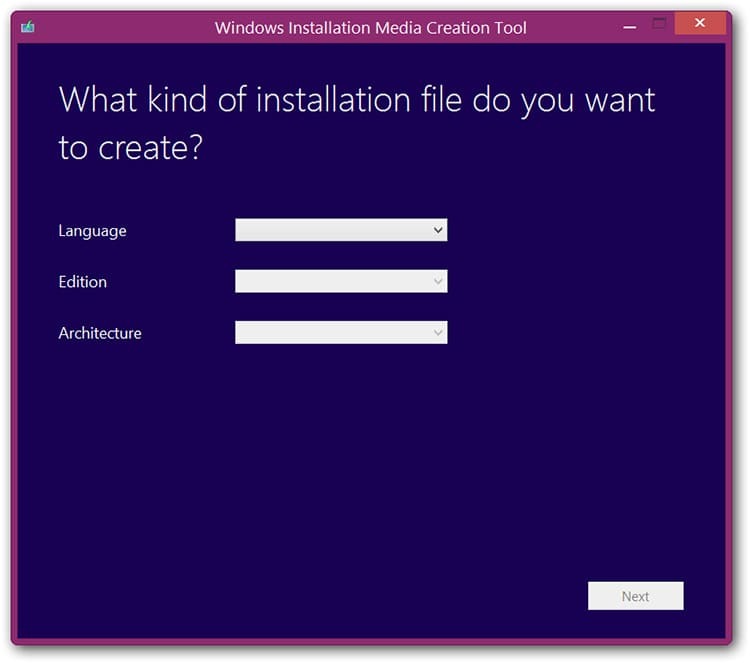
All you need to have is a USB flash drive installed in the connector and a computer connected to the Internet. The program will independently offer the ability to choose a recording version. Here you need to specify the path to the source and start the process.
How to create a USB flash drive with a Windows 10 image boot via Daemon Tools software
Any version of Daemon Tools can be used to create an image of an operating system file. In addition to its main function, the application burns files to CD and DVD media. Consider the write instruction.
- Open the program and click "Create disk image".
- We indicate the data for saving the image, as well as the type of media used.
- Find the "Open Image" icon, specify the path to the file and press the "Burn" button, then, after making sure that the parameters are correct, the "OK" button.
- After some time has elapsed (usually 15-20 minutes), the program will notify you that "The operation has been successfully completed."

In the application settings, it is possible to check the recorded image for errors. It is recommended to use it to avoid various crashes.
Why Bootable Media Creation Is Interrupted: List of Popular Errors
Incorrect image writing to USB media most often occurs due to hardware errors. This is due to the incorrect installation of the software, as well as the incorrect choice of the formatting method.


The recording will be interrupted in the following cases:
- the image format is not suitable (must be strictly ISO);
- the size of the application is too large in relation to the volume of the drive;
- incorrect settings and recording speed;
- the active partition on USB does not work (you can see it in the "Disk Management" item).
You can try to fix the defect in Flash media by formatting it in the appropriate format. However, if this does not help, then the problem has arisen due to an internal malfunction of the removable disk.
Dear readers, if you have any questions, ask them in the comments. Our team will contact you quickly and help you with advice.


