The kitchen apron is designed to protect the part of the wall between the countertop and the upper tier of the headset. The design of this site must be carefully thought out so that it organically fits into the interior ensemble. It is equally important that the apron is resistant to sudden changes in temperature conditions, changes in humidity, and aggressive chemical cleaning agents. The fact is that this element is located in the immediate vicinity of the sink, stove, countertop, on which the products are processed. It acts as a protective screen that blocks oil and water splashes, food particles, and earth from falling on the wall. That is why, when installing a kitchen apron, you must choose waterproof, clean-resistant materials.
Content
- Features and functions of a kitchen apron
- Calculation of the width and height of the apron
- Types of kitchen aprons - their advantages and disadvantages
- Ceramic tile
- Glass apron
- Plastic apron
- Natural and artificial stone
- Chipboard apron
- Apron made of MDF
- Metal
- Mounting methods
- On reiki
- To the kitchen skirting board
- On liquid nails
- DIY workshops on installing aprons from different materials
- Preparing the wall
- Installing a stone apron
- Installation of glass panels
- Installation of an apron made of chipboard and MDF
- Fastening plastic panels
- Copper and stainless steel apron fixing
- Conclusion
Features and functions of a kitchen apron
The apron that protects the area above the work surface must be organically integrated into the interior. It should be in harmony with the rest of the environment, maintain the style and mood of the room. An apron can become the main accent against the background of a seasoned headset.
First of all, this element is introduced to protect the wall. However, the aesthetic component is not alien to him either, so every now and then new original ideas are born regarding the design of this wall. But creativity has the right to exist only if it does not contradict the basic requirements. He must have:
- heat resistance - if there is a built-in cooker. Even though induction cookers do not heat up, the wall surface next to them may suffer from the neighborhood with boiling pots and hot pans, be attacked by fat and hot pair;
- moisture resistance - there is plenty of dampness in the kitchen, and especially in this area. This includes splashing water from the sink and steam from cooking food;
- environmental friendliness - in case of possible contact with products, it should not saturate them with toxic secretions;
- hygiene - the surface absorbing moisture, grease and dirt is a favorable environment for the development of bacteria and fungus. Therefore, the finish must have a dense structure and a moisture-resistant coating;
- maximum fire resistance - this is especially true in close proximity to open fire of gas burners;
- be easy to clean - the surface texture should not create obstacles during cleaning. This also applies to resistance to household chemicals, mold resistance;
- aesthetic appeal - the finish should match the headset, emphasize the dignity of the design.
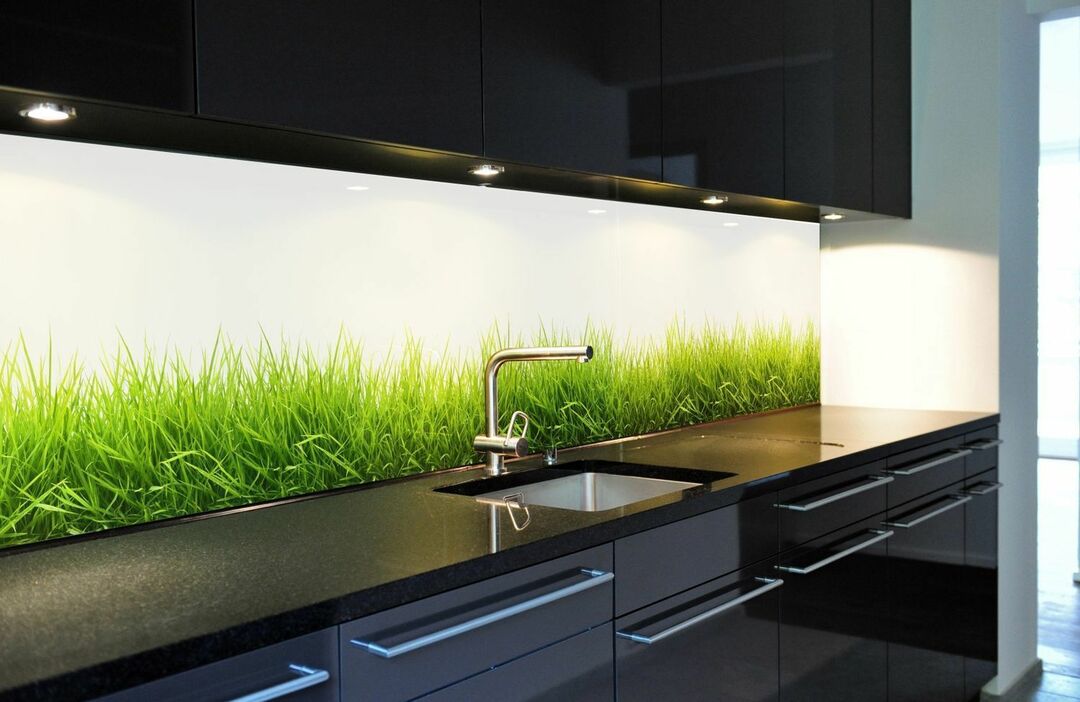
Calculation of the width and height of the apron
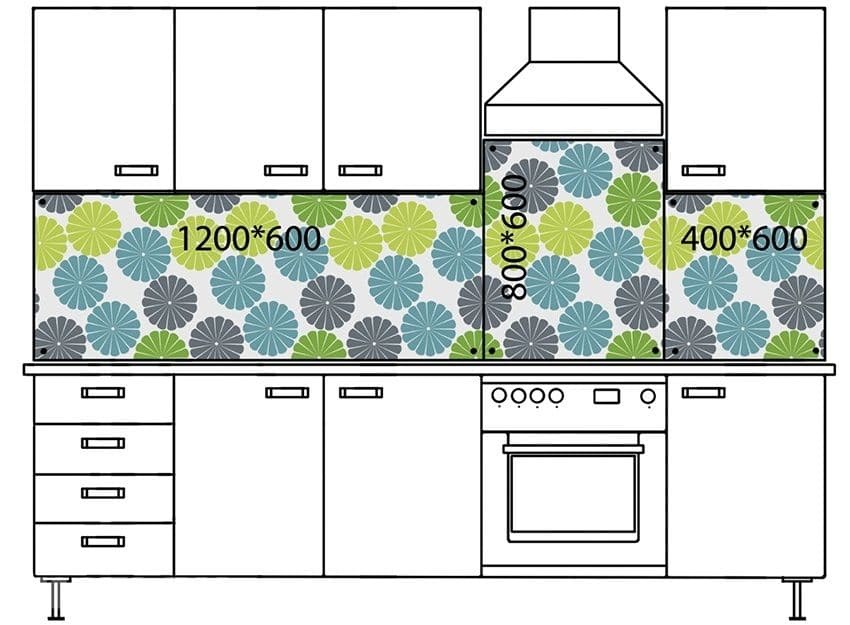
The width of the apron depends on the size of the kitchen area. With height, the situation is somewhat more complicated. This parameter is influenced by the following factors:
- the distance between the lower and upper tier of the headset. The height of this gap is most often no more than 112 cm;
- the presence of a domed independent hood - in this place the apron is laid out to a greater height, and if skinals are used, the hood itself should be placed at a lower height;
- design features of the upper cabinets - if the facades are equipped with lifting mechanisms, a low apron with dimensions of 45-55 cm looks great.
Types of kitchen aprons - their advantages and disadvantages
To create an apron, you can use a variety of materials from ordinary tiles to stainless steel and natural stone.
Ceramic tile
Tile is a practical dense material with a low porosity structure and protection in the form of a top layer of glaze. Does not react to temperature changes, does not absorb moisture and detergents, is durable, decorative, capable of serving faithfully for many years. There are a huge number of variations of this material on the market of all kinds of shapes, with a variety of textures, colors and prints. These qualities make it a sought-after and popular option for finishing the kitchen backsplash area. The only weak point of the tile coating is the seams, which must be regularly cleaned and treated with antibacterial agents. Another drawback of this type of finish can be considered the complexity of DIY installation.

Ceramic tiles should not be used to cover a wall in a wooden house. These two materials have different coefficients of moisture absorption and thermal conductivity, which can provoke destruction of the finish.
Glass apron
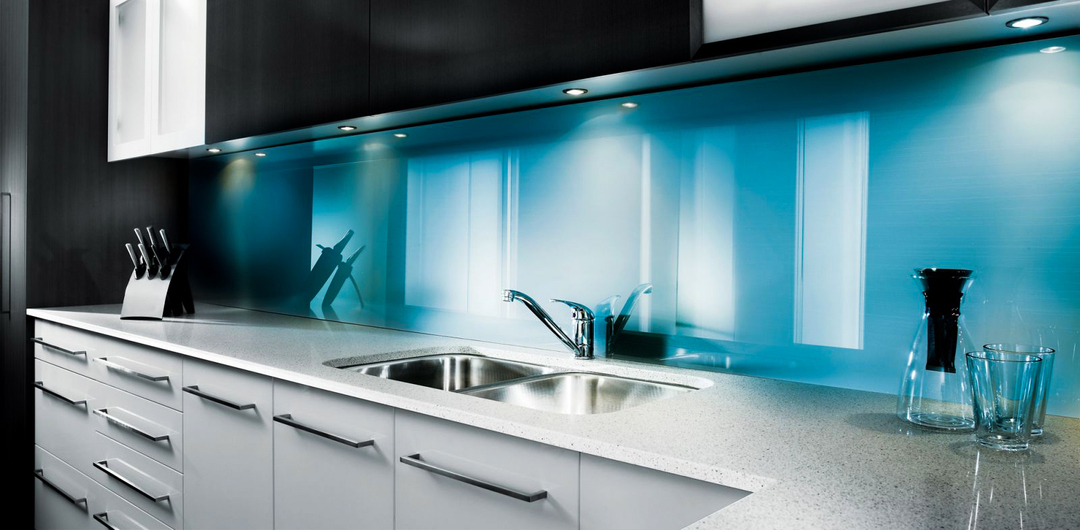
Glass is as practical as ceramics, and its popularity has just gone off scale lately. The ability to create a seamless apron makes it possible to significantly simplify the installation of the skin - the so-called tempered glass canvases, to facilitate the maintenance of the coating.
Glass aprons do an excellent job with moisture and dirt. They are easy to clean with special detergents and cleaners. They are characterized by excellent:
- hygiene;
- fire resistance;
- decorativeness - when they are finished, they use engraving, painting, toning, matting, photo printing.
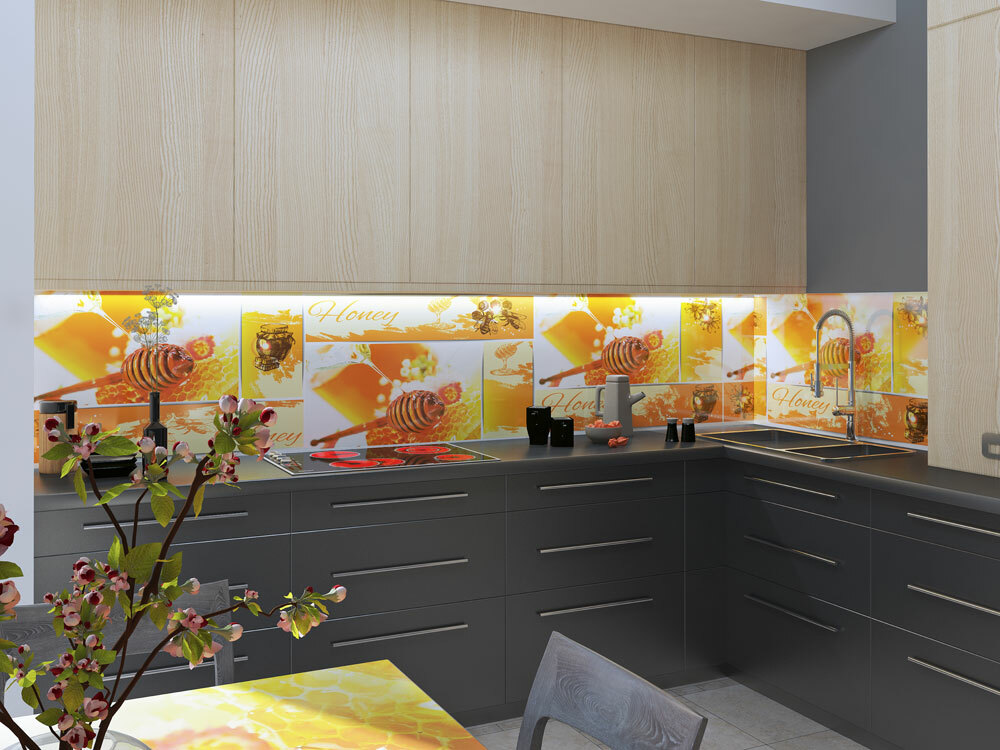
The surface of the skin can be glossy, matte, smooth or embossed. Photo printing makes it possible to apply any image, which allows you to create unique interiors. Approximately the same effect can be achieved by pasting images on the wall under transparent glass. The advantage of this method is that you can change the design at any time with minimal investment - bright pictures are often boring quickly. In addition, it will allow you to save a lot - photo printing is an expensive pleasure.
It is believed that glass is inferior to ceramics in strength. In fact, it is very difficult to break tempered glass or laminated glass. But if this does happen, no threat to your safety will arise - fragments of the triple glazing will remain on the film, and fragments of tempered glass will not injure you, since they do not have sharp edges.
The only drawback of the material is that any drops, streaks and specks on the glass surface are striking.
Plastic apron
An apron made of acrylic, PVC, polycarbonate is an affordable, attractive option. However, it is much inferior in durability to previous materials. Plastic surfaces perfectly protect walls from splashes of grease and water, but at the same time are very sensitive to high temperatures and cleaning agents.
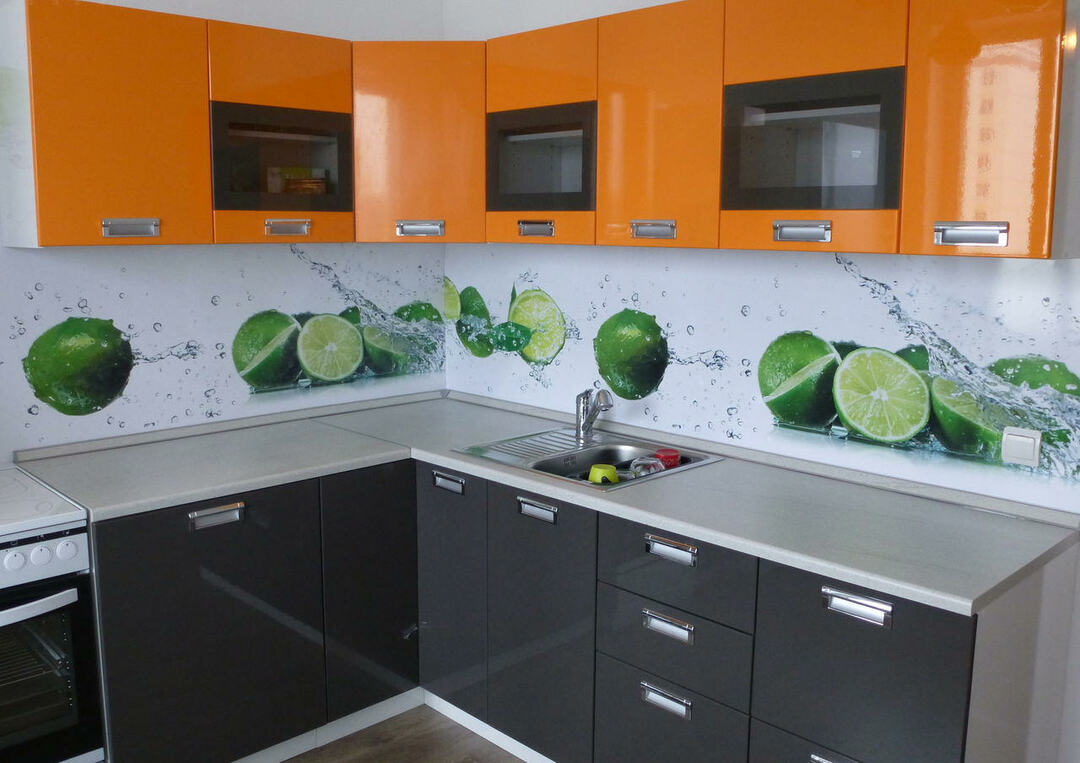
Do not install the plastic panel in the apron area near the gas stove. When buying, pay attention to the coefficient of thermal expansion - it should have a minimum value. This is the main condition in order to avoid destruction of the panel due to temperature extremes.
The following types of plastic are suitable for wall decoration:
- ABS - polymer resin is used for the manufacture of panels. The result is a plastic material that can withstand certain mechanical stress. It tolerates moisture and high temperatures well. However, it should be remembered that heating should not exceed 80 degrees. Do not be afraid of damage to the material due to contact with detergents. He is not afraid even of such chemicals, which contain acid. On the ABS apron, you can apply a pattern that will not fade over time, provided there is no constant and directional exposure to ultraviolet radiation. Installation and dismantling of an apron made of such material will not cause any difficulties, but the base should be as flat as possible, otherwise "humps" will form on the panel;
- PVC is the most readily available type of apron panels. The cost per square meter ranges from 160-180 rubles. The material is presented in the form of strips and sheets. PVC aprons are decorated using offset printing. The top coat of varnish protects the image. You can choose an option that imitates brickwork, wood or natural stone. To clean the panels, you can use any cleaning agents, including abrasive ones. It is quite difficult to remove dirt from the seams, therefore, fungus may form in them. The material is afraid of shocks and high temperatures - it deforms when heated. This material cannot boast of durability.
The panels are easily mounted on liquid nails, hiding minor imperfections of the base. Installation can be easily done by hand.
- polycarbonate - has a smooth surface, making it easy to clean. Another advantage is resistance to high temperatures and the absence of toxic emissions during heating. It is not difficult to build an apron from this material. The panels are very easy to cut and glue. If the walls are not even enough, you can fix the plastic sheets with self-tapping screws. The colors do not lose their brightness even when exposed to sunlight.
Natural and artificial stone
The advantage of natural and artificial stone is in its decorativeness and strength characteristics. However, not every material is suitable for creating a kitchen backsplash. For example, natural marble requires regular polishing, which is inconvenient for vertical surfaces. In addition, such a coating quickly absorbs dyes and impurities, which cannot be cleaned.
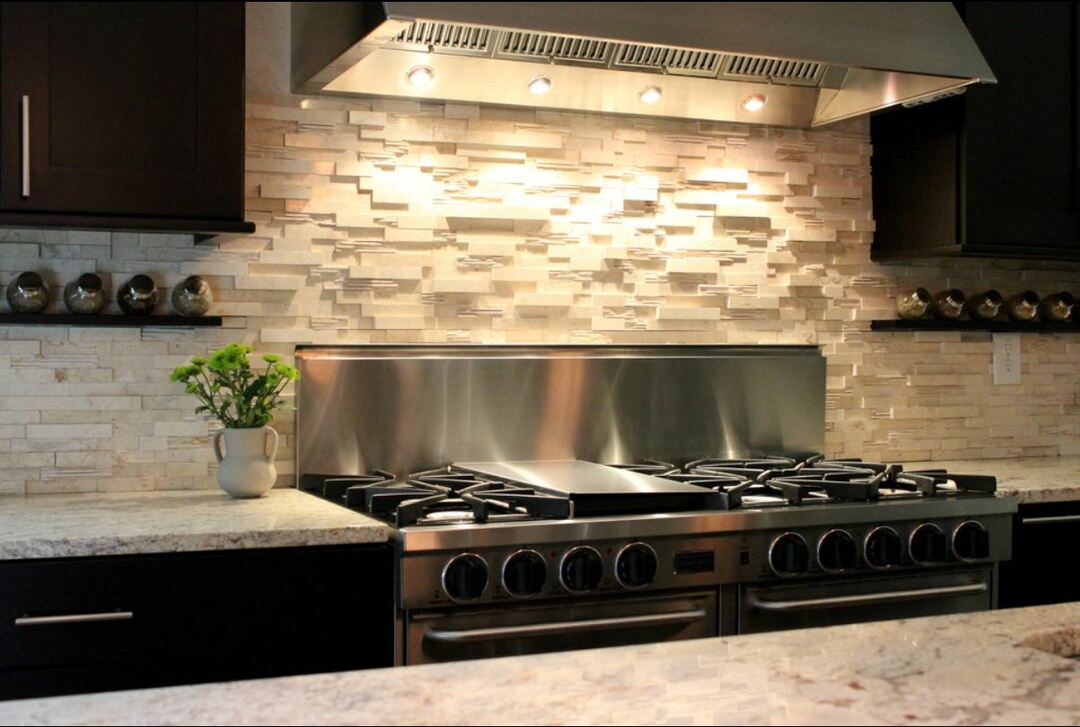
Acrylic stone is a great option for an apron. It does not absorb moisture, is resistant to heat, and lends itself well to restoration. It is optimal when the apron made of this material is a continuation of the molded tabletop. In this case, no joint is formed between the work surface and the wall, which contributes to the hygiene and durability of the kitchen set.
Quartz agglomerate is a more expensive option due to the high content of natural stone chips in its structure. The material is outwardly indistinguishable from natural granite or marble, is highly resistant to moisture and high temperatures, and is easy to clean with detergents. The seamless monolithic surface, devoid of pores, looks very presentable. Artificial stone is presented in a wide variety of colors, options with a mirror or embossed surface are possible. Long service life does not affect the color saturation. The material is not subject to deformation and destruction, does not require restorations. Agglomerate is relatively affordable compared to natural stone.
Stone cladding is not suitable for a wooden house.
Chipboard apron
Among the materials that can provide reliable protection to the walls of the kitchen, one can single out chipboard - chipboards. They are made from a mixture of sawdust and a special adhesive mass by pressing. Typically, products consist of three layers of chips in different directions, which allows them to provide sufficient rigidity. Products have many positive properties necessary for high-quality wall protection in the working area. They are environmentally friendly, since the proportion of formaldehyde hazardous to health present in them is strictly limited.
Apron made of MDF
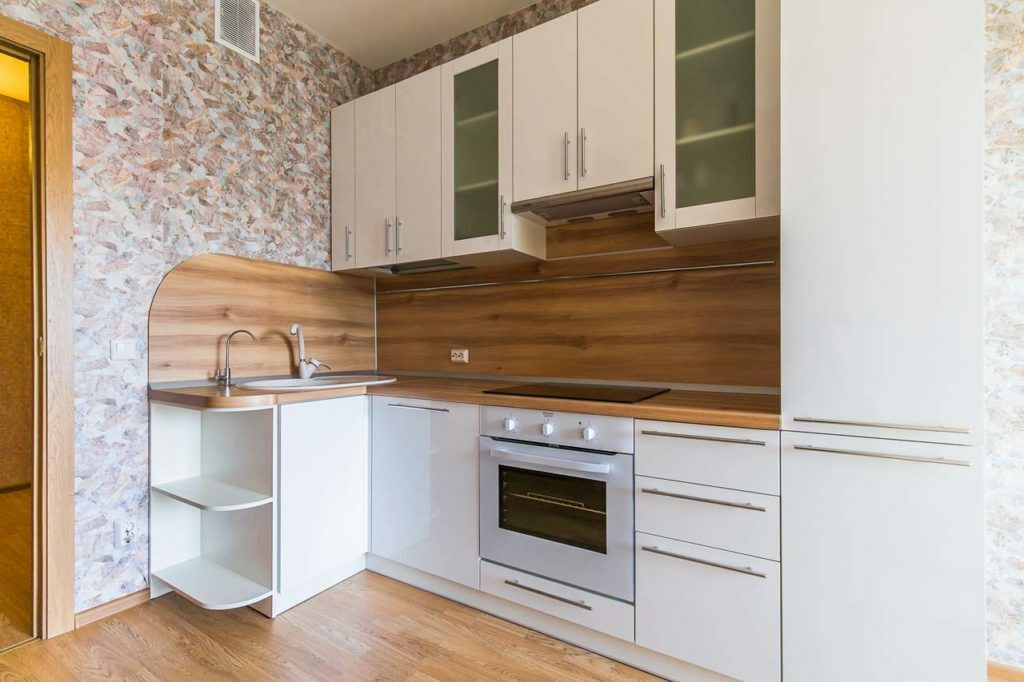
MDF boards are slightly inferior to glass and ceramics in terms of durability and resistance to mechanical stress. The advantages of this material include the ability to withstand temperature extremes and exposure to moisture. It is much more affordable in comparison with skinals, but absolutely not inferior to them in terms of decorativeness. Panels can be matte or glossy, decorated with painting, photo printing, with all kinds of color effects - for example, "chameleon". This finish is optimal for a wooden house - after all, the properties of MDF boards are not much different from those of natural wood. The panels are conveniently mounted directly on the wall. The panels can be coated with acrylic or foil. The former are much more resistant to steam, moisture, temperature. The latter are best used in a kitchen with an induction or electric stove.
Metal
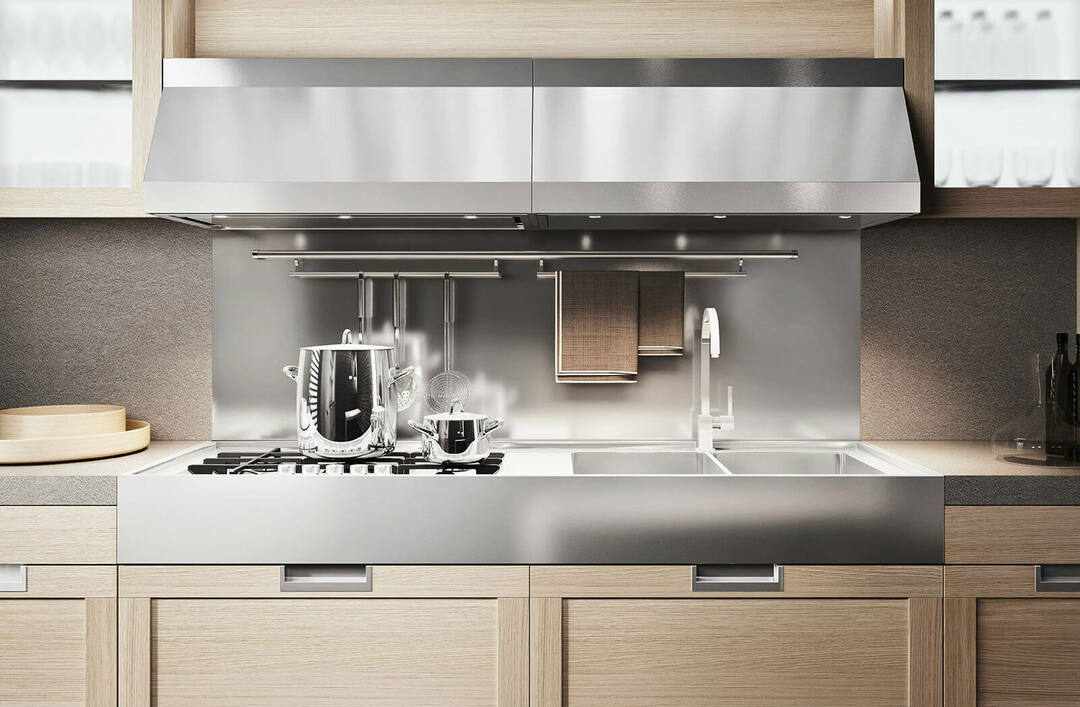
Stainless steel is a very popular material that is quite often used as an apron material. Such a design will not be to everyone's taste, but if we talk about other indicators, then he simply will not have any rivals. Steel is extremely durable, absolutely waterproof, fire-resistant, insensitive to the effects of household chemicals - not excluding abrasive agents. A metal apron is a great accessory for a high-tech or loft kitchen. It gives a certain coldness to the interior, which is important for these areas. The only trouble is that dried drops and stains are very noticeable on the metal surface. It looks quite repulsive, but if the hostess treats this circumstance philosophically or does not mind constantly wiping the surface, then there is nothing wrong with that.
Mounting methods
It is not necessary to hire specialists to install the apron. This process is quite simple, so it is quite possible to handle it yourself. There are various ways to mount the apron. The choice of a particular technology and the complexity of the work depends on the specific material.
On reiki
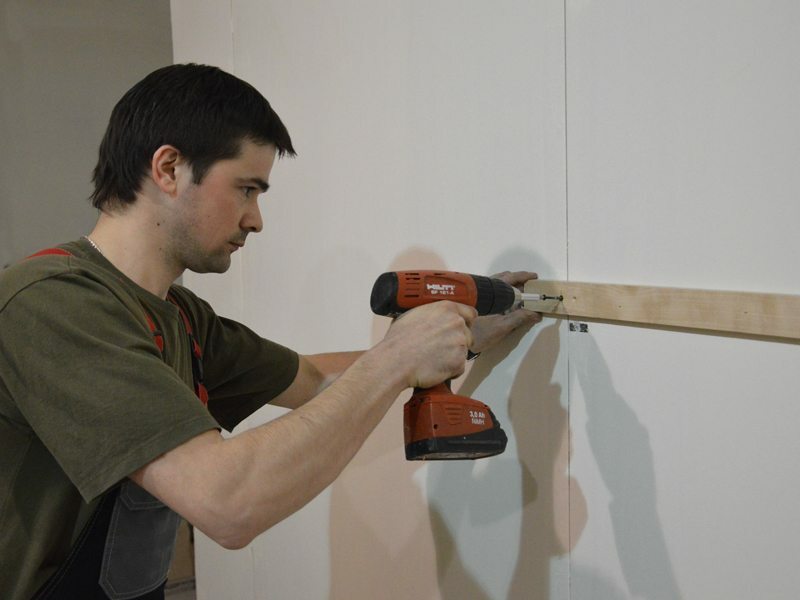
Alternatively, the apron can be fixed to a wooden frame made of slats. The lathing will allow you to ignore even significant irregularities in the walls. For work, you will need wooden planks with a section of 10x40 mm. The slats are mounted every 40 cm. It is necessary to ensure that the elements of the frame do not protrude forward, and their surface is in the same plane. The apron is attached to the rails with self-tapping screws. As an alternative to the slats, a metal profile can be used. Almost any materials can be attached to the crate - MDF or chipboard boards, plastic sheets and panels, metal options.
To the kitchen skirting board
The easiest way is to fix the apron with a plinth. The element is built-in between the apron and the work surface, as well as between the upper cabinets and the apron, closes the gaps and turns the structure into a single whole. It prevents moisture and dirt from entering the space between the wall and the worktop. The apron is installed after installing the headset. It is temporarily fixed, after which the skirting boards are installed. Fastening of these elements to adjacent surfaces is carried out using self-tapping screws, which are subsequently closed with decorative plugs.
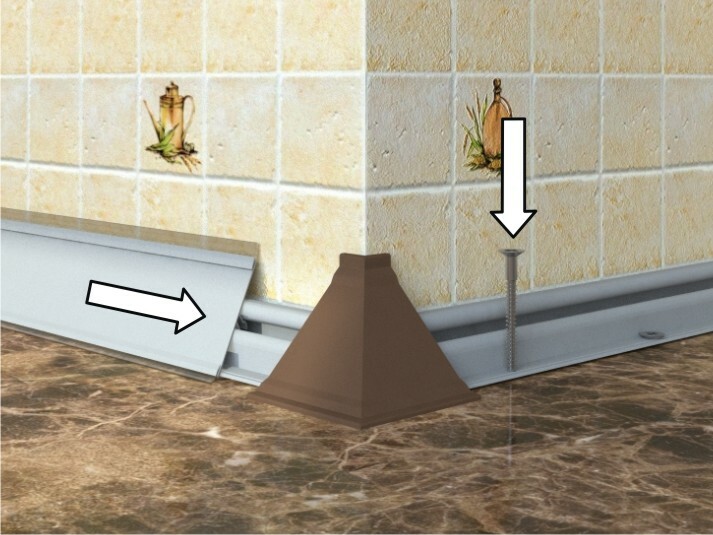
The height of the apron when using this technology should be slightly less than the gap between the table top and the upper tier.
On liquid nails
This method of fastening is suitable provided there is a perfectly flat base. If the old backsplash was made of tiles and the elements of the old coating do not fall off, you can glue the new material directly onto it.
At the preliminary stage, you should prepare the wall. You can dust and strengthen the surface with a primer.
In order to fix the apron, you need to apply liquid nails to it or to the wall, then attach the trim element to the base and hold for a few seconds. It is more convenient to apply the adhesive on a horizontal apron rather than on a wall.
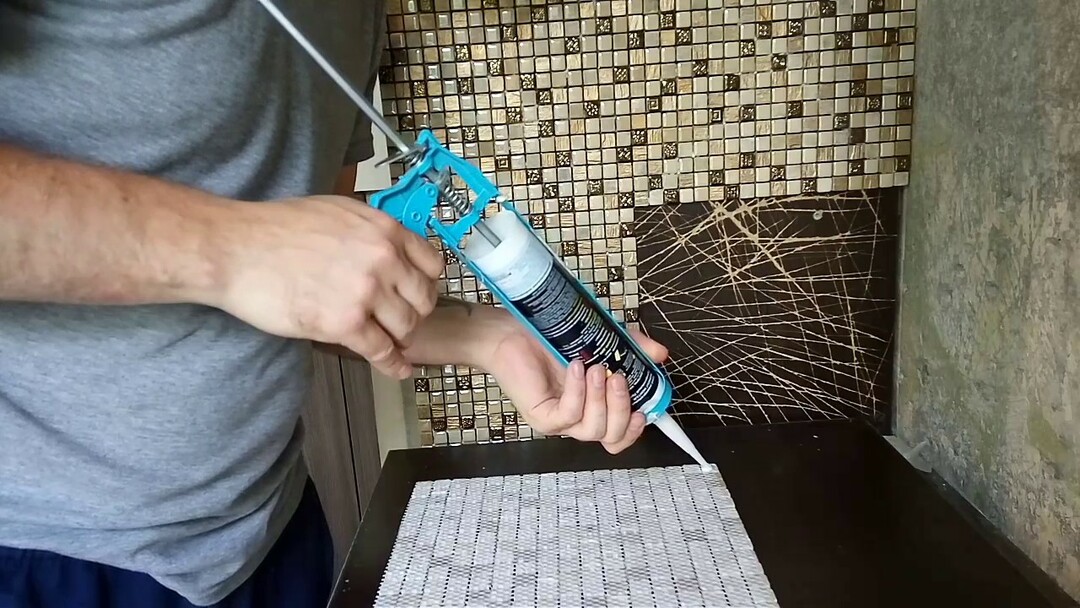
If the panel size is larger than the planned distance between the table top and the upper cabinets, then it must be fixed before installing the headset. To do this, liquid nails are distributed on the back of the panel and glued to the wall. To prevent the panel from slipping, you need to make a support from a metal profile or a wooden lath.
If the apron is smaller, the cabinets are mounted first. After gluing the apron, you need to install the skirting boards. They will protect the joints from moisture penetration into the material. If the plinth of the desired color is not available for sale, you can choose a contrasting option.
DIY workshops on installing aprons from different materials
The choice of apron mounting technology depends on the material from which it is made. Consider the main stages of work for various options for a protective coating for the wall above the working area.
Preparing the wall
Preparatory work is an integral step in installing the apron. They may differ depending on the chosen installation method. However, there are general requirements for any of the technologies.
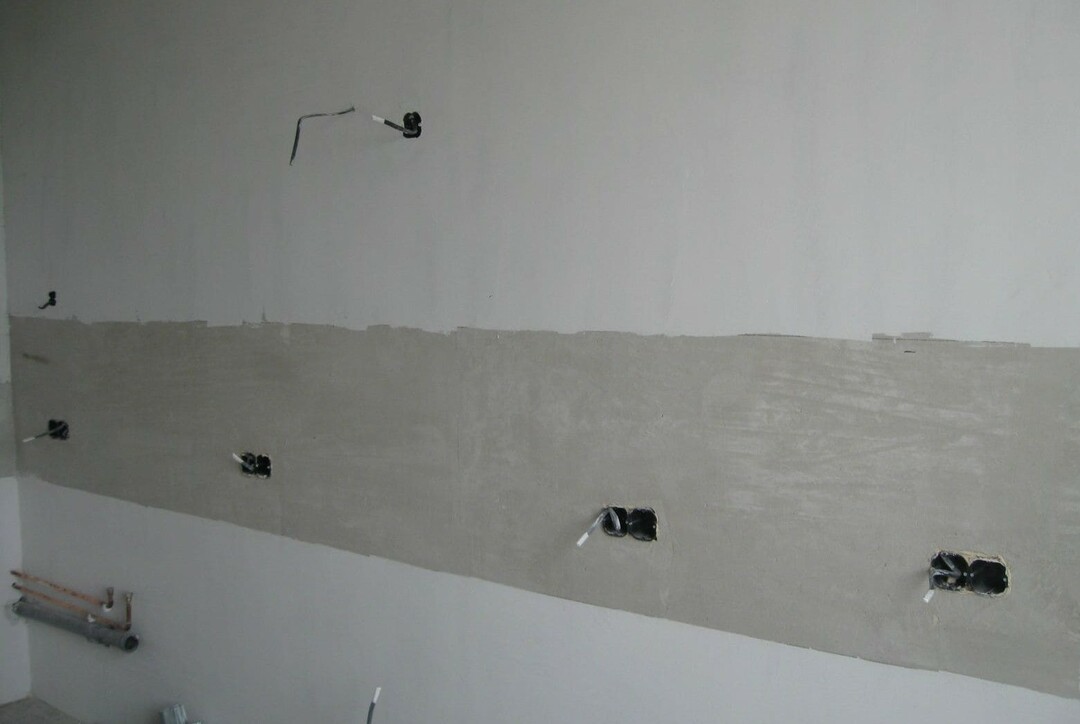
The walls must be freed from the previous coating, potholes, cracks must be repaired, and completely plastered. Most of the coatings described above require a perfectly level base. The glass backsplash can crack when installed on a wall with a drop. If the coating will be installed on liquid nails, you need to putty and prime the base twice. An antibacterial primer will prevent mold growth. Next, you need to prepare areas for the installation of sockets and switches.
Installing a stone apron
Installation of a stone apron is a complex process. To install the finishing material, a perfectly flat surface is required. The complexity of the work is also due to the heavy weight of the apron. Careful preparation of the base is necessary - it must be leveled and weak points in the plaster layer must be strengthened.
The work resembles laying tiles and is not particularly difficult. The main condition is to choose the glue that is optimal for a given material, which can hold a heavy stone on the wall.
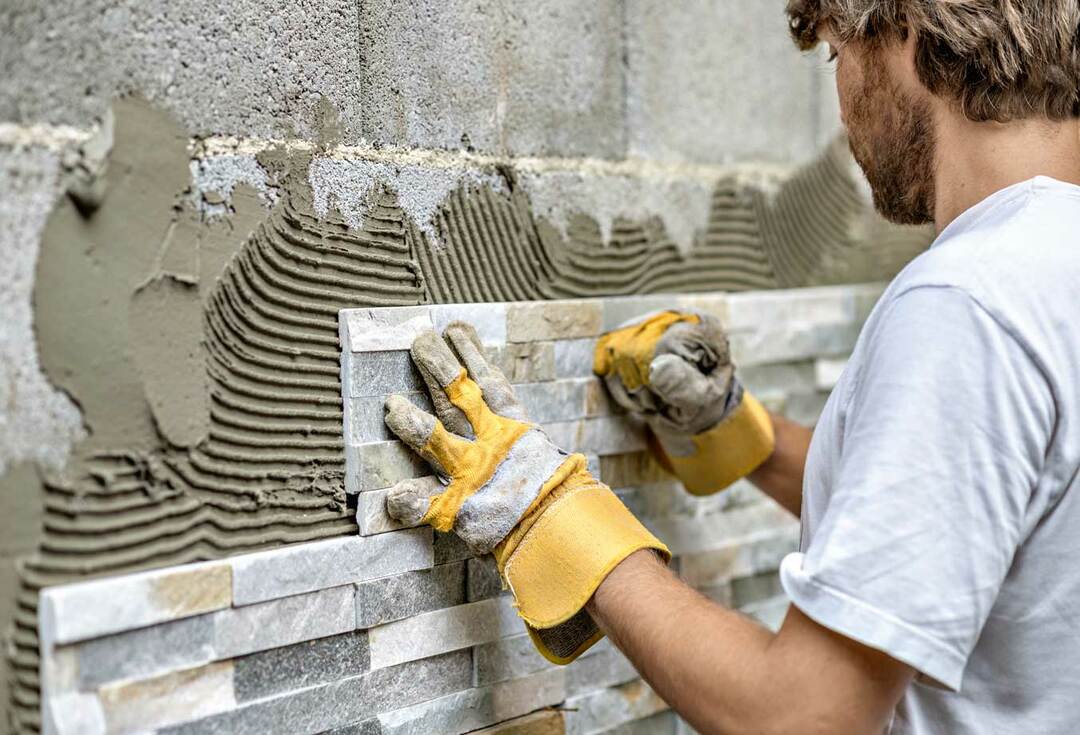
After installation, an apron made of artificial stone must be treated with a water repellent, which will give it water-repellent qualities and improve the appearance of the product.
Installation of glass panels
You can start installing the skin only after the electrical wiring is installed, the finishing of the entire room is completed and the headset is assembled. You can learn more about how to install skins from the following video.
Small straight skins or glass panels can be fixed by yourself. Fitting full-width models or corner options will require professional skills. In this case, it is better not to save money and invite a team of specialists who are guaranteed not to spoil an expensive apron.

There are 3 mounting options
- Hinged - using this method, the panels are docked into a single canvas. With this method, the condition of the base is not particularly important, since the material retreats from its surface by 4 mm.
- With the help of silicone glue - optimal in the presence of a flat wall and oversized elements.
- With the help of Velcro - for this method, the base should be not only even, but also smooth.
The most difficult, but also reliable, is the hinged mounting option.
Step-by-step instruction
- Place the panel on the desired location and mark for future fasteners through the holes made by the manufacturer.
- Drill 6mm holes and drive the dowels into the wall.
- Release the panel from the protective film and push onto the fasteners.
- Insert silicone dampers into the holes on the glass - they prevent friction and isolate the glass from metal.
- Install the threaded sleeve and screw in the self-tapping screws. Do not over-tighten the fasteners - you can damage the glass. It should hang on self-tapping screws, and not be pressed against the wall.
- Cover the screws with glass caps.
- When installing the backlight, leave a gap of 3 cm between the light source and the panel.
To make holes for switches, sockets and rails, you must contact a specialist.
Installation of an apron made of chipboard and MDF
To mount the MDF screen, lathing or glue is used. The second way is much easier. Sheets need to be cut to certain sizes, not forgetting that the panel should be higher under the hood. Next, we apply liquid nails and press the panels against the wall. We fix the sheets with props and wait 30-45 minutes.
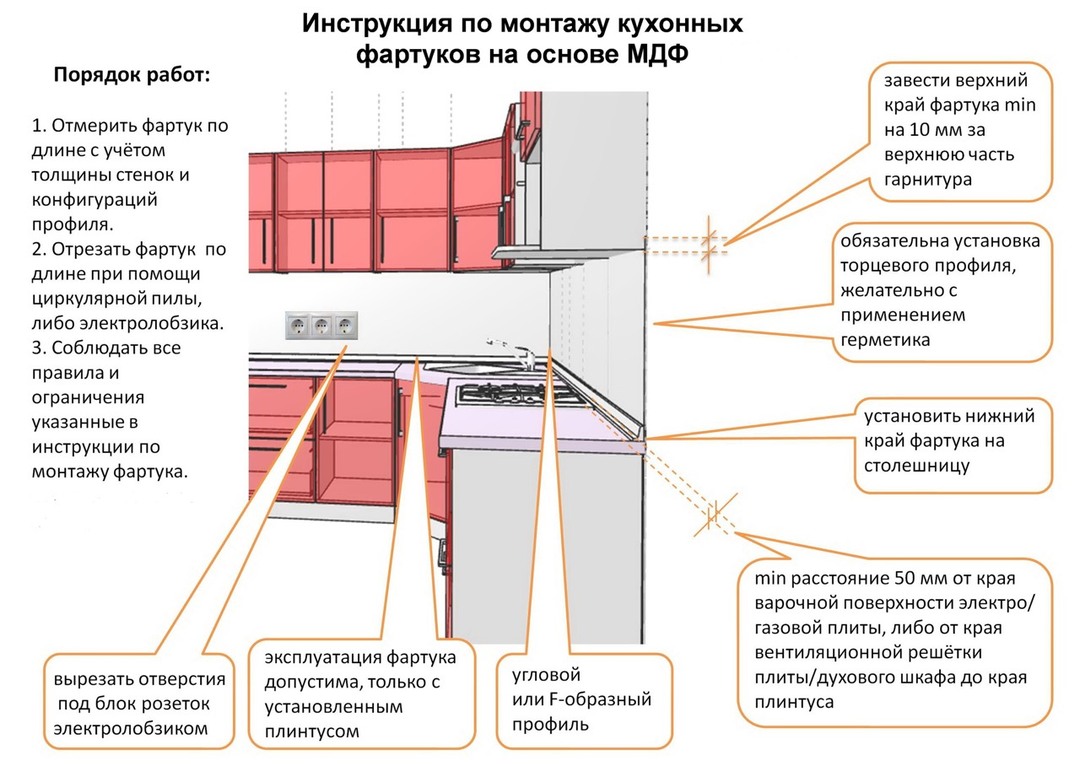
Installation with a batten is much more difficult. First, a frame is assembled from wooden slats 10 * 40mm or 20 * 40 mm. The planks must be treated with an antiseptic compound. The bars are fixed with dowels inserted into the pre-drilled holes. If the area is large, it is necessary to install intermediate frame links at intervals of 40-45 cm.
We fasten the chipboard with self-tapping screws to the crate, starting from the most visible area. Cover the unsightly screw caps with decorative caps to match the screen color. We cut the holes for the sockets in advance.
Fastening plastic panels
Plastic panels can also be fixed with glue or on the lathing. The process of installing the battens is identical to that described above. After assembling the frame, an L-shaped profile is mounted around its entire perimeter. To fix this element, we use a construction stapler.
The next stage is the installation of panels. We insert them into the profiles and fasten them to the crate. The L-profile can be replaced with a special plastic skirting board.
It is better not to glue the panels directly to the base, since if you need to dismantle one panel, the entire apron will be damaged.
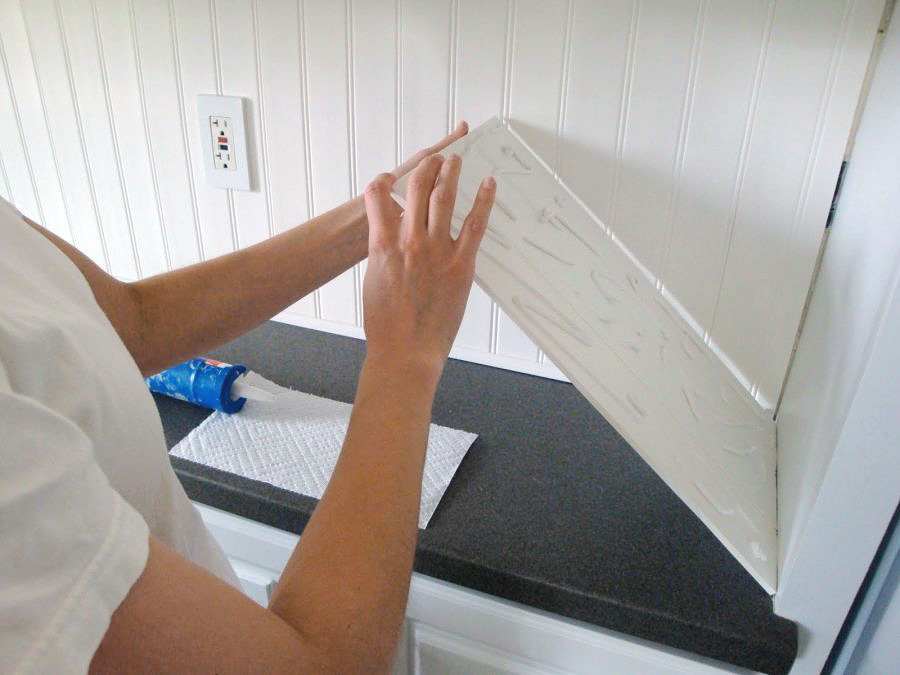
Installing plastic sheets is a fairly simple and quick process. It doesn't have to carefully level the walls using a level. The plastic is cut with a jigsaw or a conventional hacksaw and fixed on liquid nails. A seamless apron looks just perfect - there are no joints on the surface. In the opposite situation, arrange the joints of the plastic sheets using the H-profile. In addition to glue, self-tapping screws can be used for fasteners. We hide the hats under decorative furniture plugs of the corresponding color. You can lay out the plastic using the methods used for the installation of tiles.
Copper and stainless steel apron fixing
The installation of a metal apron is simple and there is no debris during work. Installation begins with the preparation of the base. In the presence of large flaws, the wall must be leveled, if necessary, finished with finishing plaster and dried thoroughly.
While the wall is drying, you can start making the panel. We take a sheet of metal of a suitable shape and size and put it on a moisture-resistant base - chipboard or plywood. Only after that we attach the part to the wall.

Stages of installing a stainless steel apron
- Determine the size of the panel. To do this, you need to measure the distance between the table top and the wall cabinets. As a rule, the height of the sheet is 55-65 cm. It can reach up to 75 cm under the integrated hood.
- We measure the distance from the floor covering to the bottom edge of the covering. The edge of the apron, hidden behind the countertop, should have a height of 3-5 cm.
- If the hood is separate, we determine the dimensions of the free space between the hanging cabinets at the point of its attachment. From above, the apron should end at the level of the top of the cabinets. The sides must be brought under the bodies by 5 cm.
- We mount the substrate made of chipboard, fiberboard or plywood using self-tapping screws on the base.
- We fasten a sheet of metal with rivets or self-tapping screws.
To prevent corrosion, we treat all joints with a sealant and cover with a plinth.
Conclusion
When choosing a material for a kitchen apron, it is necessary to take into account the characteristics of the material, its parameters, design. This detail should be optimally suited to the design of your kitchen. The photo shows various embodiments of kitchen aprons in real interiors.
