
- What is a split system?
- When is it better to set up a climate system?
- Tools for installing a split system
- How to install a split system?
Now many people want to install in their apartment not just an air conditioner, but a split-system. This is understandable, this system has many advantages: it does not block the natural lighting, since it is not necessary to cut it into the window frame, it does not depend on the general air-conditioning system of the house as a whole, and the last - the system consists of only two blocks - external and internal. The only thing that stops many consumers when buying is ignorance of how to install the split system yourself, as this requires elementary knowledge of the installation of climate technology. We will try to correct the situation, and we will acquaint you with the rules of mounting such equipment. Consider everything in order.
to the contents ↑What is a split system?
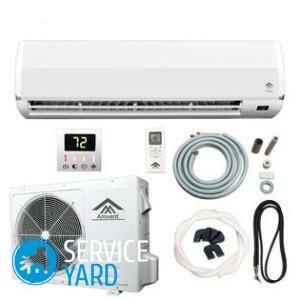
The air conditioning system consists of two separate units: the external one is the condenser, the internal one is the evaporator. These blocks are communicated with each other by means of electric wires and two copper tubes through which the coolant circulates.
The indoor unit has a thin plastic tube, along which the condensed moisture is removed from the system.
Important! By all rules, the tube performing the drainage function must be connected to a special drain tank or sewage pipe. But for some reason, many people take it out and water from the tube drips onto people's heads or under their feet.
How the
works The climate technology works quite simply:
- If it is necessary to cool the room, the coolant on the copper tube from the heat exchanger of the outdoor unit goes to the indoor unit heat exchanger. That is, in this case the freon is treated with a fan, and cold air comes out from the air conditioner.
- If the room needs to be heated, on the contrary, the heat pump of the external condenser starts functioning as an evaporator, and the evaporator, in turn, starts to work as a condenser.
Important! In the external block of the split-system there is a compressor, the main function of which is compression of freon. This process significantly increases the efficiency of the device.
How to secure the indoor units of the
The indoor units of the climate system by the fixing method can be:
- Wall-mounted.
- Floor and Ceiling.
These moments must be known to understand how to install the split system yourself.
- Most often, in apartments of high-rise buildings, use wall blocks. To change the direction of the flow of air masses, the wall blocks are equipped with movable blinds. The power of the wall-mounted units is specially limited by the manufacturers, since a very strong jet of cooled air can blow everything off in its path in a small room.
- If you need a split system for spacious rooms, for example, for workshops and offices, then in this case a more powerful technique is installed with a floor-ceiling indoor unit.
When is it better to set up a climate system?
The installation of the system is best timed to repair, since the work is dusty and serious. For the installation of electrical wires you will have to walk not one wall. In addition, if you decide to install a split system yourself, you should also consider some important factors:
- The seller is not responsible for the malfunction of the product, unless the installation work was done by a specialized organization.
- Before proceeding with the installation of the climate system, it is necessary to understand what it consists of and how it works, so that even if the installation is handled by specialists, you were able to check the progress of work and their quality.
- To install the air conditioner yourself, you need a special tool. It should be borne in mind that the list of specialized equipment is extensive, and not everyone has the skills to work with them.
Important! To save money, we advise you to do the following: do the basic work yourself, and connect the system and start up the specialists. In this case, the work will be cheaper, and most importantly - the guarantee for the goods will be preserved.
So, what can you do yourself to install a split system:
- Prepare the entire electrical part.
- Identify the "route".
- Punch a hole in the wall to bring the "road" to the street. This is the hardest part of the job and it costs a lot of money. Therefore, having done this work yourself, you will save the lion's share of the money that you need to pay specialists for connecting the system.
- Strengthen the blocks.
 To install the split system successfully, adhere to the following rules:
- The installation of the indoor unit is carried out at a distance of 3 meters from the floor and at least 10 cm from the ceiling.
- Do not place the indoor unit above cabinets, a bed and near heating elements.
- Do not install the indoor unit behind curtains, curtains, curtains and other obstructions to air flow.
- Do not install the indoor unit in rooms with a source of electrical interference: induction and microwave ovens, electric oven, in workshops with power tools. Interference from the equipment can damage the processor unit.
- You can not install a split system - its outdoor unit, yourself, if you live above the second floor. This is dangerous for health and life. If you live on the top floor, then the outdoor unit can be installed on the balcony or loggia. Better, of course, if the equipment will be located on the north side or east. To install the outdoor unit on the balcony, you can use self-made small brackets.
- The length of the freon path between the indoor and outdoor unit must not be less than 3 meters.
- Install the outdoor unit in such a way that there are no barriers at the distance of 3 meters, otherwise the air circulation will be difficult.
- For a split system, separate wiring and a separate circuit breaker must be installed.
Tools for installing the split system
In order to install the split system yourself, you will need a number of tools and tools.
Important! They can be rented or purchased. The quality of the equipment for installation directly depends on the quality of work, as well as the durability of the air conditioner.
For the installation of the climate system, you will need the following equipment, which can be conditionally divided into the following groups:
- Electrical:
- Rotary hammer with a set of bits. This tool is necessary for punching holes in the main wall.
- Bulgarian with a diamond disc.
- Pipe tools:
- Pipe cutter for copper pipes. In no case can the saws for Freon be cut with a metal hacksaw, as in the gap there will always be a copper crumb that will disable the compressor.
- Set for flaring tubes. Aids can not be used, since it will not be possible to achieve complete tightness.
- Shabrovka. This is a tool for stripping the cut ends of pipes. Using files and files for this purpose will lead to the formation of sawdust.
- Hydraulic pipe bender.
- Electrical installation tools:
- Tester.
- Phase indicator.
- Soldering Tools:
- Burner.
- Copper-phosphor solder.
- Refrigeration tool:
- Vacuum pump. It is necessary for processing the refrigeration system before filling it.
- Manometer. It is necessary to measure the pressure of the refrigerant in the system.
Important! Take note of a few valuable recommendations, thanks to which it will be easier for you to install the split-system yourself:
- If the wall is concrete, then the artifactor will not hurt, because if during the drilling the tool hits the armature, it will be necessary to punch one more hole.
- A copper tube is better for acquiring a whole bay. Excess wire is always useful, but long pipelines will allow lowering the external block. Be sure to make sure that the ends of the tube in the bay were rolled in the factory way. The tube should not have cracks or dents.
- Be sure to practice cutting and trimming the pipes: cut them in circular motions, and when holding down, hold the tube end down, so that the scraping barbs do not fall into its lumen.
How to install a split system?
The installation of the climate system is carried out in several stages. Let's consider each of them in detail.
Stage # 1.Choosing the location of the air conditioner
Following the above rules, determine where will be the internal, and where the external unit.
Stage # 2.Wiring
Even the smallest air conditioner consumes 1.5 kW of electricity. Therefore, the climate system needs to lay a separate wiring cross-section of not less than 1.5 sq. M.It is also necessary to install a separate circuit breaker in the shield.
Important! By connecting the wires to the lead-in shield, find where the phase and zero are located, using special indicators, and label them at both ends.
Stage №3.Install the external unit
If you live no higher than the second floor, then using a powerful perforator, drill a through hole in an external wall with a diameter of 8 cm. Recommendations for a hole of 60 mm or 50 mm clearly do not take into account the thermal insulation.
Important! Before you start punching a hole, be sure to wall off a section of the street under the wall with tape so that a piece of plaster or concrete does not damage people or someone's machine.
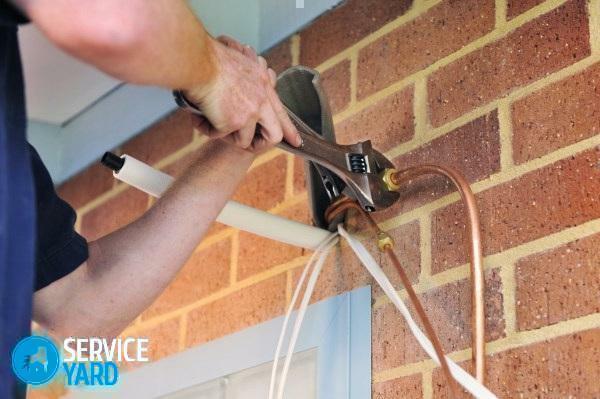
Next, secure the brackets for the outdoor unit with the bolts secure. In doing so, consider the following tips:
- The rear wall of the unit should not fit snugly against the wall of the house.
- The distance between blocks should not exceed 15 meters, and the level of height between them should not be more than 3 meters.
- Brackets must withstand the weight of the equipment, taking into account various weather conditions.
- Do not install the outdoor unit directly under the drain hose, since the freon tube is also disposed there. It is better to step aside by 40-50 cm, otherwise - the moisture that accumulates in the condenser will fall on the inner wall of the air conditioning compressor.
- When installing the equipment, make sure that the unit is located strictly horizontally, without any slopes. Control the installation of the outdoor unit using the building level.
- Mount the unit to the brackets with powerful bolts.
Important! It is desirable to install a visor over the block to protect it from precipitation.
Stage # 4.Installation of the indoor unit
The indoor unit is fixed in the room on the wall. Before proceeding with installation, very carefully refer to its placement. The unit should be located at a distance of at least 10 cm from the ceiling - this is necessary for the efficiency of the system, and at a certain distance from the walls.
Important! All these parameters are specified in the device's passport.
The indoor unit should be placed strictly horizontally, so that all condensate goes into the drainage system, otherwise - water stains on the floor can not be avoided.
Important! In the delivery set of the product, there must be a special fixing strap, which is fixed to the wall, and on which the block itself is hung.
Stage number 5.Connecting the
Pipes On the planned route of wiring and freon tubes, make grooves( shtrobs) in the wall using a grinder with a diamond disc or shtoborez. There is another option - the entire highway can be hidden in plastic decorative boxes or close the wires using skirting boards.
Important! In order not to mistake and correctly connect all the tubes, study the installation instructions for the split system.
The following actions are the following:
- Measure the required length of copper tubes. To do this, measure the distance between the cranes of the blocks.
- Cut them with a margin, not less than 1 m. Surplus will go to bends. Remember that it is necessary to bend the tubes very carefully to prevent wrinkles and kinks. The permissible bending radius of the tubes is not less than 10 cm.
- On the refrigerant pipes, put on heat insulators - hoses made of polyurethane foam or heat insulation from flex. In some kits, heat insulators are supplied.
- Put threaded flanges on the tubes, and flare ends.
- Pipelines connect to the unions. The main thing - do not mix up the connection. Many manufacturers of the climate system have made cold and hot connections of different diameters. Tighten the flanges on the fittings tightly, but not tight. When sealing, you will be able to hold on to the threaded connections.
- For the drainage system, prepare a piece of reinforced plastic tube.
- Connect the tube to the drain pipe using a threaded flange or a heat shrinkable tubing. Drainage should be installed at an inclination of at least 5-10 mm, so that water flows naturally.
- Connect the wiring between the units. The main thing is not to mix up the connection terminals of the indoor and outdoor unit, for this use a cable with multi-colored cores.
Thus, you have practically installed the split-system yourself. It remains only to invite a specialist for sealing, evacuation and start-up of the system. The main thing is that you have kept the guarantee for the equipment and saved the lion's share of the funds for the installation.
If you want to see how the next steps go, then read on.
Stage # 6.Sealing and vacuuming
To check the sealing, you can use a leak detector, or you can use the old folk way - a soapy solution.
To prepare the solution:
- Acquire 0.5 liter of distilled water in the pharmacy.
- Heat the water.
- Throw the laundry soap into the water.
The following actions are as follows:
- Connect the rubber hose of the bicycle pump to the nozzle of the outlet nipple.
- Apply a soap solution on the threaded connection with a brush.
- Pump up the air and watch for bubbles.
- After the bubbles stop appearing, tighten the threaded connection a further ⅛ turn.
- After finishing the work, remove the soap solution with a damp cloth.
Important! The work to check the sealing is best done together: one pumping the air, in the second - it puts a soap solution and watches the bubbles.
After checking the sealing, the system must be evacuated, that is to remove dust, moisture and air that got there. Without these measures it is impossible to ensure the effective operation of the device.
Vacuum with a special pump connected to the system using a manometer manifold and flexible hoses:
- Turn on the pump and open the port on the external block.
- After the manometer needle goes into vacuum, close the port.
- Switch off the pump.
- This whole procedure may take 15 minutes. However, do not rush off the pump with a pressure gauge, since the arrow can change its position.
Important! Leave the gauges in place to check the system pressure again during the test.
Stage No. 7. Testing
For testing, fill the system with freon from a cylinder through a special adapter on which a pressure gauge is installed.
Important! You can start the refrigerant only after you make sure that everything is done sealed.
The refrigerant must be charged in the following sequence:
- Open the supply pipe.
- Open the suction pipe.
- Wait until the pressure gauge shows the pressure stated in the manual.
- Turn off freon supply.
Important! Air conditioners working on freon, can not be filled with chladone, and vice versa.
Next Steps:
- During the testing, turn on the automatic switch-disconnector so that the air conditioner itself enters the mode. If this does not happen, run the test using the remote control.
- Allow the device to run for about 15 minutes, so that the freon is distributed over all the tubes and make a control pressure measurement.
Important! At this work on the installation of the climate system can be considered complete. Properly installed air conditioner should work silently, without any changes and internal rattling.
We hope that the information in the article helped you to understand the operation of the split system and the stages of its installation. If you have any doubts about your abilities and knowledge, then there is always an opportunity to turn to specialists, because now you have enough information to monitor their work.


