- What is a banquet?
- Materials and tools that need to be prepared
- Preparation:
- We are assembling our product
- We are laying furniture ourselves with a cloth
The banquet with our own hands is an incredibly beautiful decoration of your hallway interior, but it is not just beautiful, it is multifunctional. And often in order not to clutter up space, it is better to use oversized, but cute design items. For what it is generally needed, why it is multifunctional, what kinds of it exist, how to make it correctly, find out below in this article.
to the contents ↑What is a banquet?
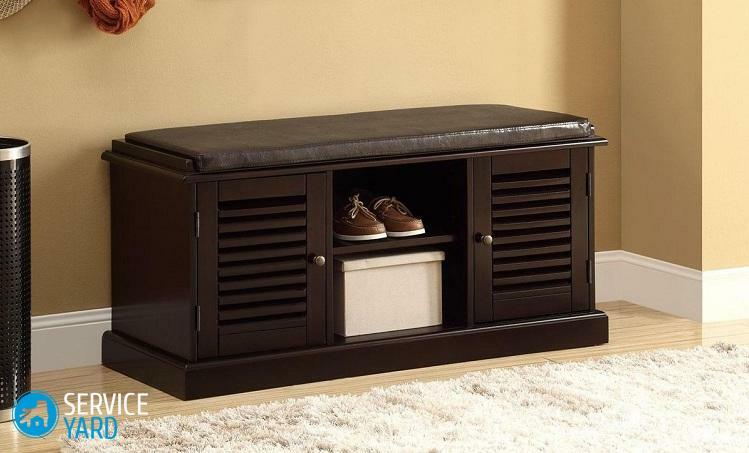
Such a brilliant element of any interior, like a banquet, was invented in the not so distant 18th century. It represents a stool or a small-sized bench with upholstery, sometimes with a backrest. Some banquettes also serve to store shoes, which makes them more functional. As a rule, they are made in the form of a rectangle, circle or square.
Such a product will be an excellent addition to the interior of absolutely any room:
- banquet in the hallway - during the tying of shoes you can sit down on the ottoman and also often store shoes;
- kitchen - a banquet is often used as a supplement to a soft corner;
- bathroom;
- bedroom - complements the tranquil and cozy atmosphere;
- living room - in this room, this piece of interior can act as an additional place for guests.
Materials and tools that need to be prepared
A tree is used to make a banquet in the entrance hall with their own hands. Forged models, a frame made of iron, require much more serious experience and skills.
For complete assembly of the product you will need:
- Wooden beam - 30 * 40, 30 * 50 mm, these parameters are applicable if the design includes strapping and legs. Reiki for products made of plywood have a cross section smaller.
- You can use ready-made legs, for example, from a stool, a low coffee table, a bench.
- MDF panels or plywood - sheet of corresponding parameters for one-, two-, three-place works.
- For fastening you need self-tapping screws, furniture corners, possibly pins, glue.
- For a soft part of a wooden bench, you need to stock up the filler and cover.
Fabrics:
- Cover in the home made from suitable fabric, for example: velor, plush, upholstery. The material must be sufficiently dense and wear-resistant. You can use a skin or synthetic substitute.
- The material for filling is foam rubber, because it is elastic enough and keeps its shape for a long time.
Important! If you want to make a very soft seat, especially with a coach coupler, then in addition to foam rubber, use also sintepon.
Tools:
- drill, electric jigsaw, screwdriver;
- level, hammer, screwdrivers;
- threads and needles;
- construction stapler;
- of different granularity sandpaper.
Important! In addition, you may need a stain or paint and varnish.
The whole process consists of a small number of steps. They are fairly simple to perform and require due care and accuracy.
to Contents ↑Preparation:
- Create a drawing of the product, no matter how simple it may seem to you. Determine the dimensions of the hall and the approximate parameters of the product.
- Calculate the capacity of the banquet, as one person occupies an area of 45 * 55 cm.
- Choose the model with the backrest. It is rather difficult to realize with minimal experience, with drawers, shelves, legs.
- Knowing the dimensions of the seat, determine the parameters of all other elements and draw a sketch.
- If there are a lot of details - partitions, back, shelves, it makes sense to make a template, and then - to start cutting a plywood board.
- The details are cut with a jigsaw and the edges are sanded.
We are assembling our product
It is not recommended that you produce at any time all the necessary details, especially if this is your first experience in making furniture: there are always possible different deviations as well as oversights.
Frame:
- First of all, cut out the seat - its parameters serve as a starting point, and all other parts are adjusted to fit the dimensions of this part.
- If you are making a model with legs, attach 4 wooden slats to the bottom so that they have the opportunity to protrude 1 to 2 cm beyond the edge.
- Collect the resulting blank and cover it with stain, paint, following all the instructions.
- If the model will rest on the sidewalls, here all the elements of the frame - sidewalls, seats, the bottom part of the shelf, and also the back wall, cut immediately, sand them, and then - collect by means of pins. To do this, in the ends of the parts themselves, pre-drill blind holes.
Models on legs:
- Produce legs from a wooden beam. The most simple option is to trim the bars along the height of the banquet, then sand them, and fasten them to the bottom using corners and screws.
- A more attractive view of the legs can ensure the use of a hand mill. The tool is fairly simple and more accessible than the milling machine. With it, you can make the legs round, with protrusions, in any case more smooth.
Important! Before fixing all the details among themselves, paint them and cover them with a special lacquer.
Seat:
- For a softer seat, open a piece of foam rubber of the required size.
- It is recommended to lay a burlap or similar rough material on the bottom at the beginning, then fix the foam with a stapler or glue.
- Select the selected fabric for the fragments you need, not forgetting to leave allowances for stitching.
- Cloth wrap inside at the edges and secure with clamps.
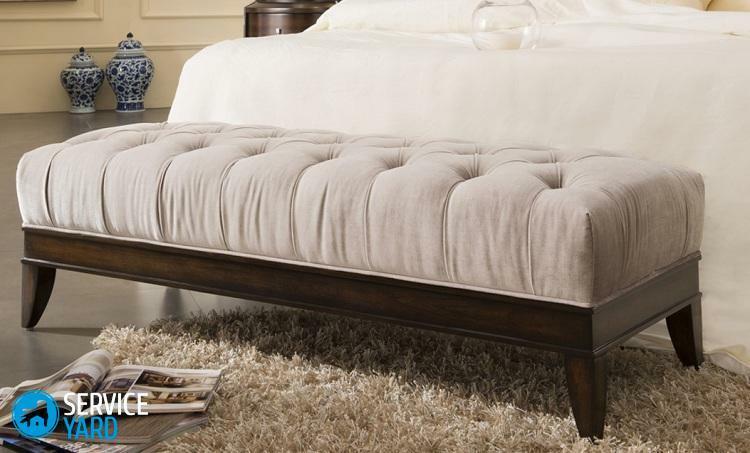
We independently coat furniture with the
cloth The method described above allows us to obtain a product with an absolutely flat surface. But while in a two- or three-place versions, such a variant looks quite presentable, then a single banquet will have a completely boring appearance. Where more interesting looks puf, which has a coach coupler.
For this, take:
- the same tools, including the hand mill;
- softer and thinner fabric, because it will need to be folded;
- large buttons that are covered with exactly the same material.
Important! The filling in this case consists of two parts at once. Once you have glued foam to the bottom, cut out the same piece of sintepon.
Manufacturing process:
- You can mark the fastening points of buttons with some skills directly on the foam rubber. But much more preferable to make a pattern: the appropriate size of a piece of paper, on which you can calculate the number of fastenings and the shape of folds.
Important! As a rule, these are rhombuses, but you can get even more refined figures. From the marked positions, drill through holes.
- Place the sintepon, using a hand cutter, cut out the holes for the buttons.
- After that, place a cloth on the seat. It should be laid flat, but without tension, because during the fastening creases will be formed.
- After - to the fabric, sew on the buttons in the previously marked places.
- Attach strong, sturdy threads or cords to the buttons, pull them out with a crochet hook through the holes and secure with a stapler.
- Wraps spread, fabric can be processed with steam if it has become somewhat crumpled during upholstery.
Such a banquet with its own hands looks incredibly decorative, and it is quite easy to make it.