- Features of weaving rugs from shreds
- Making rugs from shreds without the use of a hook
- Useful advice from masters for weaving rugs from rags
- How to crochet a rug from shreds?
- Weaving a simple rug from yarn
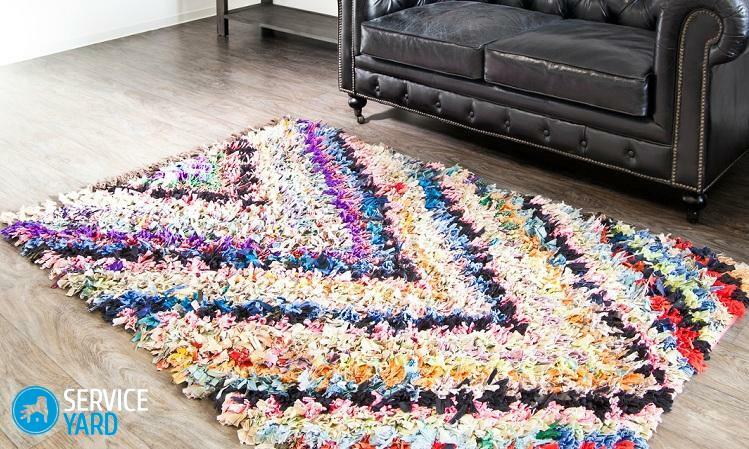
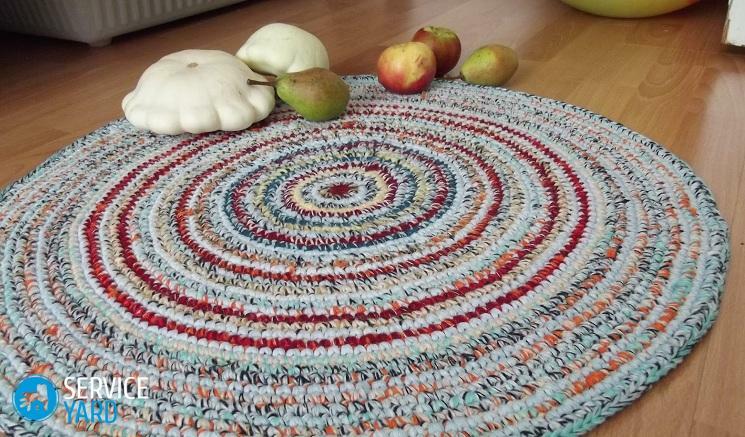
Earlier, the houses of our grandmothers and great-grandmothers were often decorated with unusual rugs, bound from shreds. The technique of this weaving was passed down from generation to generation, with every woman trying to make something of her own in the manufactured products in order to give them individuality. They turned out to be incredibly beautiful and bright. Any craftsman can learn this, because today many people try to knit rugs with their own hands from rags, scraps of unnecessary fabric and even yarn. In this article we will tell you how to make such wonderful decor elements for your house with your own hands.
to the table of contents ↑Features of weaving rugs from shreds
To date, there are several options for weaving such rugs, you can use a hook for this or do without it. But the most important thing is that before you start working out what type of rug you need, what kind of rug and design will it be?
Wicker products, consisting of multi-colored braids, are very simple to make:
- are voluminous, due to the partial attachment of fabric shreds to the base;
- lush appearance they give loose ends.
Important! A mat made of rags can be made by any hand in any shape, round, oval, and even rectangular.
to the contents ↑Making rugs from shreds without using a hook
To weave such a rug, you will need:
- thread;
- needle;
- patchwork fabric;
- large number of pins.
Such products are produced by means of a spiral twisted in a braid, which is made from three pieces of cloth of different shades.
Important! The rigidity of the product itself depends on how tightly the braid is woven.
Work features:
- Before weaving, you need to cut the ribbon of the desired width.
- Also it is necessary to solve the problem, if the flap ends, and the nodes will not be imposed, then how to weave. Here everything is very simple, at the tips of the ribbons you need to make small incisions and cut through the others in a tone to form the eyelets. Due to this stroke, the pigtail will be the right length.
- At the center of the weave, you need to gently and loosely lay a tape on the spiral, while intercepting two pieces of thread to achieve the desired diameter.
The most popular weave techniques without hooks
Rugs from rag with own hands without a hook weave using two of the simplest techniques, namely:
- "Web".To weave a rug using this technique, we need to connect about 8-12 ribbons in the form of snowflakes. Then fix them on a round cardboard base. You need to start from the center, and in a circle to weave the basics of tapes and strips between the threads. All the elements should be pressed together as tightly as possible. Then you need to twist the pigtails to make a rug. It can be fastened on the edge by an original decorative strip.
- "Chess".This technique involves the interweaving of tissue strips in a chess sequence, and not in the same way as in the previous version, in a circle. To make such a rug, dense material is more suitable.
Useful advice of craftsmen on weaving rugs from shreds
For the first time deciding to weave mats from rags with your own hands crocheted or without it, it is better to get acquainted with the recommendations and advice of experienced craftsmen so that you do not have any problems in the process of work:
- If you are worried about the fact that your product will sit down after the first wash, then take appropriate preventive measures. For example, if the shreds you make from a new fabric, you can wash and steam them before they start work, so that they immediately sit down, and then you will not have any problems with the finished rug.
- Using pieces of fabric from different things, you need to steam off and starch before starting the weaving.
- If you plan to use products actively, you need to put the flaps on the lining of the synthepone.
- To use the same elements, it is better to use ready-made cardboard templates for work. In this case, the product is of high quality.
- Do not rush to throw away your old clothes, because you can create an original and beautiful mat with your own hands. In any house, he will look stylish and unusual. Moreover, hand-made things today are very popular.
How to crochet a rug from shreds?
And now we'll take a closer look at how to tie a rug from pieces of cloth with a hook.
Materials for
You will need:
- fabric section;
- special narrow ribbons;
- crochet hook №10.
Important! Naturally, buying a fabric is not necessary, for sure in your house there are a lot of unnecessary things. You can cut strips even from an old T-shirt or T-shirt. The thinner you pick up the fabric, the wider should be the tape. And by the way, it is recommended to cut them in a spiral, so that they look longer.
Master class
So, we begin work:
- First, stretch the cloth in different directions, which you will cut. Be sure to pay attention to the direction in which the fabric is curled during stretching.
- Cut the strips, assemble them with balls and distribute them in colors.
- Use the hook to dial as many air loops as possible to match the width of the strip. Continue to knit the bars and constantly check the number of loops so that in all rows they are the same.
- Connect the ends of the ribbons with stitches, knit the rug to the desired length.
- Align it around the perimeter to make it look aesthetic and neat.
- Do not make a crochet at the time of binding, but just add 2-3 light loops at each corner. Due to this, the strips will stay much longer, and will not twist.
Get a mat bright enough, home-like cozy and warm.
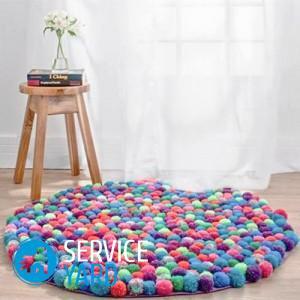
to the table of contents ↑Weaving a simple rug from yarn
In this section we will learn how to weave a rug from knitted yarn with your own hands. Pretty cute mat can be made if you make only a few rows of the same color, and then change the shade, and return to the first one again. Here everything depends on the imagination of the master and the availability of material of different colors.
A step-by-step instruction for knitting a knitted rug looks like this:
- To make such a rug, you will need an unnecessary frame for photos, or you can independently make a frame of 30 by 45 cm and fill it with studs with small smooth hats on long sides. The distance between the nails should not exceed 2.5 cm.
- Threads must be pulled in pairs in studs. And the very basis can be any color. If you tightly tighten the ranks, then it completely disappears behind them.
- Take a working thread into your hand, slowly pass it first under the warp thread, and then above it.
- As soon as the first row is finished, the thread will need to be threaded through the last thread of the base and sent backwards. The number of rows can be anything you want to do at your own discretion.
- When changing the color of the working thread, it must be cut and connected with the end of the thread of another shade.
- From time to time, tighten the already woven rows in the direction of the first row, so that the weaving is dense.
- Hide all stitches and nodules on the wrong side and remove the finished product from the frame.
The mat is ready!
We have covered only a few examples of how to weave the rug from the scraps with your hands or with the help of a hook. In fact, there are lots of options, and each of them is in its own way entertaining and original. To be engaged in manufacturing of such products it is possible even with children, believe, process will be very fascinating for all!