- Tin cans form
- How to make billets for baking from improvised materials?
- Round baking dish
- Baking vegetables
- Aluminum baking dish with your own hands
- Crystal glasses for biscuit decor
- Tartlet container
- Molds for liquid dough
- Tube molds
- Paper baking plates
Delicious baking is one of the most favorite treats of anyfestive table. Different shapes and colors, muffins, pirozhenki, cakes, muffins, cookies - you know how much and you like to cook. Sweet, salted, fruit, vegetable, with fillings and without them - there is always where to fool up fantasies. But still one of the important tools is the form for baking, because it creates funny and simple figures for your culinary recipes. Often, ready-made forms are not always at hand, and sometimes just for themed parties and birthdays for children need forms in the form of letters, numbers, flowers, little animals of all kinds. In this article we will help you to understand all the subtleties, how to make a heart shape for baking, and other forms with your own hands. We hope that our tips and tips will help you create a real holiday for family and friends. The most pleasant thing is that we will create all our forms from accessible and sometimes not absolutely necessary items and materials.
to the table of contents ↑Tin can form
So, to create a cake baking capacity, we will need the following materials:
- several tin cans;
- ruler and pliers;
- metal scissors.
Get started:
- Cut the top and bottom of the can with scissors.
- The resulting cylinders are cut lengthways so as to obtain flat sheet metal sheets.
- After they are cut into the same stripes about 15 cm wide.
- These cavities are connected with the help of pliers to each other until we get the shape, the size that we need.
A similar baking dish made from a jar can remain flat for baking a round cake or become patterned - it all depends on your imagination.
Important! It is necessary to carefully fix the edges, so that after baking it was easier to take out our dessert from the mold. A similar baking dish can be used many times.
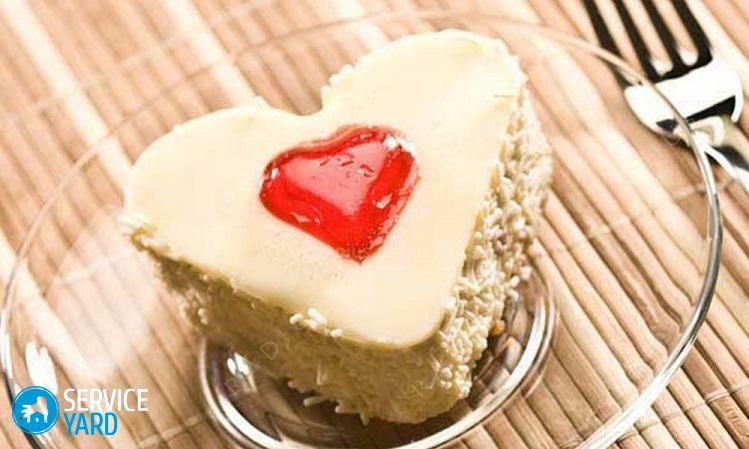
to the table of contents ↑How to make billets of the heart for baking from improvised materials?
Each holiday we associate with certain symbols: birthday - candles, wedding day - rings, and hearts most often we use for Valentine's Day. And of course, cookies or gingerbread cookies in the form of hearts will be sweet
reminders of your feelings.
Materials for work:
- sharp scissors or clerical knife;
- is an empty can;
- ruler;
- marker.
Let's proceed to the master class:
- With a stationery knife or scissors, cut the bottom and top of the jar.
- Along the perimeter, we cut exactly - we have a rectangle.
- On it mark the width of the bands that we need, about 2-5 cm.
- Cut them and form the heart.
Important! You can use this form for baking with your own hands, not only for direct baking, they can also cut figurines from dough and other products. When forming hearts, pay attention to the color part of the jar not touching the dough. For convenience, we recommend that you draw the desired pattern in advance on a piece of paper - in this case the heart, and on it form a workpiece from the tin strip.
to content ↑Round baking dish
The round shape remains an indispensable form for our culinary experiments. And here's one way to do this with your own hands.
Materials for work:
- two empty plastic bottles of 1.5 liters;
- large stapler;
- sharp scissors.
Workshop:
- We cut the neck and the bottom of the bottle with scissors.
- After cutting through the entire length to get rectangular pieces.
- Add them and fix it with a stapler.
- Free edges are reduced to each other, join in the same way.
As a result, we get a split form for a round cake.
Important! It can be used for making desserts without baking or for extruding a round biscuit.
to the contents ↑Baking vegetables
For our vegetable garnishes, we also have a tip: how and what to make a form for such a dish.
Prepare the following materials:
- food carton;
- foil;
- food paper;
- scissors and a stapler.
Let's get started:
- First cut out the bottom for the future shape.
- The rectangle should be large.
- We cut out strips of paper - the width should be slightly larger than the height of the cake. We connect them to the right size.
- Based on the need to make small cuts on the bottom edge to fix the shape.
- We bend them and attach them to the base with a stapler.
Important! In order that the dough does not stick, it is recommended to put parchment paper inside the resulting form.
to the table of contents ↑Aluminum baking mold
One of the reliable and reusable options can be considered an aluminum billet for cutting out biscuits and any other baking. It is done quickly enough.
Important! Be sure to wear gloves before working with this material. Be careful not to cut the edges of the workpiece.
Materials for work:
- aluminum molds for oven;
- metal scissors;
- marker, pencil, ruler;
- clothes pegs;
- superglue;
- pliers;
- paper;
- tight gloves;
- rectangle of cardboard for strips 4 cm wide.

Master-class:
- Remove the side edges of the mold. Apply a template of cardboard( 4 cm) with a marker strip on an aluminum sheet.
- In the middle of the resulting rectangle we draw one more line, we obtain two rectangles of 2 cm. They will subsequently help us form the workpiece.
- Cut off the excess part of the sheet, remains a rectangle.
- The longitudinal edges of the sheet are bent into the middle where our middle line passes.
- After folding the workpiece with sharp ends inward.
- We smooth the scissors handle to align our rectangle.
- Draw on paper a sketch of the form that we want to receive.
- Next, attach our aluminum tape and form a shape for baking on the contour of the drawing.
- The free ends are sealed with a superglue and the clothespin fixed until it dries completely.
Important! Now you can safely use this form to cut out different cookies and arrange different themed holidays, because numbers, letters, house, flowers - all this you can easily cut with your self-made templates.
to the table of contents ↑Crystal glasses for decorating cookies
The easiest and fastest way to transform your dough for baking, and give it a festive look - it's glasses or wine glasses, preferably with a pronounced pattern.
Materials that you need:
- Dough;
- Glasses, wine glasses.
Master-class:
- Roll out the dough - choose the thickness yourself.
- Using the bottom of the glasses, press down on the round cookie dough. Depending on what pattern you have on the bottom, we get such baking.
- Put them on a baking tray and bake them.
So without any tweaks we got interesting sweets in shape.
to the contents ↑Capacity for tartlets
A beautiful and very interesting form of baking is obtained in the form of piallets, which can be filled with fruit, vegetable, and cream fillings.
The following materials are needed:
- mold for baking cakes;
- dough.
Master-class:
- We turn the cake mold upside down.
- Roll the dough into small round cakes.
- Turn each form into a dough and smooth it.
- We put the bake at the right time.
We get the resulting tartlets to taste. You can decorate them with berries and a mint leaf.
to content ↑Forms for liquid test
If you do not have molds for cupcakes, they are very simple and easy to replace with foil forms.
Materials for work:
- an empty glass bottle of any size that suits you;
- foil;
- scissors;
- elastic for bills( or what is).
Let's get started:
- We wrap the bottom of the bottle with foil, attaching the elastic band to the desired height.
- Cut off the excess, wrap the edges of our shape.
- Fill the dough, put the baked.
Forms for tubes
In this case we need cutlery:
- two spoons for each tube;
- the rolled up dough.
Do the following:
- Cut the dough sheet into strips of 2-3 cm.
- Put the spoons into double pieces, forming a spiral.
- We lay out on a baking tray and bake in the oven.
Paper forms for baking
Such a billet requires more time, but as a result it will please tasty pirozhenki.
Prepare the following materials:
- food paper;
- scissors;
- water;
- metal base of any shape.
Master-class:
- Cut the desired form of parchment.
- Apply several layers of wet paper, press firmly.
- We leave it to dry completely.
- Separate the paper forms from the metal base, and we can safely start cooking.
Of the many options that we have described above for you, we think you will be able to find something suitable for yourself. Try and experiment with different forms, it is possible that you will have your own original ways of creating new and interesting variants with your own hands. Good luck!