Making the house cozy is what all masters want. This can help decor furniture. Proper design can improve the atmosphere of the room. Therefore, do not immediately throw out the old furniture, especially if it is in good condition. New furniture is now very expensive. And it will be more difficult for you to choose a ready model that fits your interior. You can do restoration of old furniture, at the same time giving it a proper look that will suit your interior. How to make a table decor by yourself, we'll look at this article.
to the table of contents ↑Decor of the old table
If the table is a little spoiled externally, but as a whole it does not fall apart, it can be decorated and made a pleasant piece of furniture. Nowadays hand-maid is extremely popular. There are several ways to decorate the table yourself:
- paint a tree;
- color the tree;
- tiling;
- apply self-adhesive film;
- create a mosaic of improvised materials;
- the decor of the table from the foam plastic;
- mirror ornaments;
- decoupage from various materials;
- decoration in the style of the shebbie-chic.
Painting
If you are not a professional artist, then you should contact the master to perform this table decoration yourself, because painting is an art. Having painted a table, you will make it a wonderful work, but it will not become less convenient.
Describe the old table in different colors. It is better to implement this with a wooden table. You can do this without having any special skills. Next, we will explain how best to cope with this task.
Tools and materials
You will need:
- stencils;
- brushes;
- inks;
- varnish;
- foam sponge.
Decor options
You can find patterns on the Internet. Print out the drawings you like and make a stencil out of them. Cutting it, do not forget to keep integrity, so that it does not fall apart, be careful. If you do it right, you can easily draw a drawing.
Important! If you do not want to do this yourself or doubt your artistic abilities, you can buy a ready-made stencil in the store.
Color drawings are very popular now, but do not make too many of them. Perhaps, in your case, it would be better to look at a small drawing. You can make some abstract pattern in the form of a border or some figures.
Workshop mural table:
- Clean the table from dirt using a skin, wash it and degrease.
- Start painting the table with stencils. Keep in mind that it is worth sticking the stencil so that it does not move during painting. Do not take a lot of paint, it can crawl.
Important! To decorate the table with your own hands, you can use a sponge, and not a brush. The sponge will be even better and will apply a pattern more smoothly, not allowing paint to spread.
- At the end, apply the varnish to the table. Make several layers to make the table more durable.
Paint
You can paint the whole table as follows. You will need:
- epoxy paints;
- alkyd paints;
- acrylic paints.
They are all water resistant, you do not need a varnish.
Important! Use a roller for painting. This will make the surface smoother. This restoration will be quite inconspicuous.
to the contents ↑Self-adhesive film
Self-adhesive film can be used for restoration. Choose the color that suits you.
Important! The food images are perfect for a dining table. There are films that resemble different materials.
Thoroughly clean the table before putting it on. Carefully smooth the film so that it does not swell. This is a very simple method of restoration, if you act carefully.
to the contents ↑Tile
To decorate the table with your own hands, take a tile. Acquire:
- mosaic tiles;
- ceramic tiles;
- is a plastic tile.
Important! Excellent tile in the form of a mosaic. It will be convenient to glue.
Today there is a very large selection of tiles, so this approach gives you a huge scope for imagination.
The application algorithm is very simple:
- To clean the surface, clean the surface of the table.
- You can then begin to attach the tile with glue.
- Joints should be treated with grout or paint for joints.
Table top with mosaic
You can make a real work of art from broken glass, glassware or ceramics on the table top:
- First paint the surface in a light color.
- Apply the pattern to the prepared surface and then lay it with ceramics.
- You can use natural materials, such as pebbles or spits of trees. The choice is made depending on the interior.
- When you collect the picture and the glue dries, cover everything with a trowel using a spatula.
- Wipe the pattern with a sponge and dry it.
- Clean all and for durability can be varnished.
Important! The rest of the table can be covered in different colors.
An interesting design version of
If you want to do something more interesting, try using non-standard materials to decorate the table yourself:
- If you like the sea, you can take seashells and stones from the sea. Working with such materials will be more complicated, but the result will be extremely interesting.
- As a basis, attach the plywood, decorate its edges with a fringing, use threads or any other material.
- Attach the bamboo as a frame.
- After making a frame, you can start laying stones and seashells.
Important! Do not cover them with a varnish, use a glass coating.
to the table of contents ↑Foam decoration
To perform this kind of table decor with your own hands, you will need:
- craquelure;
- varnish;
- polystyrene foam;
- wax;
- primer.
Master-class decor:
- Prime the surface, remove any irregularities using a skin.
- Place a picture in the center of the countertop and enclose it with foam.
- Attach the foam to the glue that works with the wood.
- The edges are covered with polystyrene foam.
- When the soil is ready, paint the entire table with light acrylic paint.
- Remove the bulges to make the pattern clearer.
- Apply craquelure to the surface where there is no foam.
- Then let it dry and varnish, but do not put the lacquer on the foam.
Important! For the treatment of this material, use acrylic lacquer.
to the table of contents ↑Mirror finish
Another very attractive and interesting variant of the table decoration with your own hands. You will need:
- liquid nails;
- mirrors;
- is silver;
- plywood box.
Instruction:
- Turn the box upside down. The bottom of the plywood will be like the surface of the countertop.
- Take the silver and cover the surface of our homemade countertop.
- We attach five mirrors to the faces using liquid nails.
- At the end, fix the entire structure with a paint tape, allow it to dry.
Decoupage
One way to give the table a new life in your apartment is to make a decoupage. You can easily handle this yourself.
Important! Decoupage is a technique that you can decorate all objects indoors stylistically uniformly or make a table decor by yourself. Now more and more people are fond of decoupage. This technique can decorate everything from toys to interior items.
 In general, the principle of performance is not complicated - you will need to cut out the picture and paste it to the furniture, then you will need to fix everything.
Important! This technique will decorate the children's room, bedroom, kitchen, bathroom. You can use photos or newspapers to make. Many people use vintage pictures, now it's popular.
Useful advices:
- Decoupage can be performed on any surface, glass or wood. If you use plastic, you will need to clean it thoroughly. Use alcohol or a cleaner. Be careful not to spoil the surface.
- You can also treat the surface with a sandpaper. Then primed, dry the ground and grind. After these steps, you can start decorating. The surface must be prepared so that everything looks neat.
- You can use any images: nature, flowers, animals. Take pictures on napkins or cards or print on the printer. Take advantage of ready-made pictures, so as not to waste time preparing them. If the napkin is too thick, laminate it.
- Cut out pictures you must first soak. Put in warm water for 5 minutes, then pat yourself with a towel.
- Cover the printout with lacquer, use any lacquer.
- Then dry everything, then repeat, and so 4-5 times.
- At the end of making the table decor with your own hands, remove the top layer of paper and remove the pellets by placing the pattern under the water jet.
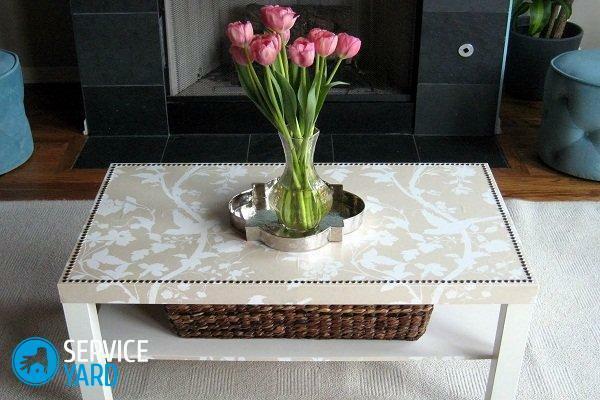
Decoupage from fabric
Here we will tell you how to make decoupage from fabric on furniture. You can put such a table in the open air or indoors. With this method of decorating, furniture will retain its colors for a long time.
Important! You can decorate the furniture with one large image or apply a lot of different. The fabric can be used as a material. Use bright dense cotton fabrics.
Plastic is not the best material, it's better to use wooden furniture. You can use wood fiber board, wood or plywood.
Instruction:
- Treat surface:
- Sand it.
- Apply primer.
- Apply several layers of acrylic paint.
- Attach the fabric using glue, cover the entire surface with it.
- When you apply glue and it dries, you need to make 3 layers.
- Next, to finish the decor of the table with your own hands, use a stapler, attaching the fabric from the back of the table.
- When the fabric is glued, the clips can be removed.
- Make a few layers of lacquer. Use a brush to apply the varnish.
Important! After the varnish is applied, the furniture gets a darker shade.
to the table of contents ↑Shebbi-chic
Next, we will discuss how to restore furniture in the style of shebbie-chic. For this you will need:
- Waterproof paint.
- Sandpaper.
- Restored table.
- Knife.
- Varnish.
- Candle.
- Pictures.
- Sponge or brush.
- Adhesive.
- Putty.
Workshop:
- Use self-tapping screws to fasten the table, squeeze all the holes.
- To surface the surface, sand it with sandpaper, paint the edges with dark paint, for example, lilac.
- Dry the paint and walk along all irregularities with a candle.
- Use a sponge or a brush to cover the table with acrylic paint. Cover the entire table, including places with dark paint.
- Allow the furniture to dry.
- When all is dry, sand the surface with sandpaper.
- Take pictures for decoupage, glue them. To do this, dilute the adhesive with water.
- Evenly smooth the sponge to the center. At the end, treat it again with sandpaper.
- Next, to perform the decor of the table with our own hands, we will age the table using coffee. We take instant coffee, pour into a bowl, dilute with warm water and mix well.
- Use a cotton pad to tone the table. Get even, walking a few times. Handle the legs and edges as well.
- Apply several coats of varnish, drying each.
In this article, we offered some interesting ideas. Now you only need to choose which table decoration with your own hands will suit you more. It remains only to realize this idea in life - go for it!