- How to make a ring of wire yourself?
- Ring of wire with your own hands
- How to weave a ring of wire with your own hands?
Any gift is a proven way to make a loved one close, thus expressing your gratitude and showing your good attitude. And the best gift is the one that is made by own hands. The gift can be small and simple enough to make, for example, homemade jewelry - a chain or a ring. Even in the Middle Ages, the craftsmen twisted very stylish and elegant accessories out of the jewelery wire, and the thinner and more refined the decoration looked, the more skillful the master was. Today, we decided to tell you how to make a ring of wire, applying a braid in the technique of Wire Wrap Art. Having mastered a primitive weaving, you in due course can proceed to the manufacture of complex elements. Just let your imagination run wild!
to the contents ↑How to make a ring of wire with your own hands?
Today we will teach you how to create jewelry with a rather unusual technique. Among the masters, it is simply called "Vairovork", and it means creating all kinds of things by twisting the wire.
Important! It should be noted that the vairovork lives among people long enough, and many jewelry jewelry is created in this technique.
It should be noted that the twisting technique from the wire is not at all simple, since the master requires the strength of the hands, the clarity of movements and the sharpness of the eye. Sometimes a beginner may need about six months to memorize all the necessary movements in order to twist a little bit of even things.
Tools
Special tools, including jewelery, are also required for work. Here are just a few:
- Nippers.
- Scissors cutting metal.
- Pliers.
- Round nose pliers.
- Platypus is a special kind of round-nosed pliers with tips beveled at 180 degrees.
- Crossbars.
- Jewelery hammers.
- Rollers.
- Other.

What should I do with a ring?
The main materials used in the weaving technique are:
- Copper.
- Wire made of special silver alloys.
- Steel.
- Aluminum.
- Semi-iron wire made of copper core, covered with a layer of silver.
To choose the best option, listen to these tips:
- Initially, experts recommend starting work with aluminum or steel gimp, since its cost is small. Therefore, it will not be a pity to spend it for the first beginnings.
- For more professional projects, such materials, unfortunately, are not suitable, since aluminum wire is too soft, and the product from it can not withstand its own weight, and steel is too rigid, and the hands of the master can quickly get tired when working with it.
The most optimal option is a copper wire, as it has many advantages:
- The price is much cheaper than a special jewelry.
- Obedient and soft in the hands, but strong and sturdy in products.
- Availability. Use gimp can be made from electric wires, and you can buy it in shops for needlework.
- The rigidity of the wire roughly corresponds to the average rigidity of the standards of the jewelry material
- . Decoration from copper can be aged( patinated).
Important! In parallel with the study of torsion technology, we recommend getting acquainted with the patination of the product and its subsequent lacquering.
to the table of contents ↑Ring from the wire with your own hands
You can create an original and beautiful accessory from ordinary wire. And it's not difficult at all if you follow the step-by-step instructions.
Step 1. Select the material and prepare the tool
First, decide on the material that you are planning to use. The simplest "basket" kind of weaving, which we consider below, allows the use of two different materials. For example:
- for the production of a solid substrate can be used aluminum;
- for an elegant braid - thin wires of copper without coating.
In the future, as you acquire skills, you can start making rings of copper wire with your own hands. This material is soft, docile and, at the same time, sturdy.
Important! The more complex the product, the thinner and more elastic the raw material for the production of small parts should be.
So, to make a ring of wire with your own hands, you will need the following materials and tools:
- 2 coils of wire of different thicknesses: 0.1 for the carcass fabrication, 0.03 for winding.
- Round nose pliers and pliers.
- Rigel for winding the base( you can use a thick marker without the edges or a normal marker).
- Bead or semi-precious stone( for decoration).
Step 2. Making the basis of the ring
When creating the basis of the decoration, proceed as follows:
- Cut the wire cutters( aluminum or copper) with a wire cutter. The piece of the desired length( the length of the workpiece depends on the thickness of the finger and the number of turns).
- With round-nosed pliers, carefully make a small eyelet at each end of the segment. To do this, grip the end of the wire between the jaws of the tool and, turning the tool away from you, form a loop at the end. Also form a loop at the other end of the segment. The eyelets are needed so that the ends of the ring do not scratch the fingers.
- Take the bolt( felt-tip pen), pressing the finger with a finger, make several turns around the size of the finger, around it. Usually two turns are enough.
Important! If you make the base too thick, then the ring will look rough, and even interlace 3-4 lines of the base is much more complicated than two.
- Note that the eyelets are exactly opposite each other( on the same line).Otherwise, the ring will look asymmetrical.
- Remove the workpiece from the deadbolt.
Important! The distance between the turns should not be too large, but it is not necessary to adjust the turns closely, since this can complicate the winding process. Optimum distance, allowing to operate freely with wire for winding, 2-3 mm.
Step 3. Create the winding of the
ring To make the winding, proceed as follows:
- Take the end of the thin copper wire.
- Make 5-7 tight turns at the base of the loops. Nippers can not be used, just gradually unwind the right amount of material from the skein.
- Tighten the first coils of the braid as much as possible.
- Take the end of the leading gimp and "dive" under the upper warp wire.
- Tighten the loop.
- Use the lead wire to wind the top "crossbar" of the base.
- Make a "dive" in the opposite direction to the lower "crossbar".
- Tighten the loop.
- Thus, weave two parallel lines of the base. The winding should go under tension, only then the pattern will lie flat.
Step 4. Decoration decoration:
- To decorate the ring, choose not a large( on the width of the product) bead or drilled on the center of the stone.
- Pass a thin wire through the opening of the decor element.
- Enter the ends of the wire piece with the bead between the braid windings.
- Fasten the ends of the decor to the top and bottom crossbars of the base.
- Fix the bead and gently trim the excess.

Tips:
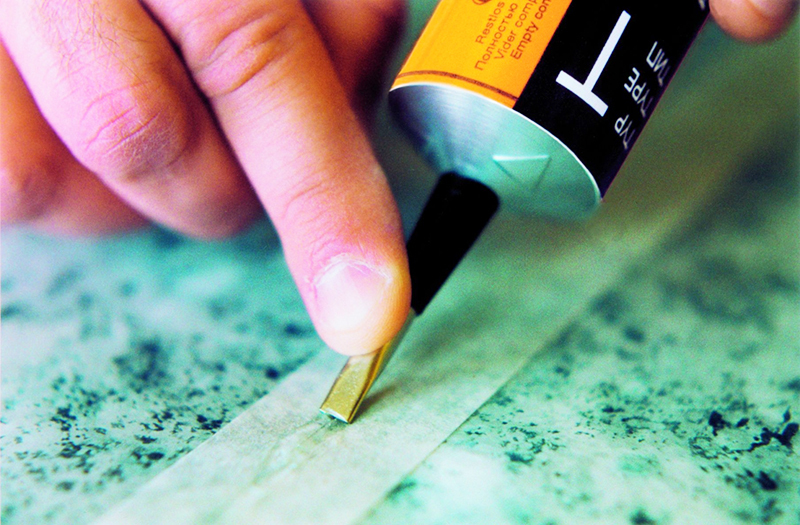
- If in the process of repeated bending and tightening the copper thin wire becomes less elastic, then lightly heat it over the gas burner, and it instantly acquires the former flexibility.
- To decorate the ring and fix the decorative element( stone), you can use an additional wire with droplets at the ends. You can make droplets with a gas burner. Wrap the wire with droplets around the stone( beads), and then wrap the ends of the ring with both ends, and lead the ends outward. Beautifully curved to give the product refinement.
- To lighten the finished product, polish it with ammonia.
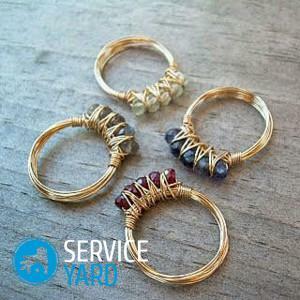
We looked at how to create a copper ring with our own hands, using Wire Wrap Art wire braiding. But from ordinary wire, you can create a simpler, but no less elegant and unique accessory. Next, we will tell you how to make a ring of beads and wire.
to the contents ↑How to weave a ring of wire with our own hands?
For the simplest, but elegant and beautiful ringlet, you will need:
- Wire( copper, artistic, brass).Beads or beads made of natural stone.
- Pliers - conventional and with bent ends.
Option 1:
- Cut off 15-20 cm rigors.
- Put beads on the piece of material.
- Move the decor element to the center of the metal thread.
- Prepare a sample with a finger diameter. You can use a special jewelry diameter, and at home - a wax candle or a tube to the size of your finger.
- Wrap the wire around the tube in such a way that both ends are pointed in opposite directions.
- Wrap the wire around the bead once with tension.
- Continuing to control the tension force, make 4-5 turns around the bead so that each subsequent lay below the previous one.
- Leave 1-1.5 cm from each end of a piece of wire, cut off excess.
- Both ends of the gimp wrap on both sides of the bead by a wire ring. Make 3-4 turns.
- Cut excess material on the top of the ring to avoid damaging the skin of the finger when worn. Use for this operation pliers with bent tips in such a way: flatten the ends of the wire, and then force them against the rim of the ring. The same operation can be done with conventional pliers, but it is much more difficult.
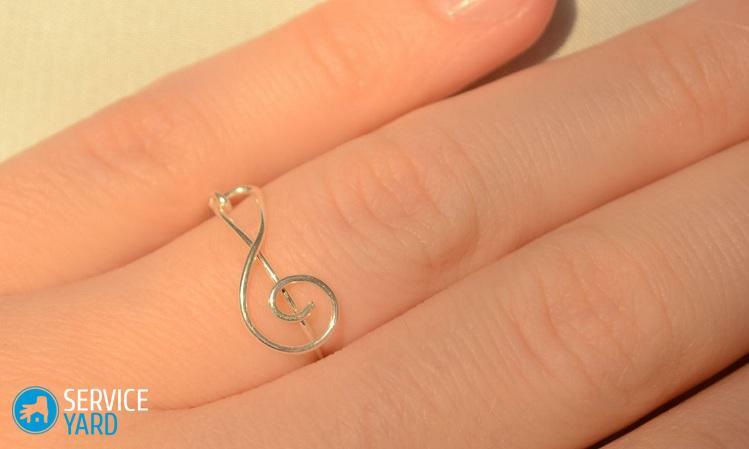
Option 2
From the same materials, you can make a ring of wire in an even simpler way:
- Make a necessary revolution with 1 wire around the marker or candle.
- Then put a bead on one end of the piece.
- Cross both ends of the wire, circle one end around a wire mustache with a bead. This part of the wire with the bead should be wrapped from the top to the bottom.
- Secure the bead with 3 loops, make a few more turns to fix the place of joining the decor element to the wire.
- Next, act on your imagination and taste.
Give gifts made by yourself, as often as possible, and loved ones will appreciate it. Do not be afraid to experiment and fantasize. Use the wire torsion technique to make various gizmos, the main thing - do it with pleasure.